Category: Radio

  • Emergency Communications: What Amateurs Actually Do

    Emergency Communications: What Amateurs Actually Do

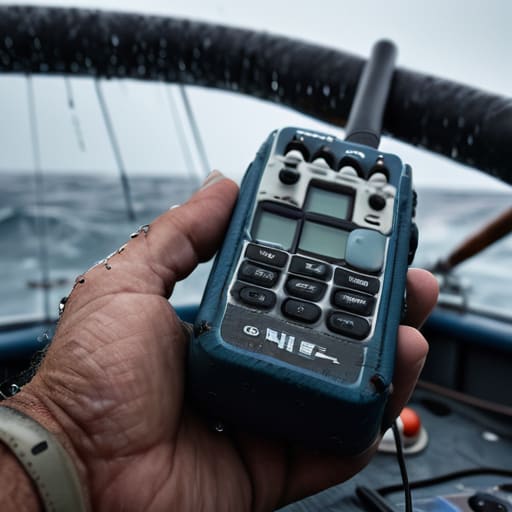
    I remember sitting on a ridge in the Cascades three years ago, watching a localized cell dump enough rain to turn the trail into a soup of mud and debris. My neighbor, a guy who’d spent thousands on a “tactical” comms kit straight out of a catalog, was staring at a dead screen because his expensive, proprietary handheld couldn’t find a signal through the heavy canopy. It’s a common misconception that knowing what is emergency communications means owning the most expensive gear on the market. In reality, it’s not about the shiny plastic or the marketing jargon; it’s about whether your setup actually functions when the infrastructure fails and you’re standing in the mud with nothing but a wire and a dream.

    I’m not here to sell you a pre-packaged survival kit or recite a textbook definition that won’t help you when the grid goes dark. Instead, I’m going to give you the ground truth based on what I’ve actually measured and used in the field. We’ll talk about real-world antenna heights, why your “emergency” battery might fail you, and how to build a station that actually works when the ionosphere is being difficult. No hype, no filler—just the practical physics of staying connected.

    Table of Contents

    Beyond the Manual Real World Disaster Relief Communication Protocols

    Beyond the Manual Real World Disaster Relief Communication Protocols.

    You can read every FEMA manual on the shelf, but those documents assume a level of order that rarely exists when the cell towers are leaning at forty-five degrees or the fiber lines are underwater. Real-world disaster relief communication protocols aren’t just about knowing which frequency to turn to; they are about the discipline of the net. I’ve sat in command posts where the “official” plan fell apart in twenty minutes because someone forgot that a repeater needs a power source and a clear line of sight. In a real crisis, the protocol is your lifeline—not because it’s pretty, but because it prevents the airwaves from turning into a chaotic mess of uncoordinated “maydays” that nobody can actually act on.

    When I’m working with amateur radio emergency services, I’ve learned that the most important part of the technology is the human element of the relay. You aren’t just passing a message; you are managing a bottleneck. If you don’t follow the established check-in procedures, you aren’t helping; you’re just adding to the noise. Effective communication is about brevity and accuracy, especially when the local infrastructure is a memory and you’re the only thing connecting a remote village to the relief coordinators.

    Public Safety Communication Systems vs What Actually Survives a Storm

    Public Safety Communication Systems vs What Actually Survives a Storm

    We like to talk about public safety communication systems as if they are invincible, monolithic structures of steel and silicon. In a textbook, they are perfect: encrypted, redundant, and seamless. But I’ve stood in the rain after a heavy storm and watched a high-tech repeater site go silent because a single backhaul microwave link lost its alignment or a generator failed to kick in. When the crisis communication infrastructure relies entirely on a centralized digital trunking system, it has a massive, single point of failure. If the tower is down, the “system” is just an expensive paperweight.

    That is where the reality of the field diverges from the planning manuals. While the pros are working to restore those digital networks, the gap is filled by people using whatever is functional. This is why amateur radio emergency services aren’t just a backup; they are the bridge. I’ve seen a simple, hand-tuned wire antenna strung between two trees outperform a $50,000 mobile unit that couldn’t find a signal because its proprietary network was offline. In a real disaster, survivability isn’t about how many features your radio has; it’s about how much independent power and line-of-sight you can actually maintain.

    Five Things Your Emergency Comms Manual Won't Tell You

    • Build for the environment, not the spec sheet. I’ve seen plenty of high-end, expensive SDRs end up as expensive paperweights because someone forgot that a real disaster usually involves mud, rain, and a complete lack of climate control. If your gear isn’t ruggedized or protected in a way that handles actual grime, it isn’t emergency gear; it’s a hobbyist’s toy.
    • Height is your best friend, and it’s non-negotiable. When the repeaters go dark and you’re relying on simplex or a local net, that antenna height matters more than your power output. I’ve seen a 5-watt handheld outperform a 50-watt mobile rig simply because the handheld operator had the sense to get their wire antenna up into a tree at least 15 meters off the ground.
    • Redundancy means different physics, not just more radios. If your entire emergency plan relies on VHF/UHF, you’re one localized storm away from silence. You need a way to bridge the gap—HF is your lifeline when the local infrastructure is physically gone. Don’t just buy another handheld; make sure you have a way to bounce a signal off the ionosphere when the towers are down.
    • Learn the “human” side of the protocol. In a real emergency, the airwaves get crowded and people get panicked. If you aren’t disciplined with your brevity and your signal hygiene, you’re just adding to the noise. Emergency comms isn’t about having a long, interesting conversation; it’s about transmitting the minimum amount of data required to get the message through before the band gets unusable.
    • Test your gear when things are boring. If you only pull your emergency kit out of the bag when the sirens are going off, you’ve already failed. I make it a point to deploy my portable setup on a random Tuesday in the middle of nowhere. You need to know exactly how your battery holds up and whether that antenna wire actually stays taut in a real wind, not when you’re staring at a rising flood level.

    The Bottom Line: What Actually Matters When the Lights Go Out

    Forget the textbook definitions; emergency comms is about whether your specific setup can actually punch through the noise when the infrastructure is dead and the ionosphere is being difficult.

    A high-end rig is useless if you haven’t tested it in the real world—I’ve seen thousand-dollar setups fail because the operator didn’t account for ground plane issues or battery life in the cold.

    Don’t rely solely on public safety networks; true resilience comes from having your own independent, measured, and tested way to reach the next county when the grid goes dark.

    The Difference Between a Protocol and a Connection

    Emergency communications isn’t a set of polished manuals or a collection of expensive, proprietary hardware sitting in a climate-controlled room; it’s the grit it takes to find a signal through the noise when the towers are down, the power is out, and your only lifeline is a piece of wire and a battery that’s seen better days.

    Wren Castellano

    Bottom Line: Gear, Grit, and the Real World

    Bottom Line: Gear, Grit, and the Real World.

    At the end of the day, emergency communications isn’t a theoretical exercise in following a handbook; it’s the messy, unpredictable reality of trying to move information when everything else has failed. We’ve looked at how public safety networks can go dark in a single surge, how protocols often crumble under the weight of actual chaos, and why your local repeater might be nothing more than a paperweight if the power grid stays down. You can have the most expensive SDR or a high-end tactical radio, but if you haven’t tested your gear in the rain, or if you haven’t accounted for how height above ground affects your signal when the terrain is working against you, you’re just carrying expensive weight. Success in a disaster isn’t about having the most advanced tech; it’s about reliability and redundancy.

    If there is one thing I’ve learned from twenty years of watching the bands, it’s that the technology is only half the battle. The other half is the person behind the microphone. You can build the most perfect, low-loss antenna system in the world, but it won’t matter if you don’t have the discipline to stay calm when the signal is weak and the situation is dire. Emergency comms is a service, a skill, and a commitment to being the voice that stays on the air when everyone else has gone silent. So, don’t just read the manuals—get out there, build something, test it, and be ready when the ionosphere finally decides to cooperate.

    Frequently Asked Questions

    If the local repeaters go down because the power grid is fried, what's my actual fallback plan for reaching people outside my immediate area?

    If the local repeaters go down, you’re officially in simplex territory, and your range just shrank to a few miles unless you change tactics. Your fallback isn’t a better handheld; it’s a HF rig and a decent wire antenna. If you can get a long wire up at least 10 meters off the ground—and trust me, that height matters—you can skip the local infrastructure entirely and bounce signals off the ionosphere to reach the next state.

    How much of my gear should actually be battery-powered versus solar, and what's the realistic runtime when I'm operating in the field?

    Look, if you’re relying solely on solar, you’re at the mercy of a cloud cover you can’t control. I aim for a 70/30 split: heavy-duty LiFePO4 batteries for your primary load, with solar acting as a trickle charger to maintain the buffer. For a typical QRP setup, I expect 12–18 hours of active operating time on a decent 20Ah pack. Don’t trust the “rated” runtimes on the box; measure your actual current draw.

    Do I really need a dedicated HF rig for emergency comms, or can I get by with just a handheld and a decent antenna setup?

    Look, if you’re just checking in with the neighbors, a handheld and a wire antenna might get you there. But if you actually need to move data or reach someone three counties away when the towers are down, you’re going to hit a wall. Handhelds lack the juice to drive a decent antenna efficiently, and their receivers are usually noisy. Get a real HF rig. It’s the difference between a whisper and a shout.

  • How to Find and Join a Radio Club Worth Your Time

    How to Find and Join a Radio Club Worth Your Time

    Don’t let the polished brochures fool you; there is no official, standardized manual on how to join a radio club that actually tells you what happens once you walk through the door. I remember sitting in the corner of my local club when I was fifteen, surrounded by guys who could recite the FCC regulations by heart but couldn’t tell you why their SWR was spiking on a cloudy day. Most people think joining a club is about finding a group of experts to hand you a cheat sheet, but if you end up in a room where the only thing being discussed is the price of the latest Yaesu rig, you aren’t joining a club—you’re joining a showroom.

    I’m not here to give you a polite, sanitized guide to networking. I’m going to tell you how to sniff out the clubs that actually have dirt under their fingernails and people who know how to use a real spectrum analyzer. I’ll show you how to find the mentors who will actually help you tune an antenna at 3:00 AM, rather than the ones who just want to argue about 1987’s propagation models. We’re going to find you a place where the gear is secondary to the actual physics of the hobby.

    Table of Contents

    Finding Amateur Radio Groups Near Me Without the Fluff

    Finding Amateur Radio Groups Near Me Without the Fluff.

    If you start typing “finding amateur radio groups near me” into a search engine, you’re going to get a lot of results that look like they were written by a marketing department for a big manufacturer. Ignore the glossy brochures. Instead, go straight to the source: your local repeater networks or the regional ARRL directories. I’ve found that the best way to gauge the actual amateur radio community engagement in your area is to listen to the local repeaters first. If the traffic is just two guys arguing about their new SDR dongles, move on. If you hear people actually troubleshooting a signal or sharing technical data, you’ve found a goldmine.

    Once you identify a few candidates, don’t just sign up. Show up to a meeting—preferably one that isn’t just a social mixer—and look at the gear they’re using. A good club should offer more than just a monthly pizza night; you want to see amateur radio mentorship programs where the older techs actually help the newcomers with things like antenna tuning or feedline loss. If a group’s only activity is talking about how much they spent on their latest rig, you aren’t joining a club; you’re joining a showroom.

    The Real Ham Radio Club Membership Requirements You Need

    The Real Ham Radio Club Membership Requirements You Need.

    Most people think the only real hurdle is passing the exam, but that’s just the entry fee. When you’re looking into actual ham radio club membership requirements, you’ll find that the formal stuff—dues, meeting attendance, and signing off on your log—is the easy part. The real requirement is a willingness to actually show up when things aren’t working. If you join a club just to collect a patch and a sticker, you’re missing the point. You want to find a group where the membership requirement is essentially a shared curiosity about why the signal dropped when the sun went down.

    Beyond the paperwork, the most valuable thing you’re looking for is access to amateur radio mentorship programs. I didn’t learn how to tune a dipole by reading a manual; I learned it because an older operator sat next to me in a damp field and showed me how to use a NanoVNA without breaking it. Don’t just look for a club that meets in a sterile community center; look for one that actually gets its hands dirty. If they don’t have a dedicated space for testing gear or a willingness to help a new licensee troubleshoot a noisy power supply, you’re better off operating solo.

    Five things to check before you hand over your dues

    • Show up to a meeting before you commit. Most clubs have a “public meeting” or an open night; go to that first. You need to see if the vibe is actually about learning and operating, or if it’s just a monthly gathering for people to complain about the price of copper and the state of the local repeater.
    • Look for the “hands-on” ratio. If every single person in the room is talking about their new transceiver but nobody has a soldering iron or a piece of coax on the table, walk away. You want a club where people actually build things, not just a showroom for overpriced gear.
    • Ask about their field day or portable operations. If you’re interested in getting out of the shack, you need a club that actually gets out into the dirt. A club that only meets in a basement with the lights dimmed isn’t going to help you learn how to deploy a wire antenna on a windy ridge at 2:00 AM.
    • Check the technical diversity. If everyone in the club is a CW purist and you’re interested in SDR or digital modes, you might find yourself shouting into a void. You don’t need a club that does everything, but you do need one that doesn’t treat your interests like a hobbyist heresy.
    • Don’t be afraid to ask about their mentors. A good club should have a way to pair a new licensee with someone who actually knows how to use a spectrum analyzer or tune a dipole. If the answer is “we just all hang out,” you’re going to be teaching yourself everything anyway, so you might as well find a club that actually prioritizes the Elmer system.

    The bottom line on joining a club

    Don’t join a club just to have a line on a resume; join one where the members actually know how to use a spectrum analyzer, otherwise you’ll spend your weekends listening to guys argue about gear they bought in 1987.

    Look for technical competence over social prestige—a club with a decent antenna farm or a shared high-end SDR setup will teach you more in a month than a “social club” will in a decade.

    Be prepared to contribute something, even if it’s just helping haul gear to a portable activation; the best clubs are built on people who actually get their hands dirty, not just people who show up for the coffee.

    The real litmus test for a club

    Don’t join a group just because they have a shiny repeater and a monthly potluck; join the one where someone actually shows up with a vector network analyzer and a willingness to help you figure out why your SWR is spiking when the wind picks up.

    Wren Castellano

    Don't Just Join a Club, Find Your Frequency

    Don't Just Join a Club, Find Your Frequency.

    Look, joining a club isn’t about collecting membership cards or showing up to meetings just to hear people argue about whether a specific brand of transceiver is worth the markup. It’s about finding a group that actually values measured data and hands-on troubleshooting over nostalgia. Whether you’re hunting for a mentor who can help you tune a dipole or just looking for someone to help you haul a heavy battery pack up a ridge, make sure they offer something tangible. Don’t settle for a group that just talks about the “good old days” of 1987; find the ones who are actually out there measuring SWR and testing new SDR workflows in the real world.

    At the end of the day, amateur radio is a deeply personal pursuit, but it shouldn’t be a lonely one. You’ll learn more in one afternoon of watching a veteran technician troubleshoot a noisy ground loop than you ever will reading a dry manual in your basement. Radio is one of the few places left where you can truly understand the physics of what you’re doing, and having a community to share those hard-won lessons with makes all the difference. So, get out there, find your people, and get your hands dirty. The airwaves are waiting, and they don’t care how much your gear cost—they only care that you know how to use it.

    Frequently Asked Questions

    Do I actually need my license in hand before I show up to a club meeting, or can I just go to listen?

    You don’t need a license to walk through the door, and frankly, I’d prefer you didn’t. If you show up with your license already in hand, you’re just a new operator; if you show up without it, you’re a student. Most clubs love the latter. Just show up, listen, and don’t touch anyone’s transceiver until they offer. If they turn you away because you haven’t passed the exam yet, find a different club.

    How do I tell if a club is actually focused on technical skill or if they're just a group of people complaining about the price of new rigs?

    Show up to a meeting and listen to the ratio of gear talk to signal talk. If the conversation is just a circular debate about why the latest Icom is too expensive, walk away. A real technical club spends its time discussing things like noise floors, antenna feedline losses, or why a specific band was dead last night despite the solar flux index. Look for people holding a meter or a spectrum analyzer, not just a price list.

    Is it worth joining a club that only meets in person, or should I be looking for something with a more active online presence for technical troubleshooting?

    If you’re looking to troubleshoot a noisy ground loop or figure out why your SWR is spiking at 3 AM, an online group is your lifeline. You can’t troubleshoot a complex impedance mismatch through a Zoom call. However, don’t skip the in-person clubs entirely. There is no substitute for someone actually handing you a calibrated wattmeter and showing you how to use it. Find a hybrid: a club with a solid local presence but a Discord or forum that actually functions.

  • Qsl Cards and Their Electronic Replacements

    Qsl Cards and Their Electronic Replacements

    I remember sitting in my first club meeting, surrounded by guys who treated every contact like a sacred ritual, arguing over the precise etiquette of confirmation. They made it sound like some arcane, high-stakes diplomatic exchange, but let’s be real: when you’re staring at a waterfall on an SDR and finally pull a weak signal out of the noise, you aren’t thinking about formal protocols. You’re just thinking, did that actually happen? That’s the heart of the question, what is a qsl card really for? It isn’t just a piece of glossy cardstock or a digital log entry to impress your neighbors; it’s your physical proof that you actually wrestled a signal through the ionosphere instead of just hallucinating a contact during a moment of high solar flux.

    In this post, I’m skipping the fluff and the “official” textbook definitions that don’t tell you anything useful. I’ll tell you how I actually manage my confirmations when I’m operating portable on a ridge with limited gear, and why some methods are a complete waste of postage. I’m going to break down the different ways we prove we were there, from the old-school paper route to the digital era, so you can decide what actually fits your station.

    Table of Contents

    The Real Science of Amateur Radio Contact Verification

    The Real Science of Amateur Radio Contact Verification.

    Look, at the end of the day, a contact isn’t just a voice in the air; it’s a data point. When we talk about amateur radio contact verification, we aren’t just being pedantic about paperwork. We are confirming that a specific exchange occurred between two stations under specific propagation conditions. I’ve spent enough nights on ridge lines to know that a signal can sound solid, but without that confirmation, you’re just guessing whether you actually closed the loop. Whether you’re logging a DXpedition or just a casual local contact, that verification is what turns a fleeting moment into a permanent part of your logbook.

    The actual qsl card exchange process has evolved quite a bit since I first started. Back then, it was all about physical cards moving through the mail, often via the qsl bureau vs direct exchange route. Nowadays, a lot of us lean on digital services to fill the gaps, which is fine for speed, but it doesn’t quite capture the same satisfaction. There is a tangible weight to holding a physical card from a station halfway across the world—it’s a physical receipt of a successful link through the ionosphere.

    Why Paper Proof Beats a Fading Signal in the Logs

    Why Paper Proof Beats a Fading Signal in the Logs

    Look, I’ve sat on many a ridge with a signal so thin it felt like trying to catch smoke with a net. You might think you’ve made a solid contact, but when you’re looking back at your logbook six months later, a scribbled note about a signal report doesn’t carry much weight. That’s where the qsl card exchange process actually becomes meaningful. A physical card is a tangible piece of history from that specific moment in time—the date, the frequency, the exact mode, and the callsign of the person on the other end. It turns a fleeting moment of propagation into something you can actually hold.

    While I know many of you are leaning heavily into digital qsl services because they’re fast and efficient, there is a specific kind of satisfaction in the physical exchange. A digital log entry is just data on a screen, but a card tells a story. It shows me that someone took the time to print it, stamp it, and put it in an envelope. For me, it’s not just about amateur radio contact verification; it’s about the connection to the person on the other side of the noise floor.

    Five Things I’ve Learned About Not Wasting Your Time with QSL Cards

    • Don’t expect a miracle every time. I’ve seen plenty of beautiful cards arrive for contacts that were basically just me shouting into a storm of noise; if the signal was garbage, don’t be surprised if the other station doesn’t bother sending the paper.
    • Digital is fine, but keep the physical ones. I keep a small box for my paper QSLs because a LoTW confirmation doesn’t feel nearly as substantial when I’m looking back at a DXpedition that actually worked.
    • Check the address twice. It sounds simple, but I’ve lost more cards to a misplaced zip code than I have to bad propagation, and there’s nothing more frustrating than knowing a contact happened but having no way to prove it.
    • Use the Bureau if you’re feeling patient. If you’re trying to collect cards from a specific country, sending them through the QSL Bureau is much cheaper and more reliable than trying to navigate international postage, even if it takes six months to trickle through.
    • Look for the details, not just the art. A card is a data packet; I care more about the signal report and the mode listed on the back than I do about a glossy photo of a sunset, because the data is what actually completes the log.

    The Bottom Line on Confirming Your Contacts

    A QSL card isn’t just a souvenir; it’s your definitive, physical proof of a contact that exists independently of a messy logbook or a signal that disappeared when the sun came up.

    While digital confirmations are fast, they lack the tangible history of the hobby—there’s a specific kind of satisfaction in holding a piece of cardstock that proves you were actually on the air when the ionosphere was behaving.

    Don’t let the paperwork discourage you; whether you’re chasing DX or just confirming a local contact, the QSL process is how we build a verifiable map of our radio life.

    More Than a Souvenir

    A QSL card isn’t just a piece of glossy cardstock to tuck into a drawer; it’s the physical receipt for a moment in time when the propagation actually cooperated and you managed to bridge the gap between two points on a map.

    Wren Castellano

    The Final Log Entry

    QSL card representing The Final Log Entry.

    At the end of the day, a QSL card is more than just a bit of cardstock or a digital confirmation sitting in a database; it is the tangible result of a successful link between two points on a spinning planet. We’ve talked about how these cards serve as your definitive paper trail, how they provide a sense of permanence that a fading signal or a messy handwritten logbook simply can’t match, and why they matter for your collection. Whether you are chasing DXCC awards or just want to prove you actually made that contact during a sudden opening on 20 meters, the QSL process is what turns a fleeting moment of radio magic into a permanent part of your history. It’s about closing the loop and ensuring that when you look back at your logs ten years from now, you aren’t just guessing if you were actually there.

    So, don’t let the paperwork intimidate you. Whether you prefer the tactile weight of a printed card or the efficiency of an electronic exchange, find the method that works for your station and stick to it. Radio is a hobby of connection, and while we spend so much time obsessing over SWR, antenna height, and propagation models, the real reward is the human connection on the other side of the noise floor. Every card you receive is a small victory—a piece of evidence that despite the distance, the interference, and the unpredictable ionosphere, you found a way to talk. Keep your logs tidy, keep your antennas high, and most importantly, keep chasing the signal.

    Frequently Asked Questions

    If I'm running everything through an SDR and logging digitally, is there actually any practical reason left to bother with physical cards?

    Look, if you’re running a purely digital station, I get the skepticism. An SDR and a digital log are efficient, sure. But a physical card isn’t about data redundancy; it’s about the connection. A digital log entry is just a line of code. A card is a tangible piece of history from a specific moment in time. Plus, when the internet goes down or a database corrupts, that stack of cards on your shelf is the only thing that’s actually real.

    How much does the "prestige" of a card actually matter—is a handwritten note from a DX station worth more than a standard printed one?

    Look, if you’re asking about the math, a printed card and a handwritten one provide the exact same data for your logbook. But if you’re asking about the soul of the hobby? The handwritten one wins every time. There is something about seeing a station operator’s actual script—maybe a quick note about the local weather or a mention of a sudden band opening—that makes the contact feel real. It’s the difference between a data point and a memory.

    What’s the best way to handle QSL exchanges when I'm operating portable and don't have a fixed station address to give out?

    When I’m out on a ridge with nothing but a backpack and a wire antenna, I don’t bother with physical cards. It’s a logistical nightmare. Instead, I lean heavily on LoTW or eQSL. If you’re operating portable, just make sure your callsign is clearly linked to your digital profile. If someone insists on a physical card, I keep a stack of pre-addressed envelopes in my kit. It’s a bit more weight, but it beats losing a contact to a lost piece of mail.

  • How the Sun Decides Whether Your Signal Gets Out

    How the Sun Decides Whether Your Signal Gets Out

    I spent three hours last Tuesday lugging a dipole and a heavy battery pack up a ridge in the Catskills, only to sit there in dead silence while my SWR meter sat perfectly steady. I didn’t have a hardware failure, and my antenna—suspended at a solid 12 meters above the ground—wasn’t the problem. The truth is, you can spend thousands on the latest SDR or a high-end transceiver, but none of that matters when the sun decides to throw a tantrum. People love to get bogged down in complex mathematical models to explain how solar activity affects radio, but most of the time, you’re just at the mercy of a temperamental ionosphere that has no interest in your carefully tuned setup.

    I’m not here to sell you a subscription to a solar weather service or tell you that a new piece of gear will fix a geomagnetic storm. What I can do is give you the ground truth based on what I’ve actually seen through my receiver. I’ll break down the real-world connection between sunspots and signal propagation, and I’ll tell you exactly when to stop fighting the noise and just pack up your gear for the day.

    Table of Contents

    Sunspot Cycle and Signal Reliability the Hard Data

    Sunspot Cycle and Signal Reliability the Hard Data

    I don’t care much for the vague “it’s a busy sun” explanations you get in the weather reports. If you want to understand why your DX contacts suddenly dried up, you have to look at the actual numbers. We are currently navigating the transition toward a solar maximum, and the data doesn’t lie. During these peaks, the increased sunspot count means the ionosphere is getting a constant, heavy dose of ionization. For those of us working the higher HF bands, this is usually a win; the F2 layer becomes a much more efficient mirror for your signal.

    However, there is a flip side to that coin. High activity isn’t just a steady stream of good propagation; it’s a series of spikes and crashes. When a significant solar flare impact on HF communication occurs, you aren’t just looking at a temporary fade—you’re looking at a complete blackout on the sunlit side of the Earth. I’ve sat on a ridge waiting for a specific window, only to have a sudden burst of X-ray radiation slam the lower ionosphere into a state of absorption. It’s not your antenna height or your tuner acting up; it’s just the physics of the atmosphere changing the rules mid-game.

    Solar Maximum vs Solar Minimum Radio Propagation Realities

    Solar Maximum vs Solar Minimum Radio Propagation Realities

    When we talk about solar maximum vs solar minimum radio propagation, we aren’t just discussing numbers on a chart; we’re talking about the difference between a wide-open highway and a road blocked by fallen trees. During a solar maximum, the increased sunspot activity keeps the F2 layer of the ionosphere thick and energized. For those of us working HF, this is the sweet spot. You can bounce signals off the sky to reach the other side of the planet on much higher frequencies than usual. I’ve spent many evenings during peak cycles sitting on a ridge, watching the bands open up on 20 meters or even 15 meters when I’d normally expect nothing but static.

    However, don’t let the high activity fool you into thinking it’s always easy mode. High solar activity also means more frequent ionosphere disturbances and radio waves getting tossed around by unpredictable solar events. A sudden solar flare impact on HF communication can cause a total blackout on certain bands for minutes or even hours. It’s a bit of a double-edged sword: you get more capacity, but you also get more chaos.

    My Field Notes: How to Actually Use This Data Without Losing Your Mind

    • Watch the SFI, not just the sunspot number. The Solar Flux Index tells you how much radiation is actually hitting the atmosphere; if the SFI is dropping while the sunspots look high, don’t be surprised when your HF bands suddenly feel like they’re made of molasses.
    • Learn to love the gray line. When the sun is below the horizon for both you and your target, you’re relying on the D-layer being thin—this is when those long-distance DX contacts happen regardless of whether the sun is in a “mood” or not.
    • Don’t chase the high bands during a geomagnetic storm. If the K-index is spiking, your VHF and UHF signals might be fine, but your HF propagation is going to get chewed up by increased ionization in the wrong layers; pack up the heavy gear and wait for the storm to pass.
    • Time your DX attempts with the solar cycle, not your schedule. If we’re approaching solar maximum, start practicing your high-frequency setups now; if you’re stuck in a solar minimum, stop wasting your battery power trying to hit the 10-meter band and move down to 40 or 80 meters where the physics are actually on your side.
    • Keep a log of the conditions, not just the contacts. I always note the K-index and the SFI next to my signal reports; six months from now, you’ll realize that “miracle” contact wasn’t because of your new tuner, but because the ionosphere was perfectly tuned for that specific frequency.

    The Bottom Line for Your Shack

    Stop chasing high-frequency DX during a solar minimum; if the sun isn’t giving you the ionization you need, no amount of expensive filtering or high-gain antennas will force a signal through a dead ionosphere.

    Use the solar cycle to plan your gear—invest in HF rigs and large wire antennas when the cycle is ramping up, but keep your VHF/UHF setups ready for when the higher bands inevitably go quiet.

    Correlation isn’t always causation, so don’t scrap a perfectly good antenna just because your contacts dropped; always check the solar flux index first to see if it’s a hardware problem or just the sun taking a nap.

    ## The Variable in Your Equation

    You can spend six months tuning your dipole to perfection and mounting it thirty feet up on a solid mast, but if the sun decides to throw a tantrum, your SWR meter won’t save you. You have to learn to stop fighting the ionosphere and start reading it; sometimes the best piece of gear in your shack is just a bit of patience and a realization that the sky isn’t cooperating today.

    Wren Castellano

    The Reality of the Long Game

    The Reality of the Long Game.

    At the end of the day, you have to stop treating the sun like a broken component in your station and start treating it like a variable you can’t control. We’ve looked at the data: solar maximum brings the DX opportunities that make us stay up until 3:00 AM, while solar minimum forces us to get creative with NVIS or stick to the local FM repeaters. You can have a perfectly tuned dipole at exactly 10 meters above ground—and trust me, I know it matters—but if the ionosphere is a blank slate, that SWR meter won’t save you. Propagation isn’t a constant; it is a shifting, breathing cycle of peaks and troughs that requires us to be as much meteorologists as we are engineers.

    Don’t let a quiet band discourage you from heading out to that ridge with your gear. There is a specific kind of magic in the hobby that you only find when you learn to read the sky as well as you read your spectrum analyzer. Whether you are chasing a rare station during a solar peak or just working local ragchews when the sun is being stubborn, remember that the unpredictability is exactly what makes this worth doing. Radio is a conversation with the universe, and sometimes, you just have to wait for the universe to answer back.

    Frequently Asked Questions

    If the sun is in a high-activity phase, does that mean my HF bands are going to be usable 24/7, or should I still expect those dead zones?

    Don’t let the high sunspot numbers fool you into thinking it’s a constant party. Even at solar maximum, you’re going to see dead zones. Propagation is a moving target. You might have incredible DX on 20 meters during the day, but as the sun goes down and the D-layer clears, your band openings will shift or vanish entirely. It’s a cycle of peaks and troughs, not a steady stream of signal.

    I've heard people talk about solar flares killing signals—is there a way to actually predict those outages before I hike up a hill to set up my station?

    You can’t predict a flare with 100% certainty, but you don’t have to hike up a hill blind. Check the NOAA Space Weather Prediction Center before you pack the gear. Look for “Solar Flare Alerts” and “Radio Blackout” classifications. If they’re forecasting an X-class flare, expect the HF bands to go dark for a bit. It’s not a guarantee, but it’s better than sitting on a ridge in the wind listening to nothing but static.

    Does increased solar activity actually improve my signal-to-noise ratio, or does it just bring more interference into the mix?

    It’s a bit of both, depending on how you look at it. Higher solar activity boosts the ionization in the F-layer, which gives you much better signal strength on the HF bands. But that same energy also ramps up the noise floor. You aren’t just getting a cleaner signal; you’re getting a louder signal sitting on top of a louder background. If your antenna is well-heightened and your noise floor is low, you’ll feel the win.

  • The Ionosphere: the Mirror That Makes Hf Possible

    The Ionosphere: the Mirror That Makes Hf Possible

    I remember sitting on a ridge in the Catskills three years ago, nursing a lukewarm thermos of coffee and staring at my SWR meter in total confusion. I had a perfectly tuned dipole, hung exactly 12 meters above the ground, and a rig that cost more than my first car, yet I couldn’t pull a single signal out of the ether. I spent an hour cursing my antenna geometry before I realized it wasn’t a hardware problem at all; I was just fighting a dead sky. People love to get bogged down in complex mathematical models when they ask what is the ionosphere, but they forget the most basic truth: you can build the most expensive station on the planet, and it won’t mean a damn thing if the atmosphere isn’t cooperating with you.

    I’m not here to feed you textbook definitions that only serve to make you feel like you need a PhD to work the bands. Instead, I’m going to strip away the jargon and tell you how this layer actually behaves when you’re out in the field. I’ll give you the real-world mechanics of how solar cycles and time of day dictate your propagation, and I’ll tell you exactly when to stop tweaking your matching network and just wait for the sky to wake up.

    Table of Contents

    Decoding Upper Atmosphere Composition and Electron Density

    Decoding Upper Atmosphere Composition and Electron Density.

    To understand why your signal bounces back to Earth instead of bleeding out into the vacuum of space, you have to look at what’s actually happening up there. It isn’t just a “layer” like a blanket; it’s a chaotic, shifting soup of particles. The upper atmosphere composition changes rapidly based on how much UV and X-ray energy is hitting the gas molecules. When that solar radiation slams into the nitrogen and oxygen, it knocks electrons loose, creating a plasma. This is where the magic—and the headache—happens.

    The real driver for your HF radio communication is the ionospheric electron density. Think of it like the thickness of a fog. If the density is too low, your signal punches straight through to space. If it’s just right, you get that sweet radio wave reflection that lets you talk to someone three thousand miles away. But keep in mind, this density isn’t static. It’s a moving target that fluctuates with the sun’s cycle, meaning the “sweet spot” for your frequency might be there at noon and completely gone by midnight.

    The Real Physics of Radio Wave Reflection

    The Real Physics of Radio Wave Reflection

    Here is the reality of how we actually get a signal from point A to point B: it isn’t a mirror, and it isn’t magic. When we talk about radio wave reflection, we’re actually talking about refraction. Think of the ionosphere less like a solid sheet of glass and more like a gradient of thickening fog. As your signal enters the layers, the increasing electron density bends the wave back toward Earth. If the density is just right, the wave turns around; if it’s too thin, your signal punches straight through into space, leaving you staring at a flatline on your waterfall display.

    The trick is that this process is incredibly fickle. Because electromagnetic wave propagation depends entirely on how those electrons are behaving at that exact microsecond, your skip distance changes constantly. I’ve sat on a ridge at 2:00 AM with a perfectly tuned dipole, only to have the signal vanish because the layer shifted by a few kilometers. It’s not your antenna’s fault, and it’s not a broken feedline—the physics of the medium simply changed the rules of the game.

    Stop Fighting the Sky: 5 Real-World Lessons for Working the Ionosphere

    • Watch the clock, not just the SWR. You can have a perfect 1.1:1 match on your dipole, but if the sun has gone down and the D-layer has vanished, your HF signals are going to punch straight through the atmosphere and into deep space. Timing your sessions with the solar cycle and local daylight is more important than buying a more expensive tuner.
    • Don’t blame your antenna for a “dead” band. I’ve spent many afternoons on a ridge with a perfectly tuned vertical, only to realize the MUF (Maximum Usable Frequency) had dropped below my operating frequency. If the band is closed, it’s a sky problem, not a wire problem. Check your propagation tools before you start tearing apart your feedline.
    • Respect the solar cycle, even when it’s boring. We’re currently in a period of high activity, which is great for DX, but don’t get complacent. High sunspot numbers mean more ionization, but they also mean more volatility. A band that’s wide open at 1400 UTC might be completely unresponsive by 2200 UTC.
    • Learn to read the “mood” of the layers. If you’re getting strong signals on 40m but nothing on 20m, the ionosphere is telling you exactly where the density is sitting. Instead of getting frustrated, shift your frequency. Work with the layers that are present rather than trying to force a signal through a gap that isn’t there.
    • Keep a log of conditions, not just contacts. If you want to actually learn this stuff, don’t just write down “QSO – 59.” Write down “high noise floor, weak signal, solar flux index 150.” Ten months from now, when you’re looking at your notes, you’ll realize that your “lucky” contact was actually just a predictable result of a specific ionization state.

    The Bottom Line

    Forget the idea that your antenna is the only thing that matters; if the electron density in the D-layer is too high because the sun is being aggressive, your HF signals are going to get absorbed before they even have a chance to bounce.

    Reflection isn’t a mirror image—it’s a messy, probabilistic interaction between your wave and a shifting layer of ionized gas, meaning “perfect” conditions are a moving target you’ll never actually hit.

    Stop blaming your feedline impedance every time a contact fades; half the time, the ionosphere just decided to change its mind, and no amount of tuning is going to fix a layer that’s moved or thinned out.

    ## The Reality Check

    “You can spend ten thousand dollars on a high-end transceiver and a perfectly tuned dipole, but if the electron density in the F2 layer decides to take a nap, you’re just broadcasting expensive noise into a void. The ionosphere isn’t a component you can solder or a filter you can swap out; it’s the most temperamental piece of gear in your entire station, and it doesn’t care about your spec sheet.”

    Wren Castellano

    Bringing it Back to Earth

    Bringing it Back to Earth: Ionosphere physics.

    At the end of the day, the ionosphere isn’t some mystical, untouchable void; it’s a dynamic, shifting layer of gas that reacts to every solar hiccup and geomagnetic storm. We’ve looked at how electron density dictates your skip distance and how the varying layers—from the D to the F—can either swallow your signal whole or bounce it halfway around the world. Understanding the physics of refraction and the impact of solar cycles means you stop blaming your coax or a bad solder joint every time the bands go dead. If you know the chemistry of the upper atmosphere, you stop fighting the medium and start working with the environment instead of against it.

    There is something deeply humbling about sitting on a ridge with a piece of wire and a transceiver, knowing that your voice is traveling through a plasma field shaped by a star ninety-three million miles away. It reminds you that radio isn’t just about hardware and spectrum analyzers; it’s about a connection to the cosmos that most people will never even realize exists. So, don’t get discouraged when the MUF drops or the signal fades into the noise. Just grab your logbook, check the solar flux index, and keep listening. The ionosphere will eventually find its rhythm again, and when it does, I’ll see you on the air.

    Frequently Asked Questions

    If the electron density changes so much throughout the day, why can't I just time my DX sessions to match the peaks?

    I wish it were that simple. If the ionosphere were a predictable tide, I’d have my schedule set for the next decade. But electron density isn’t a steady climb; it’s a chaotic dance driven by solar flux, geomagnetic storms, and even the moon’s position. You can time your sessions for peak density, sure, but if a solar flare decides to mess with the D-layer or a storm rolls in, your “perfect” window will vanish.

    Does my antenna height actually matter if the ionosphere is doing all the heavy lifting?

    Listen, I know it’s tempting to think the ionosphere is doing all the heavy lifting, but your antenna height is still the foundation of the whole link. If you’ve got a great skip opening but your dipole is hovering only three feet off the ground, your ground losses and near-field interaction are going to eat your signal before it even reaches the sky. I’ve seen plenty of “perfect” conditions ruined by a poorly placed wire.

    Why does my signal suddenly drop out even when the solar flux index looks perfect on the charts?

    Because the Solar Flux Index is a broad average, not a real-time weather report for your specific frequency. You can have a “perfect” SFI, but if a localized storm in the D-layer is eating your signal through absorption, or if the ionosphere has shifted its peak density just a few kilometers higher than your expected MUF, your signal is going to vanish. It’s not your rig; the atmosphere just changed the rules mid-session.

  • How to Program a Handheld Without Losing an Evening

    How to Program a Handheld Without Losing an Evening

    I remember sitting on a ridge in the Cascades three years ago, staring at a brand-new Baofeng that refused to touch a single local repeater, despite the manual insisting everything was “plug and play.” I had spent forty minutes squinting at a tiny, backlit screen in the fading light, realizing that the “easy” way was actually a fast track to a silent radio. Most people think learning how to program a handheld is just a matter of punching numbers into a keypad, but if you’re relying solely on the factory presets, you’re essentially carrying a very expensive paperweight. The truth is, the software is usually a mess, and the manual is often written by someone who has never actually sat in the field with a dead battery and a missed contact.

    In this guide, I’m going to skip the fluff and show you the measured way to get your rig actually working. We aren’t just going to talk about entering frequencies; I’m going to walk you through the specific quirks of the programming cables, how to avoid the dreaded “memory full” errors, and why your offset settings are likely the reason you’re only hearing one side of a conversation. I’ve tested these workflows in real conditions, and I’ll tell you exactly where the software lies so you can stop guessing and start transmitting.

    Table of Contents

    Guide Overview

    Total Time: 4-6 hours
    Estimated Cost: $30-80
    Difficulty: Intermediate

    Tools & Supplies

    • Computer/Laptop with USB ports for data transfer
    • IDE (Integrated Development Environment) for writing code
    • Serial Monitor or Debugger for testing output
    • Handheld Microcontroller (e.g., Arduino or ESP32) x1
    • USB Data Cable (compatible with device) x1
    • Breadboard and Jumper Wires for prototyping x1

    Step-by-Step Instructions

    • 1. First, stop trying to use the tiny, tactilely-impaired buttons on the side of the radio to enter frequencies. Unless you enjoy the feeling of your thumb cramping after ten minutes, you need to get a programming cable specifically for your model. I’ve spent too many evenings squinting at a tiny LCD screen only to realize I missed a digit; a USB-to-serial cable paired with a laptop is the only way to ensure you aren’t just guessing your way through a frequency offset.
    • 2. Download the manufacturer’s software, but don’t expect it to be pretty. Most of these Chinese-manufactured handhelds use software that looks like it was coded in a basement in 1995, and it often is. Once you have it installed, connect your radio and hit the “Read from Radio” button immediately. You want to download your current settings before you change a single thing, because if the software crashes—and it likely will—you’ll want a way to get back to the way things were.
    • 3. Now, let’s talk about the actual data entry. When you’re adding a new channel, don’t just punch in the frequency and call it a day. You need to pay close attention to the offset and direction settings. If you’re trying to hit a repeater, you’ll be transmitting on one frequency and listening on another; if you set the offset incorrectly, you’ll spend the whole afternoon shouting into the void without ever hearing a response.
    • 4. Check your CTCSS or DCS tones. Many people think their radio is broken because they can hear a repeater but can’t key up, when in reality, the repeater is just waiting for a specific sub-audible tone to “wake it up.” I always double-check these in the software list to make sure I haven’t accidentally assigned a tone to a simplex channel where it doesn’t belong, which is a classic rookie mistake that’ll drive you mad.
    • 5. Once your list looks correct on the screen, hit “Write to Radio.” This is the moment of truth. If the progress bar stalls, don’t just yank the cable out; give it a minute. If it fails, it’s usually a driver issue with your computer, not the radio itself. Once it’s done, power cycle the device—turn it off and back on—to make sure the firmware has actually swallowed the new configuration.
    • 6. Finally, get out of the house and test it. A radio programmed perfectly on a desk in a kitchen is useless if you haven’t checked the signal strength in the field. I always take my handheld to a spot at least ten feet above the ground—never just sit there on the sofa—to confirm that the repeater offsets and tones are actually working in a real-world environment.

    Beyond the Baofeng Programming Tutorial Myths

    Beyond the Baofeng Programming Tutorial Myths.

    Look, there is a lot of noise out there regarding the standard Baofeng programming tutorial, and most of it ignores the actual physics of what you’re doing. People will tell you that once you’ve entered the frequency, you’re done. That’s a lie. If you aren’t paying attention to your CTCSS and DCS tones, you’re going to spend your entire afternoon listening to a wall of static or, worse, wondering why nobody is answering your calls. I’ve sat on a ridge in the Cascades with a fully programmed rig that wouldn’t even trip a repeater because I’d missed a single sub-audible tone setting. It wasn’t a hardware failure; it was a configuration error.

    You also need to stop treating your radio like a toy that stays static. I’ve found that programming software compatibility is often the real bottleneck—some of these free Chinese utilities are written with the grace of a sledgehammer. If you can, find a driver that actually works with your OS instead of fighting a losing battle with a broken COM port. And please, for the love of everything holy, don’t go hunting for a handheld radio firmware update unless you have a rock-solid power supply. I once saw a guy brick a perfectly good UV-5R because his battery died mid-flash, and that’s a mistake you only make once.

    Mastering Radio Frequency Settings and Tone Logic

    Mastering Radio Frequency Settings and Tone Logic

    Once you’ve got your frequencies loaded, you’re going to run into the “silent wall”—that frustrating moment where you can hear everyone else, but nobody can hear you. Most people assume their hardware is broken, but usually, it’s just a mismatch in your CTCSS and DCS tones. These sub-audible tones act like a digital handshake; if your radio isn’t sending the exact tone the repeater expects, the repeater will simply ignore your transmission. I’ve spent too many afternoons on a ridge realizing I’d set a continuous tone when the local repeater required a specific digital code. Check your local repeater’s data sheet twice.

    While you’re diving into your VHF UHF radio configuration, don’t neglect the squelch settings. If you set your squelch too tight, you’ll miss weak signals that are actually worth chasing; too loose, and you’re just listening to the floor noise. I prefer a setting that lets in a bit of static if it means catching a distant DX station. Also, keep an eye on your power levels. It’s tempting to crank everything to “High,” but if you’re operating close to a repeater, you might actually desensitize the receiver, making your signal harder to decode.

    Five Things the Manual Won't Tell You About Your Programming

    • Stop relying on the “Auto” settings for your squelch. I’ve sat on enough ridges to know that if you leave it on default, a little bit of local noise floor will keep your radio awake all night, draining the battery for no reason. Set it manually; find the threshold where the static stops but the weak signals still break through.
    • Don’t just dump a massive frequency list into the memory. A cluttered radio is a useless radio. If you’re out in the field, you don’t want to be scrolling through forty local repeaters just to find the one simplex frequency you actually need for your hiking group. Keep your active channels lean.
    • Watch your power settings, but don’t be a martyr for the battery. Most people think “High Power” is the only way to go, but if you’re just trying to reach a repeater five miles away in a clear valley, “Low Power” is going to keep your radio alive for twice as long without sacrificing the link. I always check my signal strength first; if it’s solid at low power, leave it there.
    • Verify your offsets with a real test, not just a prayer. I’ve seen too many people program a repeater offset correctly in the software, only to realize they didn’t account for the shift direction. If you can’t hear the repeater’s transmit signal, don’t just assume it’s broken—check if you’re actually transmitting on the correct input frequency.
    • Label your channels with actual meaning. “Channel 1″ is a useless name when you’re tired and it’s getting dark. Use the text field to put the location or the purpose—”Summit Repeat” or “Local Simplex”—so you aren’t guessing which button to mash when you actually have a contact on the line.

    The Bottom Line: Don't Just Set and Forget

    Programming is only half the battle; if your frequency offset is off by even a few hundred Hertz, or if you’ve botched the CTCSS tone, you’ll be shouting into a void regardless of how much power you’re pushing.

    Stop relying on the “factory default” settings as a baseline for success; I’ve measured the signal bleed on these cheap handhelds, and a clean channel requires you to manually verify your squelch and sub-audible tones every single time.

    A perfectly programmed radio is still limited by physics; if you’re sitting in a basement with a stock rubber duck antenna, no amount of clever software configuration is going to compensate for the lack of actual aperture and height.

    The Programming Trap

    Most people treat a programming cable like a magic wand, expecting the software to fix a hardware limitation. It won’t. You can spend three hours chasing a CTCSS tone setting that isn’t working, only to realize later that your antenna is essentially a piece of wet string because you didn’t account for the ground plane. Programming isn’t just about entering numbers into a spreadsheet; it’s about understanding why those numbers matter once you actually press the PTT.

    Wren Castellano

    The Reality of Your New Rig

    The Reality of Your New Rig.

    At the end of the day, programming your handheld isn’t about memorizing a manual; it’s about understanding the logic of what you’re actually doing. We’ve covered the necessity of getting your offsets right, the headache of CTCSS/DCS tones, and why you shouldn’t blindly trust the factory presets. Remember, if you can’t explain why you’re entering a specific frequency or sub-audible tone, you haven’t finished the job. I’ve spent enough nights on ridges with a half-charged battery to know that a poorly programmed radio is just a very expensive paperweight. Make sure your channel spacing is consistent and your power settings aren’t draining your cells before you even find a repeater.

    Once the software is closed and the programming cable is tucked away, the real work begins. Don’t just assume it works because the screen says “ready”—get out there and test the actual coverage in your local terrain. There is a specific kind of satisfaction that comes from hearing a clear signal on a handheld you configured yourself, knowing every bit of data was placed with intent. Radio is a physical, measurable science, and while the tech changes, the fundamentals of a good connection stay the same. Now, stop staring at the laptop and go find a signal.

    Frequently Asked Questions

    I’ve got the frequencies right, but why am I still just hearing static when I try to transmit on the local repeater?

    If you’ve got the frequency dialed in but you’re hitting a wall of static, you’re likely missing the “handshake.” Most repeaters require a CTCSS or DCS tone to open the squelch; without it, the repeater simply ignores you. Check your programming again—did you set the tone on the transmit side? Also, check your offset. If you’re transmitting on the repeater’s frequency instead of the input frequency, you’re just shouting into a void.

    Is it actually worth buying a dedicated programming cable, or can I just get by with a cheap USB one from Amazon?

    Look, I’ve tried the $5 unbranded cables from Amazon. They work about forty percent of the time, and the other sixty percent, they’ll drop the connection right in the middle of a firmware write. If you brick your radio because a cheap Prolific chip decided to take a nap, you’ve wasted more money than the cable was worth. Buy a dedicated one with a known, stable chipset. It’s not about being fancy; it’s about not killing your rig.

    How do I know if my offset is actually working, or am I just accidentally transmitting on the wrong side of the repeater frequency?

    Don’t just take the radio’s word for it. The easiest way to verify is to find a local repeater and check your display. If you’re tuned to 146.820 but your screen shows 146.880 while you’re listening, your offset is active. If the numbers don’t move when you hit PTT, you’re just shouting into the void. I’ve seen plenty of people think they’re hitting a repeater only to realize they’re just transmitting on the input frequency.

  • Dmr Explained for Someone Who Just Bought the Radio

    Dmr Explained for Someone Who Just Bought the Radio

    I spent most of last Tuesday squinting at a spectrum analyzer, trying to figure out why a local repeater sounded like a bag of gravel being thrown into a blender. It’s the same old story: someone buys a shiny new handheld thinking they’ve unlocked a secret dimension of connectivity, only to realize they don’t actually know what is dmr beyond the marketing buzzwords on the box. People talk about Digital Mobile Radio as if it’s some magical, impenetrable shield against bad terrain, but let’s be clear—it’s just a protocol. If you’re expecting a digital signal to perform miracles through a granite ridge that would swallow a high-power HF signal, you’re going to be very disappointed.

    I’m not here to sell you on a brand or recite a manufacturer’s manual. My goal is to strip away the jargon and tell you how this stuff actually behaves when you’re out in the field, away from the clean power of a lab bench. We’re going to look at the real-world trade-offs of digital versus analog, the unavoidable latency you’ll encounter, and why your antenna height still matters more than your bit rate. No hype, just the data.

    Table of Contents

    Digital Radio Communication Basics vs the Real World Performance

    Digital Radio Communication Basics vs the Real World Performance

    In theory, the difference between analog and digital is a simple matter of bits versus waves. But when you’re standing on a ridge with a handheld, that theory hits the dirt. In a standard DMR vs analog radio comparison, the biggest shock isn’t the clarity; it’s the “cliff effect.” With analog, as you move away from the repeater, the signal degrades gracefully—you get more hiss, more static, but you can still pull a voice out of the noise. With DMR, you have perfect audio right up until the moment you don’t. Once the error correction can’t keep up, the signal just drops into a digital abyss.

    This happens because of the TDMA technology explained in the manuals: Time Division Multiple Access. Instead of one continuous stream, DMR slices the frequency into time slots. It’s efficient, and it lets two people talk on one channel, but it demands a much more stable link. If your signal is hovering right on the edge of the threshold, you aren’t going to get a “fuzzy” conversation; you’re just going to get silence. It’s a trade-off: you get incredible efficiency and capacity, but you lose that ability to “listen through the noise” that we old-timers rely on.

    Tdma Technology Explained More Than Just a Buzzword

    Tdma Technology Explained More Than Just a Buzzword

    When people talk about DMR, they usually get hung up on the “digital” part, but the real engine under the hood is Time Division Multiple Access. In a standard analog system, if you’re talking, you’re occupying the entire channel. Period. With TDMA technology explained simply, you’re essentially slicing that single 12.5 kHz channel into two distinct time slots. It’s like having two separate lanes on a highway that switch back and forth so fast your ears can’t tell the difference, but your radio can.

    This isn’t just a clever way to double your capacity; it changes how the hardware actually behaves. Because the radio is only transmitting for half the time, you get a much more efficient duty cycle. However, don’t let the marketing fool you into thinking this is a free lunch. When we look at a DMR vs analog radio comparison, the trade-off is complexity. You aren’t just dealing with a continuous wave anymore; you’re dealing with precise timing and synchronization. If your repeater configuration isn’t dialed in or your timing is off, those two slots will bleed into each other, and you’ll end up with a digital mess that’s harder to fix than a simple noisy analog signal.

    Five Real-World Realities of Moving to DMR

    • Don’t expect a miracle with your coverage. If you’re used to the “graceful degradation” of analog—where the signal gets fuzzy but you can still make out a voice—DMR will frustrate you. It’s either perfect digital audio or nothing at all. If you’re operating in a valley with a weak signal, you aren’t going to hear a “ghost” of a transmission; you’re just going to hear silence.
    • Time slots aren’t free real estate. The TDMA structure is what allows two people to use one frequency, but remember that you are still sharing the same physical bandwidth. If the repeater is slammed with traffic, your “slot” might be clear, but the congestion at the repeater level can still lead to latency or missed packets. It’s not magic; it’s just efficient scheduling.
    • Your antenna height still dictates your success. I see people buying $600 digital handhelds and then trying to use the stock rubber duck antenna from a basement. It doesn’t matter how clean the digital protocol is; if you don’t have the elevation or a decent ground plane to get that signal out of the noise floor, you’re just shouting into a void.
    • Get comfortable with your radio’s software. In the analog days, you turned a knob and you were done. With DMR, you’re managing Color Codes, Talk Groups, and Time Slots. If you don’t program your radio correctly, you’ll be transmitting perfectly fine on the right frequency, but nobody will hear a word you say because you’re on the wrong digital “channel.”
    • Watch your battery life, but don’t obsess over the wrong things. The digital processing does take a bit more juice than a simple FM squelch, but the real killer is the screen and the backlight while you’re digging through menus to find the right contact. If you’re out on a portable activation, bring a spare; the math says you’ll need it.

    The Bottom Line: What You’re Actually Getting With DMR

    DMR isn’t a magic way to boost your effective radiated power; it’s a way to squeeze more efficiency out of the spectrum by using time slots, meaning you get cleaner audio and more capacity, but you aren’t going to magically punch through a mountain that a good analog signal could have skirted.

    The TDMA structure means your radio is essentially “pulsing” its transmission, which is great for battery life and channel sharing, but it also means that if your timing or synchronization is off due to poor repeater implementation, your audio is going to sound like a digital mess regardless of how much power you’re pushing.

    Don’t buy into the idea that digital is “better” across the board—it’s just different. Analog will still give you that graceful degradation where you can hear a faint signal through the noise, whereas with DMR, once the signal drops below a certain threshold, it doesn’t just get noisy; it simply disappears.

    The Reality of the Digital Bitstream

    Don’t let the marketing brochures fool you into thinking DMR is some kind of magic wand for your coverage area. At its heart, it’s just a way to squeeze two conversations into a single 12.5 kHz slot using time-division, which is great for efficiency, but it won’t fix a poorly placed repeater or a bad antenna. If your signal strength is too low to maintain the sync, you aren’t going to get “faded” audio like you do on FM; you’re just going to get silence.

    Wren Castellano

    The Bottom Line on DMR

    The Bottom Line on DMR efficiency.

    At the end of the day, DMR isn’t some magical way to bypass the laws of physics; it’s a practical tool for managing how we use our limited spectrum. We’ve looked at how TDMA lets two people share a single frequency and how that digital clarity can save you from the frustration of a signal that’s just barely audible on FM. But remember, the digital “cliff effect” is real. Unlike analog, where you can slowly fade into the noise, a digital signal is either there or it isn’t. If you aren’t paying attention to your signal-to-noise ratio or the quality of your repeater’s coverage, you’re going to find yourself sitting in silence rather than hearing a garbled mess. It’s about efficiency and clarity, not about making a bad antenna work better.

    If you’re thinking about jumping into the digital fray, my advice is to do it with your eyes open. Don’t just buy the flashiest handheld because the box looks good; make sure you actually have a local network that makes sense for your operating style. Whether you’re using it for local emergency prep or just to talk to folks across the county, the technology is a means to an end. Radio is still about the connection, regardless of whether that connection is a waveform or a packet of data. Get your gear, test your coverage, and once you’ve got it dialed in, get out there and see what you can reach.

    Frequently Asked Questions

    If I'm moving from analog to DMR, am I going to lose that "near-miss" audio where I can still make out a signal through the static?

    Yes, you will. That’s the biggest psychological hurdle when switching. In analog, you can hear a signal fading into the noise floor—it’s messy, but it’s there. With DMR, you get “cliff effect” audio. It’ll sound perfect right up until the moment it completely vanishes into digital silence. You don’t get the “near-miss” anymore; you either have a solid bitstream or you have nothing. It’s cleaner, but it’s definitely less forgiving.

    How much does my antenna height and placement actually matter if the signal is digital—does the "digital cliff" effect mean I'll just get nothing at all?

    Look, don’t let the digital transition fool you into thinking physics has taken a holiday. That “digital cliff” is real—you’ll go from perfect audio to absolute silence without the nice, slow fade of analog—but it doesn’t change the math of your antenna. If your dipole is sitting six feet off the ground in a backyard, your signal-to-noise ratio is going to crater. You still need height to clear the local clutter and get that gain. Digital just means you have less margin for error.

    Do I really need a dedicated repeater to make this work, or can I actually get decent results with direct simplex communication in the field?

    Look, if you’re out on a ridge with a clear line of sight, simplex will surprise you. I’ve pulled digital signals through a thicket that would have choked an analog signal to death. But don’t mistake “it works” for “it’s reliable.” Without a repeater, you’re at the mercy of terrain and your battery life. If you’re just testing gear, simplex is fine. If you’re relying on it for safety, find a repeater or bring more power.

  • How to Get Started Listening to Shortwave

    How to Get Started Listening to Shortwave

    Stop wasting your money on those shiny, “all-in-one” shortwave receivers that promise the world but deliver nothing but static and disappointment. I’ve seen too many beginners head to the shop thinking they need a three-thousand-dollar rig just to figure out how to listen to shortwave, when the reality is that most of those expensive pre-built units have mediocre front ends that choke on local interference. If you think a fancy digital display is going to make up for a poorly designed tuner or a lack of actual signal gain, you’re being sold a dream. Most of the time, you don’t need a bigger budget; you need better physics.

    I’m not here to sell you a lifestyle or a brand name. My goal is to show you what actually works when you’re sitting in your chair at 2:00 AM, trying to pull a weak signal out of the noise. I’ll give you the real numbers on antenna heights, tell you which SDRs are actually worth the silicon they’re printed on, and I’ll be the first to admit when a station is only audible because the ionosphere is behaving for once. This is about building a setup that actually performs.

    Table of Contents

    The Best Shortwave Receivers for Beginners Who Value Data

    The Best Shortwave Receivers for Beginners Who Value Data.

    Look, you don’t need a $3,000 laboratory-grade receiver to start, but you do need something that doesn’t drift every time the sun comes out from behind a cloud. If you’re looking for the best shortwave receivers for beginners, my first instinct is to steer you toward a decent SDR (Software Defined Radio) setup. I’ve spent enough time with hardware to know that while a dedicated tabletop rig feels more “real,” a mid-range RTL-SDR dongle paired with a solid antenna will give you more visual data on the spectrum than most entry-level commercial radios. Seeing the signal rise and fall on a waterfall display helps you actually see the physics of what’s happening.

    If you prefer something tactile—and I still do—don’t just buy the first shiny box you see on an ad. Look for something with a decent selectivity and a stable local oscillator. You want to be able to move across the various shortwave radio frequency bands without the signal turning into a mess of noise the moment you touch the dial. I once tried a budget “all-in-one” unit that promised the world; it was useless because it couldn’t distinguish between a legitimate broadcast and local interference. Get something that lets you control the gain, or you’ll spend more time fighting the noise floor than actually hearing the stations.

    A Shortwave Listening Equipment Guide That Actually Works

    Look, you can spend a fortune on a high-end DSP receiver and still hear nothing but static if your setup is fundamentally flawed. Most people think the magic happens inside the box, but the real work is done by your antenna and your connection to the ground. If you’re just using the telescopic whip that came with a cheap portable, you aren’t really listening; you’re just hoping for a miracle. For a decent shortwave listening equipment guide, my first rule is this: invest in a long-wire antenna. Even a simple piece of copper wire strung up 20 feet in a tree will outperform a thousand-dollar receiver paired with a junk antenna.

    Once you have the wire up, you have to deal with the reality of understanding ionospheric propagation. I’ve sat on ridges during perfect solar cycles and still struggled because my antenna was too low to the ground to capture the reflected signals. You need to realize that the different shortwave radio frequency bands behave like different lanes on a highway; some are wide open during the day, while others only wake up after sunset. If you aren’t accounting for the height of your wire and the time of day, you’re just spinning your wheels.

    Five Things the Manuals Won't Tell You About Actually Hearing Something

    Five Things the Manuals Won't Tell You About Actually Hearing Something
    • Stop relying on the built-in telescopic whip. It’s fine for FM radio in your car, but for shortwave, it’s practically useless. If you want to pull in anything beyond local stations, you need a dedicated wire antenna. I put a simple 25-foot length of copper wire out my window last Tuesday—at least 15 feet above the ground—and the difference in signal-to-noise ratio was night and day.
    • Learn the difference between signal strength and signal quality. Just because your S-meter is hitting the red doesn’t mean you’re actually hearing a station; you might just be listening to a local burst of interference or a heavy-duty solar flare. I’ve spent many nights chasing a “strong” signal only to realize it was just local RFI from a poorly shielded LED driver in my kitchen.
    • Watch the clock, not just the frequency. The ionosphere isn’t a static thing; it’s a moving target. A band that’s dead at 10:00 AM might be wide open at 10:00 PM. I don’t bother checking the 40m band during the heat of the day unless I’m looking for something specific; I wait for the sun to go down and the layers to settle.
    • Get comfortable with the “noise floor.” Before you start hunting for DX, tune to a completely empty part of the band to see what your baseline noise looks like. If your floor is already high because of your neighbor’s switching power supply, you aren’t going to find much of anything, no matter how expensive your receiver is.
    • Don’t get married to a single piece of gear. I’ve seen people spend three months’ salary on a high-end SDR only to realize they were placing it right next to a computer monitor that was flooding the room with RF noise. Sometimes a cheap, used analog receiver and a well-placed wire antenna will outperform a $1,000 setup that’s buried in electronic smog.

    The Bottom Line

    Don’t sink your entire budget into a fancy receiver if you haven’t sorted your antenna first; a $50 SDR with a well-placed wire at 10 meters will outperform a $2,000 tabletop rig sitting on a desk with no elevation.

    Stop chasing “magic” specs in marketing brochures and start looking at real-world measurements like selectivity and dynamic range, because a radio that looks good on paper won’t mean a thing when a local AM station is screaming across the band.

    Accept that some nights you’ll hear everything and some nights you’ll hear nothing; if the ionosphere isn’t cooperating, no amount of expensive gear is going to fix a dead band.

    ## The Reality of the Signal

    You can spend five thousand dollars on a receiver with the prettiest waterfall display in the world, but if you’re trying to pull in signals with a ten-foot wire draped over a bookshelf, you aren’t listening to shortwave—you’re just listening to your neighbor’s microwave oven. Get your antenna up, get it away from the house, and stop blaming the hardware when the problem is actually your geometry.

    Wren Castellano

    Final Thoughts Before You Hit the Airwaves

    Final Thoughts Before You Hit the Airwaves

    At the end of the day, getting into shortwave listening isn’t about owning the most expensive SDR or the shinyest transceiver on the shelf. It’s about understanding the relationship between your gear, your antenna, and the sky above you. I’ve spent enough time staring at waterfall displays to know that a $500 receiver won’t save you if your wire is dragging in the dirt; you need to prioritize a decent antenna and get it at least 15 to 20 feet up if you want to see anything more than local noise. Don’t get caught in the trap of chasing specs on a datasheet without considering your actual operating environment. Measure your signal, test your connections, and remember that a simple wire antenna, when placed correctly, will often outperform a piece of gear twice its price.

    There is something deeply grounding about tuning into a distant signal and realizing that, despite all our fiber optics and satellites, the ionosphere is still doing the heavy lifting. It’s a hobby that demands patience and a bit of a scientific temperament, but the payoff is worth the trial and error. When you finally pull a clear signal out of the static on a band you thought was dead, you’ll realize it wasn’t just luck—it was the result of understanding the physics at play. So, stop overthinking the perfect setup and just start listening. The airwaves are waiting, and they have plenty to tell you if you know how to tune in.

    Frequently Asked Questions

    I have a decent receiver, but can I actually get anything decent with just a long wire thrown over a tree, or am I dead in the water?

    You aren’t dead in the water, but don’t expect miracles. A long wire is a fine start, provided you actually get some height. If that wire is just draped over a low bush at six feet, you’re mostly just collecting local noise. Get it up at least 20 or 30 feet into a tree to clear the ground losses. It’ll be noisy, sure, but it’s better than nothing—and it’s a hell of a lot better than a piece of wire sitting on your desk.

    Is it worth spending the extra money on an SDR with a wide bandwidth, or should I just stick to a dedicated single-band receiver for now?

    If you’re just starting, don’t dump your entire budget into a high-end SDR. A wide bandwidth is flashy, but if you can’t parse the signal from the noise, you’re just looking at a pretty waterfall of chaos. I’d suggest a mid-range SDR for the visual data, but keep some cash aside for a decent dedicated receiver or a better antenna. Realistically, you’ll spend more time tuning the antenna than chasing wide bandwidths anyway.

    How much of my signal strength is actually my gear, and how much is just the ionosphere deciding to cooperate for an hour?

    The honest answer? It’s a toss-up, and most days the ionosphere is winning. I’ve had $3,000 SDR setups go silent while a cheap, noisy analog rig pulls in a station from halfway across the globe. Good gear gives you the floor—it lowers the noise and clarifies the signal—but it can’t manufacture physics. If the MUF drops or the solar flux is garbage, even the best front-end in the world won’t save you.

  • Linked Repeaters and Internet Radio: Where the Line Sits

    Linked Repeaters and Internet Radio: Where the Line Sits

    I spent most of last Tuesday trying to coordinate a simple check-in between two groups on a ridge line, only to realize our local repeater was about as useful as a paperweight because of a single dead zone in the valley. It’s one of those moments where you realize the textbook definition of connectivity doesn’t actually account for terrain. People will throw a lot of jargon at you when you ask what is a linked repeater system, acting like it’s some kind of magical, impenetrable network architecture. In reality, it’s just a way to cheat physics by stitching together different sites so your signal doesn’t die the second you drive behind a granite outcrop.

    I’m not here to give you the glossy, manufacturer-approved sales pitch. Instead, I’m going to break down how these links actually behave when you move from the lab to the field. I’ll tell you where the latency issues actually bite you, why some backhaul methods are a total waste of money, and when a link is actually reliable versus when you’re just getting lucky with a clear line of sight.

    Table of Contents

    Beyond Local Range Real Amateur Radio Networking

    Beyond Local Range Real Amateur Radio Networking

    When we talk about amateur radio networking, we aren’t just talking about making sure two people can hear each other across a valley. We’re talking about creating a cohesive web that ignores geography. In a standard setup, your range is dictated by the line-of-sight from your antenna to the local tower. But with a linked system, you’re essentially using the internet or a dedicated microwave link to perform RF signal bridging. This means a signal that enters a node in one county can pop out of a repeater three hundred miles away in a matter of milliseconds. It changes the game from local chatter to something that feels much more like a regional conversation.

    I’ve seen this work beautifully with modern digital voice repeater interconnection, where the data packets move through a backbone that doesn’t care about hills or terrain. However, I’ve also seen it fail when the backhaul link is poorly configured. If your VoIP radio integration is jittery or your latency spikes, the digital handshake breaks, and your “wide area” suddenly becomes a series of disconnected islands. It’s a powerful way to achieve wide area radio coverage, but you have to respect the stability of the link connecting those nodes just as much as the RF at the antenna.

    Rf Signal Bridging vs the Theoretical Ideal

    Rf Signal Bridging vs the Theoretical Ideal

    When you look at a manufacturer’s spec sheet for RF signal bridging, it looks like magic. They describe a seamless, instantaneous connection that makes it feel like you’re sitting in the same room as the person on the other end. But in the field, reality is a bit more stubborn. You aren’t just moving bits; you are managing the latency and jitter that come with moving a signal across a backbone. If you’re using a high-speed fiber link, it’s nearly perfect, but the moment you introduce a wireless microwave link or a shaky internet connection, that “instant” feel starts to lag.

    In my experience, the gap between the theoretical ideal and actual repeater node connectivity usually comes down to how the system handles the transition. If the timing is off by even a few milliseconds, you get those clipped syllables that make digital voice repeater interconnection a nightmare to listen to. It’s not just about the signal getting from Point A to Point B; it’s about the integrity of the timing. I’ve seen plenty of setups that look great on a bench but fall apart the second they have to handle a real-world burst of traffic.

    Five Real-World Realities of Linking Sites

    • Don’t trust the coverage map; trust the link. You can have a repeater with a massive footprint, but if the link between Site A and Site B is a shaky microwave hop or a low-bandwidth VoIP connection, your effective range is only as good as that bridge. I’ve seen perfectly good local repeaters go silent because the backhaul link decided to take a nap.
    • Watch your latency, especially if you’re using internet-based linking. If you’re trying to run digital modes or even just quick tactical comms through a linked system that has a half-second delay baked in, you’re going to end up stepping on yourself or getting frustrated. It’s not just about signal strength; it’s about timing.
    • Height is still king, even for the link. Just like I’ll tell you an antenna is useless if it’s sitting in a ditch, a linked repeater is only as good as its backhaul antenna’s elevation. If you’re linking via UHF, you better ensure that line-of-sight is clear, or you’re just wasting electricity on a link that’s mostly noise.
    • Build in a “fail-soft” mentality. A good linked system should be designed so that if the link fails, the individual repeaters still function as local nodes. I don’t want to lose my ability to talk to the guys in my own valley just because a fiber line got cut ten miles away.
    • Mind the audio quality. When you start daisy-chaining links or passing audio through multiple compression stages (like cheap VoIP gateways), the signal can turn into a muddy mess. I’ve measured the SNR on several linked setups, and if you aren’t careful, you’ll find yourself straining to hear a signal that technically has a great S-meter reading but zero intelligibility.

    The Bottom Line: What Actually Matters

    Linked repeaters aren’t magic; they’re a logistical bridge. They don’t make your radio more powerful, they just give your signal a more efficient way to bypass geography that would otherwise swallow it whole.

    Theoretical coverage maps are a starting point, but real-world reliability depends on the link between the sites. If the backbone connection between two repeaters is weak or prone to interference, the whole system is just a collection of expensive, isolated islands.

    Don’t mistake a linked network for a “set it and forget it” solution. Because you’re adding more nodes and more points of failure, you have to account for the fact that a single bad link can drop an entire section of the network, regardless of how good your local signal looks on the S-meter.

    Understanding The Reality of the Link.

    A linked repeater system isn’t some magical way to defy physics; it’s just a way to cheat distance by handing your signal off from one tower to the next before it hits the horizon. It works beautifully until the backhaul link drops or the weather turns, and that’s when you realize you aren’t just relying on your radio—you’re relying on a whole chain of hardware that’s only as strong as its weakest connection.

    Wren Castellano

    At the end of the day, a linked repeater system isn’t a magic wand that solves every coverage gap, but it is a powerful tool if you use it correctly. We’ve looked at how these systems bridge distances that a single station simply can’t touch, and we’ve acknowledged that the theoretical gain promised in a technical manual often hits a wall when you factor in real-world latency and link stability. You have to account for the backhaul—whether it’s a microwave link or a high-speed data connection—because if that bridge fails, your entire network goes silent. Don’t just build for the best-case scenario; build for the moment the signal starts to jitter and the link margin starts to disappear.

    If you’re looking to expand your reach, don’t get discouraged by the complexity of the setup. There is something deeply satisfying about knowing that a signal you keyed in a valley can pop out of a repeater fifty miles away, perfectly intact. It’s about more than just hardware; it’s about extending the conversation beyond the physical limits of your local terrain. Just remember to keep your eyes on the meter and your feet on the ground. Radio is a game of physics, and while the links make the world feel smaller, it’s the actual connection you make that makes the whole effort worth the climb.

    Frequently Asked Questions

    If the link between two repeaters goes down, does the whole system fail, or can I still use the local site?

    The short answer is: no, the whole system doesn’t die, but your options change. If the link—whether it’s a microwave point-to-point or a leased line—drops, the remote repeaters effectively become “islands.” You can still key up the local site and talk to anyone within its direct line of sight, but you’ve lost the ability to reach the rest of the network. It’s a localized failure, not a total blackout.

    How much extra latency am I actually going to deal with when my signal has to jump through three different nodes before hitting the airwaves?

    If you’re talking about digital links—like an AllStar node or a VoIP-based system—you’re looking at a noticeable lag. Jumping through three nodes, you’ll likely hit a 200 to 500 millisecond delay. It’s enough to make “over” and “out” feel awkward, as you’ll constantly step on each other’s tails. If it’s an old-school microwave link, it’s negligible, but in the digital era, expect to wait a beat before you start talking.

    Is it worth investing in a high-end mobile rig for a linked system, or will the bottleneck always be the link itself?

    Look, if you’re chasing a link, your high-end rig is mostly just expensive window dressing. If the link between sites is noisy or dropping packets, a $1,200 transceiver won’t magically clean up the skywave or fix a poorly placed donor antenna. Invest in a solid antenna and a clean power supply first. Buy the high-end rig for the better receiver sensitivity and better filtering, but don’t expect it to fix a bad link.

  • Aprs Explained: Sending Position and Messages Over Radio

    Aprs Explained: Sending Position and Messages Over Radio

    I spent three hours last Tuesday hiking up a ridge in the Cascades, only to realize my setup was practically useless because I’d listened to a forum post claiming I could run APRS from a handheld tucked inside a heavy canvas pack. If you’re trying to figure out how to use aprs effectively, stop looking for a magic software setting or a high-priced proprietary gadget to do the heavy lifting for you. The reality is much more grounded—and much more frustrating—than the marketing brochures suggest. Most people treat digital packets like they’re magic, but if your antenna is buried under a layer of nylon and sitting two feet off the ground, you aren’t transmitting data; you’re just generating heat.

    In this guide, I’m going to skip the fluff and tell you how this actually works when you’re out in the field. I’ll show you the specific hardware combinations that don’t fail when the weather turns, and more importantly, I’ll explain why antenna height and placement are the only two metrics that actually matter when your packet won’t clear the treeline. I’ve measured the signal drop-offs, I’ve dealt with the interference, and I promise to give you the unvarnished truth about what it takes to get your station online.

    Table of Contents

    Mastering Aprs Frequency Settings and Packet Radio Protocols

    Mastering Aprs Frequency Settings and Packet Radio Protocols

    Look, you can have the most expensive handheld on the market, but if your aprs frequency settings are off by even a fraction of a kilohertz, you’re essentially just broadcasting white noise. Most people think you just plug it in and go, but you need to be precise about your offset and your frequency selection. If you’re running a mobile setup, you’re usually looking at 144.390 MHz in North America, but don’t assume your local repeater is the only game in town. I’ve spent many afternoons scanning for local nodes just to see which ones actually have the backbone to handle a decent traffic load.

    When you move into the actual packet radio protocols, things get a bit more granular. It isn’t just about sending data; it’s about how that data is framed and timed. If your timing is sloppy, your packets will collide, and you’ll spend your whole session watching your signal fail to clear the buffer. Whether you are configuring aprs software setup on a laptop or trying to squeeze a signal out of a handheld, remember that the protocol expects discipline. If your baud rate isn’t matched perfectly to your hardware’s capability, you aren’t tracking; you’re just wasting battery.

    The Truth About Aprs Pager and Mobile Stations

    The Truth About Aprs Pager and Mobile Stations

    Most people get caught up in the software side of things, but they forget that the hardware is what actually pushes the data through the air. When we talk about aprs pager and mobile stations, there is a massive difference in how they behave in the real world. A pager is a low-power, “listen-and-wait” device; it’s fine for checking in if you’re sitting near a digipeater, but don’t expect it to punch through a dense canopy. On the other hand, a mobile station in a vehicle has the luxury of a decent ground plane and a much higher duty cycle. If you’re trying to achieve reliable tracking via amateur radio, you really need to think about your antenna’s placement relative to the vehicle’s roofline.

    I’ve seen plenty of folks struggle with mobile setups because they treat it like a desktop rig. If your antenna is mounted low or tucked behind a pillar, your packet loss will skyrocket regardless of your software settings. I ran a test last month with a mobile rig mounted at 5 feet above the ground versus a handheld at waist height; the difference in successful packet transmission wasn’t just marginal, it was transformative. If you want your station to actually contribute to the network rather than just being noise, get that mobile antenna up where it can actually see the horizon.

    Five Ways to Stop Shouting Into the Void and Actually Get Your Packets Through

    • Height is your best friend, and your worst enemy if you’re lazy. If you’re running APRS from a handheld in your pocket, you aren’t “operating,” you’re just wasting battery. Get that antenna at least 10 feet off the ground—ideally much higher if you’re in a valley—or your signal is going to spend more time fighting the dirt than it is talking to the digipeaters.
    • Stop assuming every digipeater is a magic portal. I’ve spent too many afternoons watching a signal strength meter climb only to realize the local repeater is stuck in a loop or buried under a layer of interference. Check your local APRS map first; if you’re in a dead zone, no amount of fancy software is going to fix the physics of your location.
    • Watch your packet timing. If you’re trying to burst out a massive amount of data all at once, you’re going to collide with someone else’s signal or get timed out by the gateway. I prefer small, frequent updates. It’s better to send a clean, short packet every five minutes than to try and shove a data-heavy mess through a noisy channel every thirty.
    • Don’t trust your GPS blindly. If you’re operating in a canyon or under heavy tree canopy, your NMEA data is going to drift, and your APRS position will look like you’re driving through a lake. If the position looks jumpy on the map, stop sending updates until you have a solid lock, or you’ll just be cluttering the frequency with garbage data.
    • Keep your hardware simple. You don’t need a $500 SDR setup to move a few bytes of location data. A decent dual-band handheld with a tuned, high-gain antenna is more than enough. I’ve seen people spend a fortune on “optimized” mobile rigs only to realize they were using a rubber duck antenna that was essentially a glorified paperweight.

    The Bottom Line on Making APRS Actually Work

    Stop assuming your signal is the problem when it’s actually your height; if your antenna is sitting on a tabletop or tucked inside a car window, you aren’t “communicating,” you’re just wasting battery.

    Don’t get blinded by the shiny new gear—a well-tuned, properly mounted mobile station will outperform a high-end handheld every single time because of the power and the antenna placement.

    Accept that APRS is a game of physics and luck; you can optimize your protocols and your frequency settings all day, but if the terrain is blocking you or the local digipeaters are slammed, you’re going to have to wait for a better window.

    The Height Reality Check

    Everyone wants to talk about the protocol and the software, but if you’re trying to push APRS packets through a dense canopy from a handheld at waist height, you aren’t communicating—you’re just wasting battery. If you want your position to actually show up on the map instead of just drifting in digital limbo, get that antenna at least fifteen feet up; otherwise, you’re just hoping the ionosphere or a lucky skip does the heavy lifting for you.

    Wren Castellano

    Getting Out of the Shack and Into the Field

    Getting Out of the Shack and Into the Field.

    At the end of the day, getting APRS to work isn’t about having the most expensive mobile rig or the fanciest software interface; it’s about understanding the physics of your specific environment. You can have the perfect frequency settings and a solid packet protocol, but if you’re running a rubber duck antenna inside a metal vehicle parked under a canopy of oaks, you’re just burning battery for nothing. Remember that height is your best friend—get that antenna up, clear the local obstructions, and don’t be afraid to measure your signal strength in different spots rather than assuming one location is a magic fix. If your packets aren’t clearing, it’s likely a practical issue with your placement or your antenna’s ground plane, not a mystery of the universe.

    There is something deeply satisfying about seeing your little digital footprint appear on a map, knowing it traveled through the air via a protocol you configured yourself. It connects you to a wider network of operators and emergency services in a way that feels much more tangible than just scrolling through a web browser. So, grab your gear, find a spot with a decent view of the horizon, and start transmitting. Don’t worry if your first few attempts are a bit messy; radio is a learning process, and the best way to master it is to get out there and actually use it.

    Frequently Asked Questions

    I’ve got a decent handheld, but will I actually see anything on the map if I’m running a wire antenna at 15 feet in a suburban backyard?

    At 15 feet in a suburban backyard, you’re fighting a losing battle against the ground plane and your neighbors’ rooftops. You might see a few local packets if the wind is right, but don’t expect a robust map presence. If you want that handheld to actually clear the local clutter and hit the digipeaters, you need to get that wire up to at least 30 feet. Otherwise, you’re just wasting battery shouting into the dirt.

    Is it worth spending the extra money on a dedicated APRS tracker, or can I just get a reliable signal using a cheap Baofeng and a mobile rig?

    Look, if you’re just trying to see if your local repeater is alive, a Baofeng will get the job done—provided you have a decent antenna. But if you actually want to track a moving vehicle or a hike, don’t waste your money on a cheap handheld. The latency and duty cycle on those budget rigs will drive you mad. Get a dedicated tracker; it’s built for the constant packet stream, whereas a handheld is just a radio trying to do math it wasn’t designed for.

    When the weather turns or the ionosphere is acting up, how much of my missing data is actually my equipment's fault versus just bad luck?

    Look, if your packets are dropping, don’t immediately blame your coax. If you’re operating on 144.390 MHz and the signal just vanishes, check your antenna height first. If you’re sitting in a valley with a low-mounted whip, you’re fighting physics, not gear. But if your SWR is rock solid and you’re still seeing gaps during a solar storm or heavy precipitation, that’s just the universe telling you to go grab a coffee and wait for the ionosphere to settle.