I was halfway up a limestone ridge last October, tangled in a mess of 14-AWG copper and cursing my own luck, when I realized I’d made the classic mistake. I’d spent forty minutes obsessing over the resonant length of my dipole, but I hadn’t actually figured out how to raise a wire into a tree without it becoming a giant, conductive bird’s nest. Most people think the physics of the antenna is the hard part, but if you don’t have a solid plan for the mechanical deployment, you’re just standing in the dirt looking at a pile of expensive wire.
In this guide, I’m going to skip the fluff and tell you exactly how I get my arrays up and running without losing my sanity—or my gear. We aren’t just talking about throwing a weighted line over a branch and hoping for the best; I’ll show you the specific tools that actually work, how to manage tension so your SWR doesn’t spike every time the wind blows, and why height above ground is the one metric you can’t afford to ignore. Let’s get your signal up where it belongs.
Table of Contents
- Step-by-Step Instructions
- Mastering the Fishing Pole Method for Trees and Aerial Line Deployment
- The Right Climbing Throw Line Weight for Securing Wire to High Branches
- Five Things I Wish I’d Learned Before My First Tree Deployment
- The Bottom Line Before You Head Out
- ## The Height Reality Check
- Before You Head Back to the Shack
- Frequently Asked Questions
Guide Overview
Tools & Supplies
- Ladder for reaching high branches
- Wire cutters to trim excess length
- Insulated wire (length as needed)
- Tree straps or heavy-duty zip ties (multiple)
Step-by-Step Instructions
- 1. Before you even touch the wire, you need to scout your anchor points. I’ve spent too many afternoons staring at a tangled mess of copper because I assumed a branch was sturdy enough. Look for two points that give you a decent angle; if your wires are too horizontal, your take-off angle is going to be garbage, and you’ll be shouting into the dirt instead of the horizon. Aim for a height that gets you at least half a wavelength above the ground if you can swing it, otherwise, you’re just building a very expensive heating element.
- 2. Get yourself a decent throw line. Don’t try to use a piece of heavy twine you found in the garage; it’ll snag on every twig and you’ll end up pulling the wire down with it. I prefer a lightweight, braided mason line or a dedicated fishing weight setup. You want something that has enough mass to carry the momentum through the canopy but is thin enough to slip through the leaves without acting like a sail.
- 3. Tie your throw line to a small, weighted object—a golf ball works if you’re careful, but a dedicated weighted shuttle is much more predictable. Aim for the “V” where the branches split. You aren’t trying to hit a bullseye; you’re trying to get that line over a limb that has enough structural integrity to hold tension. If you miss, don’t just keep chucking it blindly; stop, reassess the branch structure, and try a different angle.
- 4. Once the line is over, it’s time to pull your climbing rope through. This is where most people get impatient and ruin their gear. Use a secondary, thicker rope to pull your lightweight mason line across, and then use that mason line to pull your heavy-duty pull rope. If you try to pull the actual antenna wire directly with a heavy rope, you’re going to stretch the copper or snap your insulators, and then you’re just having a very bad day in the woods.
- 5. Now, attach your wire to the pull rope using a secure knot, like a bowline. I’ve seen people use simple overhand knots that slip the second the wind picks up, leaving your antenna dangling halfway up a trunk. Make sure the connection is solid before you start the heavy lifting. You want to feel the weight of the wire as it moves, but be ready to stop immediately if you feel the tension snagging on a branch.
- 6. Slowly pull the wire up, but don’t just yank it. You need to manage the slack as it rises. If you let a huge loop of wire hang in the air, it’s going to snag, twist, and potentially snap. I usually have a second person helping me “feed” the wire from the ground to ensure it’s traveling smoothly through the canopy. Once it’s at the height you want, secure the ends to your anchor points using insulated tensioners.
- 7. Finally, check your tension and your ground clearance. A wire that’s sagging too low is going to have a completely different impedance than what you calculated on your spreadsheet. If the tree is swaying in the wind, make sure your insulators can handle that movement without the wire rubbing against the bark. I always do a quick SWR check once everything is taut; if the numbers look wonky, it’s usually because your height changed the moment you tightened the line.
Mastering the Fishing Pole Method for Trees and Aerial Line Deployment
If you’re trying to reach a branch that’s just out of reach of a standard telescoping pole, don’t go trying to scale the thing yourself. I’ve seen enough twisted ankles at field meets to know better. Instead, lean into the fishing pole method for trees. I use a heavy-duty graphite pole—nothing too flimsy or it’ll whip and snap—paired with a high-visibility braided line. The trick isn’t just the reach; it’s the weight. I always keep a specific climbing throw line weight in my kit. It needs to be heavy enough to carry the momentum through the foliage but light enough that you aren’t essentially launching a lead sinker into your neighbor’s window.
When you’re managing aerial line deployment, patience is your best tool. Once you’ve snagged that limb, don’t just yank the wire up. You want to loop your line around the branch first, then use the line to pull the antenna wire upward. This method is much better for avoiding tree limb damage because you aren’t dragging a heavy, abrasive wire directly across the bark. I usually find that once the wire is seated, a quick loop of paracord around the branch is enough to keep it stable until I can tension the rest of the span.
The Right Climbing Throw Line Weight for Securing Wire to High Branches
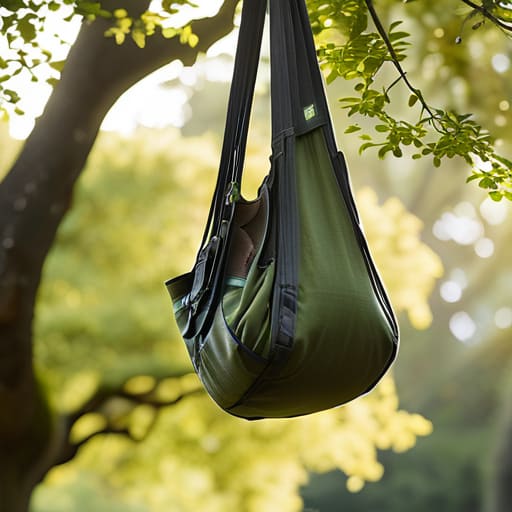
If you’re moving past the fishing pole method and actually trying to reach the upper canopy, don’t just grab the first heavy thing you find in the garage. I’ve seen too many people try to use a heavy steel nut or a massive lead sinker, only to end up with a snapped limb or a broken window. When you’re working on securing wire to high branches, you need a climbing throw line weight that has enough mass to carry your cord over a limb, but not so much that it becomes a projectile. I usually stick to a small, aerodynamic weighted bag—something around 2 to 4 ounces. It’s enough to maintain momentum through the leaves without turning your deployment into a demolition derby.
The real trick is finding that balance between weight and aerodynamic stability. If your weight is tumbling end-over-end, it’s going to snag on every bit of bark and twig on the way up, which is a fast track to losing your line in the canopy. I prefer a teardrop shape; it cuts through the brush much more predictably. Remember, the goal of your aerial line deployment is to get the rope up so you can pull the wire, not to test the structural integrity of the oak tree. Keep it light, keep it smooth, and you won’t spend your afternoon untangling knots.
Five Things I Wish I’d Learned Before My First Tree Deployment
- Watch your ground plane, not just your wire. If you’re throwing a half-wave up there and it’s sitting only six feet off the ground, your radiation pattern is going to look like a pancake and your SWR will be a nightmare. Aim for at least a quarter-wavelength of clearance if you want that signal to actually go somewhere useful.
- Stop using cheap electrical wire for your pull lines. I’ve seen too many people try to hoist a heavy copper antenna using some flimsy nylon string that snaps the moment a gust hits it. Use a dedicated, braided paracord or a high-tensile throw line; if you lose your antenna in the canopy because of a cheap knot, you aren’t just losing a wire, you’re losing a whole afternoon of hiking.
- Check the “neighbor factor” before you start climbing. I’ve been in situations where I thought I had the perfect limb, only to realize halfway up that I was about ten feet away from a neighbor’s high-gain TV antenna or a massive power drop. If you’re too close to their gear, you’re going to spend your whole DX session listening to their local interference instead of the ionosphere.
- Don’t forget the insulators at the high end. It’s tempting to just tie the wire directly to a branch, but wood holds moisture, and moisture is conductive. I always use a small piece of UV-rated PVC or a dedicated ceramic insulator at the attachment point; it keeps the impedance from swinging wildly every time it starts to drizzle.
- Test your tension before you walk away. A wire that’s sagging like a wet noodle isn’t just an eyesore; it changes your resonant frequency. Once you’ve got it up, give it a little tension to ensure it’s taut, but don’t overdo it—trees move in the wind, and if your wire is too tight, the first stiff breeze will snap your connection or, worse, pull a branch down on your head.
The Bottom Line Before You Head Out
Height isn’t a suggestion; if you can’t get that wire at least 10 meters off the ground, you’re mostly just building a very expensive heater for the local interference.
Don’t skip the physics of the throw line; a weight that’s too light won’t clear the canopy, and one that’s too heavy will snap your line or tear the bark off the very branch you’re trying to use.
Always leave yourself enough slack to account for the sag and the wind; a wire tuned perfectly on a workbench will go completely out of resonance the moment it starts swaying in a real breeze.
## The Height Reality Check
You can spend all afternoon perfecting your impedance match and tuning your coax, but if you’re only getting that wire ten feet off the ground because you were too lazy to climb a real ladder, you aren’t building an antenna—you’re building a very expensive piece of garden decoration. Height above ground is the one variable you can’t cheat with a better tuner.
Wren Castellano
Before You Head Back to the Shack
At the end of the day, getting that wire into the canopy isn’t about having the most expensive gear; it’s about the physics of what you’re actually achieving. You’ve got your throw line weighted correctly, your fishing pole is doing the heavy lifting, and you’ve hopefully avoided the frustration of a tangled mess. Just remember that none of this matters if you don’t pay attention to that final height. If you stop at fifteen feet because you’re tired, you’re going to see a massive drop in your radiation pattern compared to when you push for that extra ten feet. It’s the difference between actually making a contact and just listening to the noise floor.
There is something deeply satisfying about standing at the base of a tree, looking up at a wire you placed yourself, and knowing exactly why it’s working. It’s a connection to the craft that you just don’t get from clicking a button on a software-defined radio. Radio is a physical thing, and sometimes that means getting a bit of dirt under your fingernails or a scratch from a branch. Don’t let the technical hurdles stop you from getting that antenna up. Once you’ve mastered the deployment, you stop worrying about the gear and start focusing on the signal, and that is where the real fun begins.
Frequently Asked Questions
I've got the wire up there, but my SWR is still jumping all over the place; could the tree branches themselves be detuning my antenna?
It absolutely can. If your wire is draped directly over wet branches or tucked into thick foliage, you’ve essentially built a capacitive coupler to the tree. The moisture in the leaves and the dielectric properties of the wood will pull your resonant frequency down and cause those SWR swings as the wind moves the branches. I’ve seen it happen a dozen times. Try to use some lightweight insulators to keep the wire at least six inches away from the main limbs.
Is it worth using a heavy-duty insulated wire for the climb, or am I just adding unnecessary weight that's going to snap my fishing pole?
Don’t do it. Adding heavy-duty insulated wire to your throw line is a rookie mistake that’ll snap a fiberglass pole faster than you can say “SWR alarm.” You aren’t trying to build a power line; you’re just trying to get a lead to a branch. Use a lightweight, UV-rated poly line for the climb. Once that line is through, then you pull your antenna wire up. Keep the weight off the pole, or you’ll be picking fiberglass out of the dirt.
How much sag should I actually leave in the line to account for wind loading, or am I better off tensioning it as tight as possible?
Tension it tight? Absolutely not. If you pull that wire drum-tight, the first decent gust of wind will either snap your insulator or, more likely, pull your tree limb down into something expensive. I’ve seen enough hardware end up in the dirt to know better. Aim for a gentle catenary curve—think of it like a heavy swing, not a guitar string. You want enough slack to let the wire breathe and move with the wind without losing your precious height.
