
You don’t need a $5,000 desk, a dedicated cooling system, or a room full of gear that looks like it belongs in a NASA control center to get on the air. Most of the “expert” advice you’ll find online about how to set up a shack is just a glorified shopping list designed to separate you from your hard-earned money. I spent years thinking I needed the ultimate rack-mount setup to make a difference, only to realize that my most successful DX sessions happened in a cramped corner of a shed with a single transceiver and a well-organized mess of cables. It’s not about the aesthetic of the gear; it’s about the ergonomics of the operator and the signal integrity of the connections.
In this guide, I’m stripping away the fluff and the marketing hype to give you a blueprint that actually works in the real world. I’ll show you how to organize your workspace so you aren’t fighting your own cables mid-contact, how to manage your power distribution without creating a nightmare of interference, and—most importantly—how to build a station that is actually functional for the way you intend to operate. No shiny brochures, just the practical reality of building a station that performs when the bands open up.
Table of Contents
- Step-by-Step Instructions
- Minimalist Shack Design That Actually Works Under Load
- Efficient Workspace Layouts Beyond the 1987 Standards
- Five Things Your Manual Won't Tell You About Real-World Setup
- The Real-World Essentials
- ## Stop Building Museums
- Final Thoughts Before You Plug In
- Frequently Asked Questions
Guide Overview
Tools & Supplies
- Hammer for driving nails and securing framing
- Measuring tape for accurate cuts and spacing
- Hand saw or circular saw for cutting lumber
- Level to ensure a flat and even foundation
- Pressure-treated wooden posts (4 units)
- Dimensional lumber for framing (10-15 boards)
- Plywood sheets for walls and roof (4-6 sheets)
- Roofing felt or shingles (1 roll/pack)
- Box of exterior grade nails or screws (1 large box)
Step-by-Step Instructions
- 1. Start with your power supply, and don’t skimp here. I’ve seen too many people buy a high-end transceiver only to choke it with a cheap, noisy switching power supply that sounds like a jet engine on the HF bands. You want a clean, regulated DC source that can handle the current spikes when you’re keying up a heavy load. If you’re running a big rig, make sure that supply has enough headroom so you aren’t seeing the voltage sag every time you transmit; nothing kills a signal faster than a voltage drop.
- 2. Map out your RF isolation before you even unbox a piece of gear. A shack isn’t just a desk; it’s a collection of potential interference sources. I always tell people to separate your digital life from your analog life. If your computer is sitting right next to your transceiver, those USB bus noises and monitor switching frequencies are going to show up in your receiver as a constant, annoying floor of hash. Get some distance, or at the very least, use high-quality shielded cables to keep the noise from migrating.
- 3. Get your grounding and bonding sorted early, and I don’t mean just a single wire stuck into a garden stake. You need a dedicated ground bus that connects your equipment chassis, your power supply, and your antenna system. I’ve measured the common-mode current on poorly grounded stations, and it’s a mess—it turns your coax into part of the antenna and ruins your SWR readings. Do it right the first time so you aren’t chasing phantom interference for the next six months.
- 4. Choose your control layout based on how you actually operate, not how it looks in a catalog. If you’re a CW enthusiast, you need your key right where your hand naturally rests; if you’re running digital modes, you need a clear line of sight to your monitor. I personally prefer a modular setup where I can move things around. You don’t want to be fighting your own desk layout when the ionosphere finally opens up and you’re trying to catch a rare DX station.
- 5. Invest in decent, high-quality coaxial cable and connectors. This is where people get lazy, and it shows. I’ve tested cheap, thin coax that had more loss at 144 MHz than a heavy-duty LMR-400, and it’s a complete waste of your transmit power. Use high-quality, low-loss coax for your main runs, and for heaven’s sake, learn how to properly crimp an N-type or PL-259 connector. A loose connection or a poorly seated shield will introduce enough reflected power to make your tuner work harder than it ever should.
- 6. Set up your monitoring station—the “eyes and ears” of your shack. You need more than just your main rig; a dedicated SDR (Software Defined Radio) or even a simple well-tuned receiver allows you to scout the bands without interrupting your primary station. I like to have a separate screen dedicated solely to waterfall displays. It lets me see the band opening happening in real-time, so I’m not just blindly tuning through the noise hoping for a hit.
Minimalist Shack Design That Actually Works Under Load
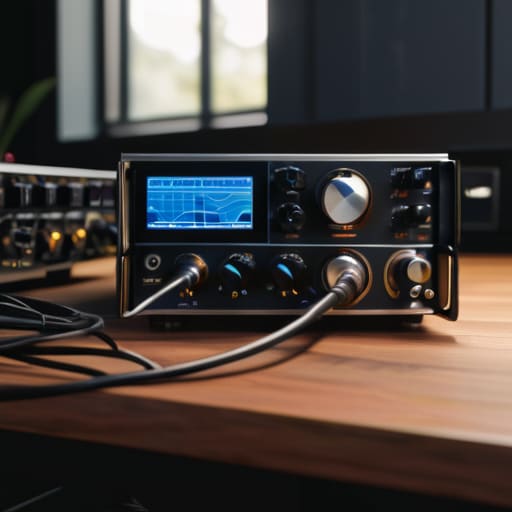
When people talk about a minimalist shack design, they usually think about aesthetics—clean lines and matching gear. That’s fine if you’re building a showroom, but if you’re actually operating, you need to think about thermal management and cable routing. I’ve seen too many setups where a beautiful, compact desk becomes a heat trap because the transceiver is tucked into a corner with zero airflow. If you’re squeezing a high-power amp and a radio into a tight footprint, you aren’t just fighting for space; you’re fighting physics. I always leave at least three inches of clearance around the vents, even if it means the rig looks a little lopsided on the desk.
For those of us leaning into a portable workstation setup, the real secret is modularity. Don’t try to bolt everything down in a way that requires a screwdriver and an hour of frustration to move. I use ruggedized, stackable cases that act as both storage and a stable base. If you’re looking for off-grid power solutions, skip the cheap, unbranded lithium packs you see in every online ad. Get a battery with a known discharge curve and a high-quality regulator. I’ve lost more contact windows to voltage sag than I care to admit, and trust me, it’s never because the ionosphere was being difficult.
Efficient Workspace Layouts Beyond the 1987 Standards
Most people look at old amateur radio magazines and think a shack requires a massive, dedicated desk that occupies half the room. That’s a relic of a different era. If you’re working with limited square footage, you need to stop thinking about “furniture” and start thinking about compact living ergonomics. I’ve spent years squeezing rigs into spare corners and even the back of a van, and the secret isn’t just getting smaller gear—it’s about verticality. Use wall-mounted racks for your power supplies and heavy transformers. If it’s sitting on your desk, it’s taking up precious real estate where your hands and your signal analyzer should be.
When I’m designing an efficient workspace layout, I prioritize the “reach zone.” Your transceiver, your tuner, and your primary control interface need to be within a natural arc of your arms without you having to lean forward and strain your lower back. If you’re transitioning into a portable workstation setup, this becomes even more critical. You can’t afford to hunt for a patch cable in a cluttered bag when the band is opening. Organize by frequency or function, not just by size. If you can’t find your coax in under five seconds, your layout is failing you.
Five Things Your Manual Won't Tell You About Real-World Setup
- Stop treating your power supply like an afterthought; if you’re running a high-duty cycle mode on a cheap, unshielded switching supply, you’re just inviting a floor of RFI into your RX chain that no amount of filtering will fix.
- Cable management isn’t just about looking tidy—if you bundle your power leads right next to your coax, you’re creating an induction loop that’ll turn your signal into a mess, so keep the high-current lines and the RF lines in their own lanes.
- Don’t skimp on the grounding, and I don’t mean just sticking a wire to a copper rod in the backyard; I mean a dedicated, low-impedance ground plane for your equipment that actually separates your signal ground from your chassis ground.
- Lighting is a practical engineering problem, not an aesthetic one; if you’re squinting at a tiny frequency readout under a harsh fluorescent bulb, you’re going to miss the subtle drift on your VFO, so get some adjustable, dimmable task lighting.
- Thermal management is non-negotiable—I’ve seen too many people cram a high-power transceiver into a tight corner of a desk only to have the internal components cook themselves after twenty minutes of contesting; give your gear room to breathe.
The Real-World Essentials
Stop building for a floor plan and start building for your signal; a compact, efficient layout is useless if your desk is so cluttered you can’t actually reach your tuner when the propagation opens up.
Prioritize cable management and power distribution from day one, because nothing kills the joy of a weekend DX session faster than a tangled mess of coax and a dying power supply.
Don’t mistake “expensive” for “effective”—invest your budget in high-quality, low-loss interconnects and a solid ground loop solution rather than overpaying for a radio brand name that won’t fix a poor station setup.
## Stop Building Museums
A shack isn’t a collection of shiny gear you’ve gathered to impress your neighbors; it’s a tool for communication. If you can’t reach into your rack and swap a connector without knocking over your coffee, or if your layout makes it impossible to see your signal chain at a glance, you haven’t built a station—you’ve built a museum. Build for the way you actually operate, not the way you think a radio operator is supposed to look.
Wren Castellano
Final Thoughts Before You Plug In
At the end of the day, setting up a shack isn’t about buying the most expensive transceiver or having a desk that looks like a showroom floor. It’s about intentionality. We’ve talked about why you need a layout that respects your physical movement, why a minimalist approach keeps you from drowning in cable clutter, and why your gear needs to be accessible when the propagation finally turns in your favor. Remember, a shack is a living tool, not a museum piece. If your workspace is organized around how you actually operate—rather than how some magazine told you to do it in 1987—you’re already ahead of most of the operators I meet. Keep your measurements honest, keep your connections tight, and don’t overcomplicate the signal path just because you have the budget for it.
Once the last bit of coax is routed and your power supply is humming, the real work begins. A shack is just a collection of metal and silicon until you actually put a signal out into the world. There is a specific, quiet magic in sitting in a space you built with your own hands, knowing exactly how every component behaves, and hearing a faint signal pull itself out of the noise. Radio is one of the few things left where you can truly understand the entire chain, and that understanding is what makes the hobby worth doing. So, get your station set up, get your antenna up at the right height, and then go out there and see who’s listening.
Frequently Asked Questions
If I'm building a minimalist shack in a small apartment, how much do I actually need to worry about RFI from my neighbor's electronics?
If you’re in an apartment, RFI isn’t just a possibility; it’s your primary adversary. I’ve spent too many nights chasing phantom signals that turned out to be a neighbor’s cheap LED driver or a poorly shielded switching power supply. Don’t ignore it. Invest in a decent SDR to see the noise floor, and for heaven’s sake, get some high-quality ferrite beads for your cables. If your noise floor is high, your signal-to-noise ratio dies before it even hits the antenna.
You mentioned layout efficiency, but what's the real-world impact of putting my transceiver right next to a high-current power supply?
If you put them side-by-side, you’re asking for a headache. It’s not just about the physical space; it’s about the magnetic fields. A high-current switching power supply can dump enough EMI right into your transceiver’s front end to raise your noise floor significantly. I’ve sat in shacks where the S-meter was jumping just because the power supply was idling. Keep them separated, or at the very least, use high-quality shielded cables.
For someone transitioning from a desk setup to a portable one, what are the non-negotiable pieces of test gear I should actually carry?
Leave the benchtop spectrum analyzer at home; it’s dead weight. If you’re moving to portable, you need a solid NanoVNA—it’s small, and I’ve measured its accuracy enough to trust it for tuning wire antennas at 10 feet up. Pair that with a decent, rugged multimeter and a high-quality directional antenna tester if you’re running beams. If you can’t verify your SWR and ground plane in the field, you’re just guessing in the dark.
