
I remember sitting on a ridge in the Blue Ridge Mountains three years ago, staring at a signal meter that refused to budge, despite having followed every “expert” diagram in the manual. I had the gear, I had the power, and I had the budget, but I didn’t have a link. Most people will tell you that setting up a repeater link is all about the highest wattage or the flashiest digital controller you can find, but they’re wrong. If you aren’t accounting for the actual terrain profile and the specific Fresnel zone clearance between your sites, you’re just building an expensive way to broadcast static. Learning how to set up a repeater link isn’t a math problem you solve on a whiteboard; it’s a physical battle against geography and RF interference.
In this guide, I’m going to skip the sales pitches and the theoretical fluff. I’ll show you how to calculate your actual path loss, how to choose a frequency pair that won’t get swallowed by local noise, and—most importantly—how to ensure your antenna height is actually sufficient for the link to hold. We’re going to focus on real-world measurements and the kind of hardware that actually survives a season of weather.
Table of Contents
- Step-by-Step Instructions
- Precision Radio Repeater Configuration Over Old Wives Tales
- Mastering Frequency Coordination for Repeaters and Offset Frequency
- Five Things That Actually Matter When You’re Linking Your Repeaters
- The Bottom Line on Your Repeater Link
- The Reality of the Link
- Before You Flip the Switch
- Frequently Asked Questions
Guide Overview
Tools & Supplies
- Drill and bits for mounting hardware
- Multimeter for testing power continuity
- Screwdriver set for terminal connections
- Wire strippers for cable preparation
- Wireless Repeater/Extender unit 1 unit
- Ethernet cable (Cat6) 1 roll or custom lengths
- Mounting brackets 2 units
- Power adapter 1 unit
Step-by-Step Instructions
- 1. Start with the geometry, not the gear. Before you even look at a catalog, you need to sit down with a topographical map or a decent GIS tool and find your line-of-sight. A repeater link is only as good as the path between your two points. If there’s a ridge or a dense cluster of hardwoods in the way, no amount of high-gain antenna magic is going to punch through that. I’ve seen people spend thousands on high-end transceivers only to realize they were trying to shout through a brick wall. Map out your Fresnel zone; if you don’t clear that elliptical space around the direct line, you’re going to deal with massive phase cancellation and a link that drops every time a heavy truck drives by.
- 2. Pick your frequency and stick to the math. Most people jump straight to UHF because it’s easy to point a Yagi, but you need to decide if you’re prioritizing penetration or distance. If you’re doing a fixed link over a long distance, I usually lean toward the lower end of the VHF spectrum if the terrain allows, because it’s a bit more forgiving with atmospheric attenuation. Once you’ve picked your band, check your local regulations to ensure you aren’t stepping on anyone else’s toes, and make sure your equipment is actually rated for continuous duty. A radio meant for intermittent mobile use will cook itself if you leave it keyed for a link 24/7.
- 3. Get your antennas up—and I mean really up. This is where most amateur setups fail. If you’re mounting a directional antenna on a tripod at six feet off the ground, you aren’t building a repeater link; you’re building a very expensive paperweight. I’ve measured signal gains that dropped by 15dB just because the antenna was sitting in a shallow depression rather than on a high point. Aim for at least 30 feet of elevation if you’re in rolling hills, or higher if you’re in a valley. The height above the ground is the single most important variable in your link budget, period.
- 4. Precision alignment is the difference between a solid link and a frustrating mess. Once your antennas are mounted, don’t just “eyeball” it. Use a signal meter or an SDR to watch your RSSI (Received Signal Strength Indicator) as you make micro-adjustments. I prefer to sweep the signal slowly, watching for the peak, and then back it off slightly to ensure I’m not sitting on a null point. If you’re using high-gain Yagis, even a two-degree error can mean the difference between a crystal-clear digital link and a stream of corrupted packets.
- 5. Manage your cable loss like your life depends on it. You can have the most beautiful antenna system in the world, but if you run 100 feet of cheap, thin coax, you might as well just throw your power supply in the trash. I’ve seen plenty of “high-power” setups that were actually just losing 80% of their energy to heat inside a low-quality RG-58 cable. Use LMR-400 or better for your runs, and keep those connections tight and weather-sealed. If you can, keep the heavy lifting—the transceivers and the power supplies—as close to the antenna as is practical, or use a high-quality attenuator to stabilize the signal if you’re overdriving the receiver.
- 6. Test under real-world conditions. A link that works perfectly at 2:00 PM on a clear Tuesday might fall apart during a thunderstorm or when the temperature drops. Once you think you’re dialed in, run a stress test. If you’re using digital modes like DMR or System Fusion, check your BER (Bit Error Rate). If you’re on analog, listen for the noise floor. I always make sure to test during a weather transition; if the link stays stable when the humidity spikes or the wind starts howling, then you know you’ve actually built something reliable.
Precision Radio Repeater Configuration Over Old Wives Tales

I’ve spent enough time on ridges to know that most people approach a two-way radio repeater setup by following a manual written for a controlled laboratory, not for a site where the wind is howling and the terrain is unforgiving. You’ll hear people say, “just get the offset right and you’re golden,” but that’s a half-truth. If you aren’t paying close attention to your repeater offset frequency in relation to the actual local noise floor, you’re going to spend your weekends chasing phantom interference. I once spent four hours troubleshooting a link that looked perfect on paper, only to realize the local topography was causing a multipath issue that no amount of software tweaking could fix.
Don’t fall into the trap of assuming your signal strength readings are the absolute truth. A high RSSI doesn’t mean a clean link; it might just mean you’re being deafened by a nearby commercial transmitter. When you’re handling your radio repeater configuration, you need to prioritize signal quality over raw power. I’ve seen setups with massive gain that fall apart the moment a heavy rain cell moves in because the link margin was too thin. Measure your actual bit error rate or packet loss if you can—don’t just trust the pretty bars on your screen.
Mastering Frequency Coordination for Repeaters and Offset Frequency

Now, let’s talk about the math that actually keeps your link from eating itself. When you’re working on a two-way radio repeater setup, the most common mistake I see isn’t the hardware—it’s a sloppy approach to the repeater offset frequency. You can have the most expensive duplexer on the market, but if your offset isn’t precisely calculated to account for the isolation capabilities of your filters, you’re going to end up with a massive amount of desensitization. I’ve seen guys try to “eyeball” the spacing on a narrow-band system, only to find their receiver is being hammered by their own transmitter. Don’t trust the manual blindly; always verify your offset against your specific hardware’s isolation specs.
Proper frequency coordination for repeaters also means being mindful of the neighbors. If you’re setting up a link in a crowded metropolitan area, you can’t just pick a frequency because it “looks open” on a cheap SDR scan. You need to look at the actual usage patterns and the potential for intermodulation products. I always tell my students: if you aren’t measuring the noise floor before and after you key the mic, you aren’t actually testing your setup—you’re just guessing.
Five Things That Actually Matter When You’re Linking Your Repeaters
- Stop obsessing over the brand of your transceiver and start looking at your Fresnel zone. I don’t care if you’re using a $3,000 radio; if there’s a cluster of pine trees or a granite ridge sitting right in the middle of your line-of-sight, that link is going to be garbage. You need clear air, not expensive hardware.
- Measure your actual path loss instead of relying on the math in a textbook. I’ve seen links fail because someone assumed a flat field when they were actually dealing with a subtle dip in the terrain. If you aren’t using a signal meter or an SDR to check your RSSI at both ends during a clear day, you’re just guessing.
- Grounding isn’t a suggestion; it’s your lifeline. When you’re setting up a link, especially if one end is on a high ridge or a standalone tower, you need a proper lightning protection scheme. I’ve seen more expensive gear fried by a single dry strike than I have by actual signal interference.
- Don’t ignore the noise floor. Before you commit to a frequency, sit there with a spectrum analyzer and see what else is talking in that band. If your link is sitting right next to a high-duty cycle commercial signal, your effective range is going to be half of what the propagation models promised you.
- Check your antenna height relative to the ground at both sites. A link isn’t just about the two antennas seeing each other; it’s about how much ground they’re actually covering. If you’ve got a 50-foot tower on one end but the other end is barely 10 feet off a muddy field, your pattern is going to be asymmetrical and your coverage will be lopsided.
The Bottom Line on Your Repeater Link
Stop relying on “rule of thumb” height estimates; if your link isn’t getting enough clearance over local terrain, no amount of power amplification is going to fix your Fresnel zone issues.
Treat your offset frequencies and coordination like a legal contract, not a suggestion—one mistake here and you’re just shouting into a void or, worse, stepping on someone else’s established link.
Measure everything twice and trust your spectrum analyzer over your gut feeling; if the link only works when the weather is perfect, you haven’t built a reliable repeater, you’ve built a fair-weather hobby project.
The Reality of the Link
A repeater link isn’t just about matching your frequencies and hoping the magic happens; if you haven’t accounted for the actual path loss and the height of your donor antenna relative to the terrain, you aren’t building a link, you’re just building an expensive way to transmit static.
Wren Castellano
Before You Flip the Switch
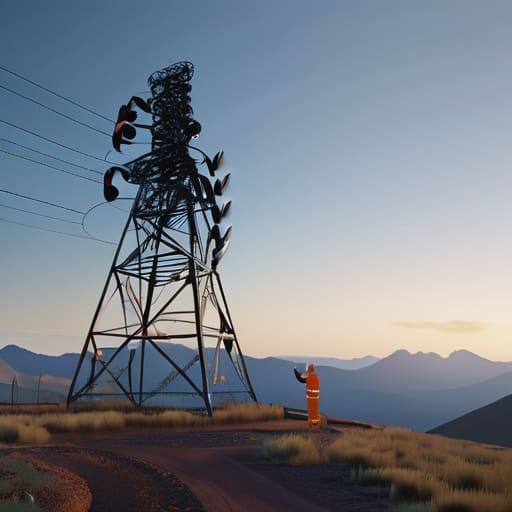
Setting up a repeater link isn’t about following a checklist blindly; it’s about understanding the physics of what you’re actually doing. We’ve covered the heavy lifting—from ensuring your offset frequencies are mathematically sound to moving past the “rule of thumb” nonsense that plagues most amateur setups. Remember, if your link is dropping packets or failing to bridge the gap, don’t just blame the hardware. Check your antenna height, verify your path clearance, and for heaven’s sake, measure your VSWR before you commit to a permanent install. A repeater link is only as strong as its weakest link, which is usually a poorly planned frequency coordination or a cable run that’s more interference than signal.
At the end of the day, there is a profound satisfaction in hearing a voice come through a link you built with your own hands. It’s more than just technical proficiency; it’s about creating a bridge where there wasn’t one before. Whether you’re building a robust link for a local emergency net or just trying to connect two distant hillsides, remember that the real magic happens in the details. Don’t settle for “good enough” when you can strive for precision. Once you get it right, and the signal holds steady through the noise, you’ll realize that all those hours of testing and tweaking were worth every second.
Frequently Asked Questions
If I'm using a microwave link for the backhaul, how much does the actual antenna height matter if I've already got a clear line of sight to the other site?
Look, “clear line of sight” is a dangerous phrase in microwave work. If you’ve got visual contact but your antennas are sitting just above the treeline, you’re asking for trouble. I’ve seen links drop the moment a summer storm hits because the Fresnel zone was too tight. Even with a visual path, I want that antenna at least 15 to 20 feet higher than the theoretical minimum to account for seasonal vegetation growth and atmospheric refraction. Don’t skimp on the height.
Do I really need a dedicated high-stability clock for the link, or can I get away with standard TCXO modules if the temperature stays relatively constant?
If you’re sitting in a temperature-controlled shack, a decent TCXO will hold you steady enough for most things. But if this link is going up on a ridge or in a roadside cabinet, don’t gamble. I’ve seen links drift just enough to lose the offset during a sunset temperature drop. If you can’t guarantee a steady thermal environment, spend the extra money on a high-stability clock. It’s cheaper than troubleshooting a “ghost” signal issue at 2:00 AM.
How do I figure out if my link budget is actually accounting for real-world rain fade, or am I just relying on a theoretical number from a spreadsheet?
If your link budget is just a spreadsheet calculation using free-space path loss, you aren’t looking at a link; you’re looking at a fantasy. To see the truth, you need to factor in specific attenuation values for your frequency—especially if you’re pushing microwave bands. I don’t trust the “standard” margins. I pull the actual precipitation rates for my local area and apply the ITU-R P.838 model. If you haven’t accounted for the actual dB/km drop during a heavy downpour, your link isn’t robust; it’s lucky.
