I was hunched over my workbench last Tuesday, squinting at a vintage transceiver that had gone completely silent, when I realized I’d fallen for the oldest trap in the book. I had spent three hours chasing a phantom ground fault, only to find that a single, unassuming capacitor had dried out and failed. Most people think you can just slap a multimeter on a component and call it a day, but if you want to know how to test electrolytic capacitors properly, you have to look past the basic capacitance reading. A meter might tell you the value is within spec, but it won’t tell you if that component is about to leak DC current or fail the moment the power supply hits full load.
In this guide, I’m going to skip the textbook fluff and show you how I actually diagnose these little ticking time bombs in the field. We aren’t just going to talk about theory; I’ll show you how to use an ESR meter to find the real culprits and why a “functional” reading on your cheap digital multimeter is often a total lie. By the time we’re done, you’ll know exactly when to patch a circuit and when to just grab the soldering iron and toss the old junk in the bin.
Table of Contents
- Step-by-Step Instructions
- Identifying Bulging Capacitor Tops and Other Visible Signs of Leaking Elect
- The Truth About Capacitance vs Esr Importance and Using an Esr Meter
- Five Things Your Multimeter Won't Tell You About Failing Caps
- The Bottom Line: Don't Leave Your Gear to Chance
- ## The Trap of the "Good" Reading
- Don't Just Swap Parts—Understand Them
- Frequently Asked Questions
Guide Overview
Tools & Supplies
- Digital Multimeter with capacitance mode to measure Farads
- ESR Meter for testing Equivalent Series Resistance
- Soldering Iron for component removal
- Solder and Flux for desoldering old capacitors
- DeoxIT or Contact Cleaner for cleaning terminals
Step-by-Step Instructions
- 1. Before you even pick up a probe, you need to drain the charge. I’ve seen too many people blow a fuse in their multimeter—or worse, themselves—because they assumed a capacitor was “dead” when it was actually just holding a nasty little charge. Use a high-wattage resistor to bleed it off, or if you’re in a pinch and it’s a low-voltage component, a well-insulated screwdriver can do the trick. Just don’t go doing that on a high-voltage power supply unless you really want a surprise.
- 2. Get your eyes on the component first. This is the “sanity check” phase that most people skip because they think they’re too advanced for it. Look for the tell-tale signs: a bulging top, a leaking base that looks like crusty dried salt, or any discoloration on the casing. If the capacitor looks like it’s been through a war, don’t bother testing it; just pull it out and replace it. A visual failure is a definitive failure.
- 3. Set your multimeter to the capacitance mode (usually marked as F). If your meter doesn’t have a dedicated capacitance setting, you’re going to have a much harder time getting a real answer. When you touch the probes to the leads, pay close attention to the polarity. I know, I know, it’s common sense, but if you flip them on a polarized electrolytic, you’re just going to get an error reading and a waste of your time.
- 4. Once you’ve applied the probes, give the meter a few seconds to settle. Capacitors take a moment to charge through the meter’s internal circuitry to take a reading. If the numbers are jumping around wildly or won’t stabilize, the capacitor is likely leaking internally or has a high ESR (Equivalent Series Resistance). If you have an ESR meter—and if you’re serious about repairing old gear, you really should—use it here. A capacitor can show the correct capacitance but still be completely useless because its internal resistance has spiked.
- 5. Check the tolerance. Every capacitor has a rated tolerance, usually around +/- 20%. If your cap is rated at 100uF and your meter says 95uF, it’s probably fine. If it says 60uF, it’s effectively dead, regardless of what the datasheet says. I’ve seen plenty of rigs fail on the bench because someone thought a “mostly working” capacitor was good enough to put back into a high-stability filter circuit.
- 6. If you’re testing capacitors that are still soldered into a circuit, be prepared for some noise. The other components on the board will act like parallel paths, and your reading will be a lie. To get a real measurement, you almost always have to desolder at least one leg of the capacitor to isolate it from the rest of the traces. It’s a bit more work, but it’s the only way to know if the component is actually the culprit or if the circuit is just confusing your meter.
Identifying Bulging Capacitor Tops and Other Visible Signs of Leaking Elect
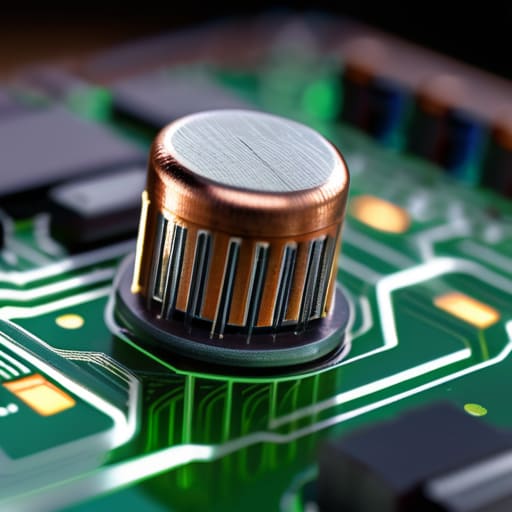
Before you even reach for your meter, just take a good, hard look at the board. You’d be surprised how many people skip this and go straight to complex testing, when the evidence is staring them in the face. When you’re identifying bulging capacitor tops, look for that slight, convex dome where the metal should be perfectly flat. If the top looks like it’s trying to become a little mushroom, that capacitor is done. It’s a pressure relief mechanism, essentially, telling you the electrolyte has cooked itself.
Keep an eye out for any crusty, brownish residue around the base of the component, too. Those are the unmistakable signs of leaking electrolytic capacitors, and they aren’t just messy—they’re corrosive. If that electrolyte touches your traces, it’ll eat through the copper faster than you can say “rework.” Even if the top looks flat and there’s no visible leak, I’ve seen plenty of aging caps that look pristine but have dried out internally. That’s why you can’t rely on your eyes alone; you’ll eventually need to pull out the ESR meter to see what’s actually happening inside the can.
The Truth About Capacitance vs Esr Importance and Using an Esr Meter
Here is the reality that most entry-level textbooks gloss over: a capacitor can show the correct microfarad reading on your multimeter and still be completely dead. This is where the debate of capacitance vs ESR importance comes into play. Capacitance tells you how much charge the component can hold, but Equivalent Series Resistance (ESR) tells you how much it struggles to move that charge through its internal chemistry. As these components age, their ESR climbs. You might have a cap that looks perfect on a standard meter, but because the internal resistance has spiked, it can no longer handle the ripple current in a power supply. It’s like trying to run water through a pipe that’s half-clogged with silt; the volume is there, but the flow is ruined.
If you’re serious about using an ESR meter, you’ll find it’s the only way to catch these “silent killers” without desoldering every single component on the board. I’ve spent many an evening troubleshooting a noisy RF stage only to find a capacitor that passed a capacitance test with flying colors but had an ESR high enough to turn the component into a tiny, inefficient heater. If you’re replacing old capacitors on a PCB, don’t just match the numbers on the side; look at the temperature rating and the ESR spec if you can find it. A cheap cap might have the right capacitance, but if the ESR is too high, you’re just installing a future headache.
Five Things Your Multimeter Won't Tell You About Failing Caps
- Don’t trust a “good” capacitance reading blindly. I’ve seen plenty of caps that show the correct microfarad value on a standard meter but have an ESR so high they’re basically acting like a resistor. If you’re working on a power supply rail, that high ESR is going to turn your heat sinks into frying pans.
- Check the temperature while the circuit is live—carefully. If a capacitor is getting noticeably warm to the touch while the device is idling, it’s struggling. A healthy cap shouldn’t be generating its own heat; if it is, it’s likely fighting internal leakage and is halfway to a pop.
- Look at the surrounding components, not just the cap itself. If you see a capacitor that’s slightly discolored or if the PCB around it looks “toasted,” that cap has likely been running hot for a long time. Often, one bad cap creates a thermal cycle that stresses everything else in its immediate vicinity.
- Always keep a “known good” reference handy. When I’m troubleshooting a vintage rig, I don’t just rely on the datasheet. I find a similar cap from a working board and compare the readings. It’s easy to forget how much component tolerances can drift over thirty years of heat cycles.
- If you’re replacing a cap, don’t just match the capacitance; pay attention to the voltage rating. If the original was rated for 25V, don’t try to “save space” by using a 16V part just because it’s smaller. Give it some headroom—I’d rather see a 35V cap in there, even if it’s a bit taller, just to ensure it isn’t working at its absolute limit.
The Bottom Line: Don't Leave Your Gear to Chance
If you see a bulging top or a crusty leak around the base, don’t bother testing it—just pull it out and replace it. A capacitor that looks like it’s failing is already a liability, and no amount of multimeter readings will change the fact that it’s about to die in your circuit.
Stop relying solely on capacitance readings. A capacitor can show the correct microfarads on a standard meter but still have an ESR so high that your power supply becomes a noisy, unstable mess. If you’re serious about troubleshooting, get an ESR meter; it’s the only way to see the real health of the component.
Always check the context of your measurements. A capacitor might test fine on your bench, but if it’s sitting in a high-heat environment or an aging piece of gear, it’s likely on its way out. If you’re working on something critical, trust your eyes and your ESR meter over a single “good” capacitance reading.
## The Trap of the "Good" Reading
“A multimeter might tell you a capacitor has the right capacitance, but that’s just half the story. I’ve seen plenty of rigs pass a basic continuity test only to die three weeks later because the ESR was shot. If you aren’t checking the internal resistance, you aren’t testing the component—you’re just checking if it’s still technically there.”
Wren Castellano
Don't Just Swap Parts—Understand Them
At the end of the day, testing capacitors isn’t just about checking a box on a repair list; it’s about knowing exactly what is happening inside your gear. You’ve learned to look for the obvious signs like bulging tops or crusty electrolyte leaks, but if you really want to get it right, you have to trust your ESR meter more than a standard capacitance reading. A component can show the correct microfarads on a cheap multimeter and still be a complete dud because its internal resistance has climbed too high. Remember, a capacitor that looks fine visually can still be a ticking time bomb for your power rails if the ESR is out of spec.
There is something deeply satisfying about opening up an old piece of kit, finding the culprit, and bringing it back to life with a few well-chosen components. It’s easy to get frustrated when a circuit behaves erratically, but most of the time, the answer is sitting right there in a little tin can. Don’t let the complexity of modern electronics intimidate you; if you take the time to measure the reality of your components rather than just guessing, you’ll find that almost anything can be fixed. Keep your soldering iron hot, keep your measurements honest, and don’t stop digging until you find the truth.
Frequently Asked Questions
If my capacitor tests fine on an ESR meter but my radio still has a nasty 60Hz hum, what am I missing?
If your ESR meter says the cap is healthy but that 60Hz hum is still screaming through your audio, you’re likely looking at a failure in the ripple rejection, not the capacitance itself. Check the diodes in your rectifier bridge; if one is leaking or sluggish, it’ll pump AC ripple straight into your rails. Also, don’t ignore the ground plane. A high-impedance ground path can turn a perfectly “good” capacitor into a noise antenna.
Is it worth trying to desolder and replace a single capacitor in a piece of vintage gear, or am I better off just replacing the whole batch to be safe?
Look, if you’re working on a piece of gear from the 70s, don’t play the hero by replacing just one. If one electrolytic has dried out, the others aren’t far behind; they’re all living the same life in the same heat. I’ve spent too many afternoons chasing intermittent noise because I thought I could save three dollars on a batch. Replace the whole lot. It’s more work upfront, but it’s the only way to actually sleep at night.
Can I trust a cheap component tester from an online marketplace, or do I actually need a dedicated, calibrated ESR meter to get real data?
Look, if you’re just checking if a capacitor is completely dead or shorted, those $10 LCR-T4 testers from the online marketplaces are fine. They’ll tell you if the component is a total loss. But if you’re trying to diagnose a piece of gear that’s acting up—say, a radio with a noisy power supply—those cheap testers won’t give you the precision you need. For real troubleshooting, you need a dedicated ESR meter that can actually handle the low-impedance reality of a healthy cap.
