I was halfway up a ridge in the Cascades last October, shivering in a damp wind, when my SWR suddenly spiked into the red for no apparent reason. I thought I’d lost the band, but it wasn’t the ionosphere playing games; it was a single, poorly seated coax connector that had decided to host a tiny, microscopic puddle. Most people think you can just wrap some electrical tape around a junction and call it a day, but if you want to know how to waterproof antenna connections that actually survive a season of real weather, you have to stop treating it like an afterthought. Tape dries out, cracks, and eventually becomes a wick for moisture rather than a barrier against it.
In this guide, I’m skipping the theoretical fluff and giving you the methods I’ve actually used in the field, from self-amalgamating tape to the specific grades of silicone that won’t degrade your jacket. I’ll show you exactly where the failure points hide and how to seal them so you aren’t climbing a ladder or hiking a mountain just to fix a preventable signal loss. We aren’t just aiming for “dry enough”; we’re aiming for set it and forget it.
Table of Contents
- Step-by-Step Instructions
- Using Dielectric Grease for Connectors Science vs Hearsay
- Preventing Coaxial Cable Oxidation With a Weatherproof Coax Junction Box
- Five Things I’ve Learned the Hard Way (So You Don't Have To)
- The Bottom Line: Don't Let Your Hard Work Rust Away
- The Cost of Cutting Corners
- Don't Let a Little Rain Ruin Your DX
- Frequently Asked Questions
Guide Overview
Tools & Supplies
- Wire stripper and cutter for preparing cable
- Heat gun or lighter for shrinking tubing
- Self-amalgamating silicone tape (1 roll)
- Heat shrink tubing (1 pack, assorted sizes)
- Dielectric grease (1 small tube)
Step-by-Step Instructions
- 1. Before you even touch your sealant, you need to clean the connection. I’ve seen people try to waterproof a connection that was already oxidized, and it’s a waste of good time. Use a bit of high-grade isopropyl alcohol on a lint-free cloth to wipe down the connector and the cable jacket. If there is any salt spray or grit from a recent hike, you need it gone. If you trap even a microscopic bit of moisture or grime under your sealant, you aren’t protecting the connection; you’re just sealing in the rot.
- 2. Inspect your coax and connectors for any physical damage. If the jacket is nicked or the braid is starting to fray, no amount of silicone is going to save you in the long run. I always check the dielectric too—if it looks crushed or uneven, your SWR is going to jump around like a kid on a sugar high the moment the temperature shifts. Fix the mechanical integrity of the line before you worry about the weatherproofing.
- 3. Apply a thin layer of dielectric grease to the actual mating surfaces of the connectors. This isn’t just for waterproofing; it prevents the metals from seizing up due to galvanic corrosion. I’ve had to use pliers to break apart a “permanent” connection because someone forgot this step, and let me tell you, it’s a nightmare to undo. Just a light coating is enough; you don’t need to be drowning the pins.
- 4. Now, for the heavy lifting: the self-amalgamating tape. This is not your standard electrical tape that loses its stickiness after six months in the sun. You want the stuff that fuses to itself. Start wrapping at least two inches below the connection, and as you move up, you need to overlap each turn by about half the width of the tape. You’re essentially creating a solid, seamless sleeve of rubber. If you leave gaps, you’re just creating little pockets where water can hide and wait for the first frost to crack things open.
- 5. Once the self-amalgamating tape is tight, wrap a layer of high-quality UV-rated electrical tape over the top. The self-amalgamating layer handles the moisture, but it can sometimes get a bit tacky or degrade under direct sunlight. The electrical tape acts as a sacrificial skin that takes the UV punishment so your primary seal doesn’t have to. Stretch it tight as you go, but don’t go so crazy that you’re compressing the coax and changing its impedance.
- 6. If you’re working on a permanent installation—like a vertical on a rooftop rather than a portable setup on a hill—I highly recommend a dab of liquid electrical tape or a specialized silicone sealant around the base of the connector where it meets the cable jacket. This prevents “wicking,” where moisture travels up the inside of the jacket via capillary action. It’s a sneaky way for an antenna to fail, and it’s much harder to diagnose than a simple bad connection.
- 7. Finally, give everything a “tug test” and a visual check. It sounds basic, but when you’re tired and your hands are cold, it’s easy to miss a loose wrap. Make sure the tension is even and that there are no visible air bubbles or gaps in your tape layers. If it looks like a neat, professional job, it’ll probably stay that way. If it looks like a bird’s nest, go back and do it again; your SWR will thank you when the first storm rolls in.
Using Dielectric Grease for Connectors Science vs Hearsay
You’ll hear people in the club lounge swearing by dielectric grease for connectors like it’s some kind of magic potion, but let’s get the physics straight. It isn’t a sealant; it’s an insulator. If you slather it on and then try to use it to plug a leak in a cracked jacket, you’re going to have a bad time. Its real job is to displace air and moisture at the contact point, which is vital for protecting RF signal integrity by stopping the microscopic dance of oxygen and water. I’ve used it on every N-type connector I’ve ever mounted on a hilltop, and it’s been the difference between a clean SWR and a creeping loss that shows up six months later.
The trick is application. Don’t just glob it on like you’re frosting a cake. You want a thin, even film inside the female socket before you mate the cable. This is one of those essential outdoor antenna installation tips that separates the pros from the weekend warriors: the grease should sit between the metal surfaces to prevent coaxial cable oxidation without creating a massive, messy buildup that makes disassembly a nightmare when you eventually need to move your station.
Preventing Coaxial Cable Oxidation With a Weatherproof Coax Junction Box
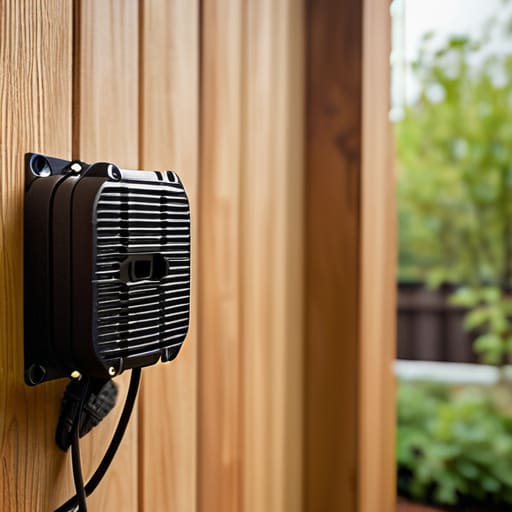
If you’re running a long feedline or have a spot where your coax has to transition from an indoor run to an outdoor antenna installation, don’t just leave the splice exposed to the elements. I’ve seen too many people try to wrap a junction point in electrical tape and call it a day. Tape dries out, cracks, and becomes a sponge for moisture within a single season. Instead, I always use a dedicated weatherproof coax junction box. It gives you a controlled environment to manage your connections, and more importantly, it keeps the physical stress of the cable from pulling directly on your soldered joints.
When you’re setting one up, remember that a box is only as good as its seal. I typically use a high-grade silicone sealant for electronics around the cable entry points to ensure nothing creeps in through the jacket. While the box provides the first line of defense, it’s the combination of a solid enclosure and proper sealing that actually succeeds in protecting RF signal integrity over the long haul. If you’re mounting this on a pole, make sure the box is positioned so that water sheds away from the seams, not into them.
Five Things I’ve Learned the Hard Way (So You Don't Have To)
- Don’t trust a single layer of electrical tape; it’s not a sealant, it’s a suggestion. If you aren’t using high-quality self-amalgamating tape that fuses to itself, you’re basically just making a sticky mess that will peel off the first time the temperature drops.
- Check your mounting hardware for galvanic corrosion. I’ve seen stainless steel bolts paired with aluminum brackets turn into a fused, unusable lump of oxide in under two seasons—if they touch, they’ll react, so use nylon washers to keep them apart.
- Inspect your cable jacket for “micro-cracks” every time you climb the mast. It sounds overkill, but UV degradation is a slow killer, and once that hairline fracture lets moisture into the dielectric, your SWR will climb steadily until the cable is nothing more than an expensive piece of wet string.
- If you’re using a coax junction box, don’t just rely on the rubber gasket; use a bit of butyl tape around the rim. Gaskets dry out and shrink over time, and I’ve lost far too many good afternoons chasing a signal that died because a seal failed during a summer thunderstorm.
- Always leave a “drip loop” in your coax before it enters a building or a junction box. It’s basic physics—if the water can’t find a path straight down into your connector, it’ll follow the cable, but a loop gives gravity a chance to pull it off before it reaches the seal.
The Bottom Line: Don't Let Your Hard Work Rust Away
Waterproofing isn’t a “set it and forget it” task; if you’re mounting an antenna 15 meters up a tree, you’d better double-check your seals every season, because even the best silicone will eventually crack under UV exposure.
Dielectric grease is your best friend for preventing oxidation inside the connector, but remember it’s a supplement, not a substitute for a mechanically sound, tight connection.
If you’re seeing your SWR creep up over a few months, don’t assume your tuner is failing—check your junctions first, because moisture ingress is almost always the culprit behind a degrading signal.
The Cost of Cutting Corners
“You can buy the most expensive transceiver on the market, but if you treat your connector seals like an afterthought, you aren’t building a radio station—you’re just building a very expensive way to let moisture into your signal path. I’ve seen more high-end rigs die from a single unsealed N-type connector than from actual component failure, and frankly, it’s a waste of good gear.”
Wren Castellano
Don't Let a Little Rain Ruin Your DX
At the end of the day, waterproofing isn’t about following a checklist to satisfy some theoretical standard; it’s about making sure you aren’t out there in a storm three months from now trying to troubleshoot a high SWR that’s actually just moisture migrating through a poorly sealed connector. We’ve talked about why dielectric grease isn’t a magic wand, why those junction boxes are worth their weight in copper, and why you can’t just rely on a thin layer of silicone to do the heavy lifting. If you take nothing else away from this, remember that water is patient. It will find the smallest gap in your coax jacket or the tiniest thread in an N-type connector, and it will sit there until it starts eating your signal.
There is something deeply satisfying about standing on a ridge, looking at an antenna you rigged yourself, and knowing it’s built to actually last. Radio is a physical, tactile hobby, and there is a quiet pride in knowing your station is robust enough to handle whatever the weather throws at it. Don’t get discouraged if your first few attempts at weatherproofing aren’t perfect—I’ve spent plenty of nights chasing ghosts in my own lines because I got lazy with a bit of tape. Just keep measuring, keep testing, and build it to endure. The ionosphere might be temperamental, but your connections shouldn’t be.
Frequently Asked Questions
If I use self-amalgamating tape, how often should I actually be getting up on the mast to check if it's still holding?
Look, I’m not going to give you a “set it and forget it” answer because that’s how you end up with a heavy piece of coax dragging on the ground. If you’ve done the job right with self-amalgamating tape, check it once a year—ideally after the worst season you’ve had. If you’re in a high-salt coastal area or dealing with extreme UV, make it every six months. If the edges look dry or brittle, get the ladder out.
Is there a specific type of silicone I should avoid that might actually degrade the jacket of my coax over time?
Watch out for anything labeled “acid cure.” They usually smell like vinegar, and that acetic acid is a nightmare for your coax. If you slap an acid-cure silicone over a polyethylene or PVC jacket, it’ll start eating the insulation before you’ve even finished your first contact. Always hunt for “neutral cure” or “acetoxy-free” on the tube. I’ve seen enough brittle, cracked jackets to know that saving five bucks on cheap sealant isn’t worth the trip back up the ladder.
Does the type of connector—like N-type versus SO-239—change how much sealant I actually need to use?
It’s not about the connector type, it’s about the geometry. An N-type is a precision-machined, threaded beast designed to be weather-resistant by its very nature; you’re mostly just sealing the interface where the two halves meet. An SO-239 is a different story—those threads are coarser, the tolerances are looser, and they’re much more prone to capillary action pulling moisture into the center conductor. Use more sealant on the SO-239 to compensate for that lack of precision.
