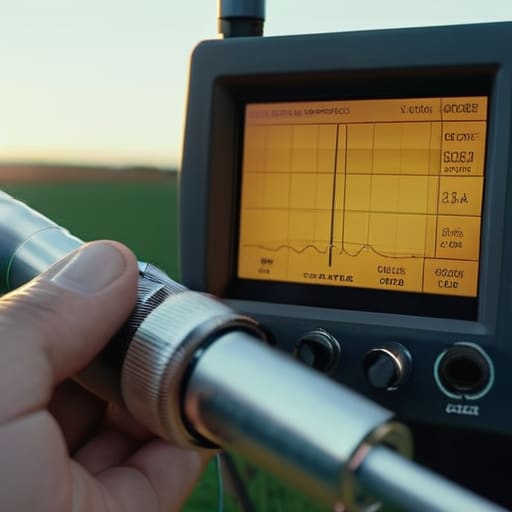
I was standing on a ridge in the Blue Ridge Mountains last October, shivering in a light wind, staring at an SWR meter that insisted my dipole was perfectly resonant, yet I couldn’t pull a single signal out of the noise. I had followed the math, I had checked the lengths, and I had even checked the coax, but I hadn’t actually measured the real-world performance of the system in its final environment. Most people think learning how to test an antenna is just about glancing at a cheap SWR meter and seeing if the needle stays down, but that is a dangerous way to operate. If you aren’t looking at impedance, ground plane interaction, and how your mounting height is actually affecting your radiation pattern, you aren’t testing—you’re just guessing.
In this guide, I’m going to skip the textbook fluff and show you how to use actual tools to see what is happening on the wire. We’ll talk about using a vector analyzer to find where your impedance is actually shifting, why your measurement height is more important than your wire length, and how to tell if a “good” reading is just a fluke of the ionosphere. I promise no marketing hype—just real-world data and the practical steps you need to ensure that when you finally key up, your signal is actually going where it’s supposed to.
Table of Contents
- Step-by-Step Instructions
- Beyond the Swr Meter Precision Using an Antenna Analyzer
- Why Your Antenna Vswr Measurement Might Be Lying to You
- Five Things Your Manual Won't Tell You About Real-World Testing
- The Bottom Line: Don't Trust the Numbers Alone
- ## The Truth About Your Measurements
- Final Thoughts Before You Head Out
- Frequently Asked Questions
Guide Overview
Tools & Supplies
- SWR Meter (to measure Standing Wave Ratio)
- NanoVNA (for advanced vector analysis)
- Coaxial Cable (to connect antenna to tester)
- Multimeter (to check continuity and grounding)
- Dummy Load (to prevent signal transmission during testing)
- Connector Adapters (to match antenna and meter threads)
Step-by-Step Instructions
- 1. First, you need to get your hands on a decent antenna analyzer. I don’t care if you’re using a high-end Vector Network Analyzer or a little handheld NanoVNA you picked up for fifty bucks; the point is that you need to see the impedance curve, not just a single SWR number. If you’re just looking at a single point on a frequency, you’re flying blind.
- 2. Before you even touch the antenna, calibrate your analyzer with the exact same coaxial cable you plan to use for the actual connection. This is where most people mess up. If you calibrate with nothing attached and then run twenty feet of RG-58 to your antenna, your readings are going to be completely offset by the loss and reactance of that cable. Treat the cable as part of the measurement system, not an afterthought.
- 3. Set up your antenna at its intended operating height. I’m serious about this. I’ve seen people get frustrated because their dipole looks perfect on the analyzer at bench height, but once they hoist it ten meters up a tree, the resonant frequency shifts like crazy. The ground plane interaction changes everything, so if you want real data, you have to measure it where it’s actually going to live.
- 4. Once you’re connected, sweep through your target bands and look for the dip in the SWR, but pay closer attention to the imaginary part of the impedance. You’re looking for that sweet spot where the reactance approaches zero. If you see a low SWR but your reactance is still high, your antenna isn’t truly resonant; it’s just a coincidence that the resistance happens to match your feedline at that specific frequency.
- 5. Check your bandwidth. A narrow, sharp dip might look great on paper, but if the slightest breeze or a change in humidity shifts your frequency, you’ll be out of tune before you can even finish a contact. I prefer a slightly broader, more stable resonance over a razor-thin spike that requires constant adjustment every time the weather turns.
- 6. If you’re testing a wire antenna or something you built yourself, take a few measurements at different heights above the ground. I did this last summer with a simple end-fed, and I found that moving it just two meters higher dropped my reactive component significantly. It’s not about whether the design is “correct” in a textbook; it’s about how it actually behaves in the real world.
- 7. Finally, do a sanity check with a real signal if you can. If the analyzer says you’re matched but you can’t pull a signal out of the noise floor, something is wrong—either your analyzer is lying to you, or you have a high-loss connection somewhere in your chain. Trust the math, but verify with the ear.
Beyond the Swr Meter Precision Using an Antenna Analyzer
If you’re still relying solely on a basic SWR meter, you’re only seeing half the picture. A meter tells you if you’re about to cook your finals, but it won’t tell you why the antenna is behaving badly. When I’m using an antenna analyzer, I’m looking for the actual complex impedance. Knowing your SWR is 1.5:1 is fine, but knowing that your resonant frequency is shifting because of inductive loading or that your capacitive reactance is higher than expected—that’s where the real engineering starts. It’s the difference between guessing where to trim a wire and actually knowing where the resonance lives.
Don’t fall into the trap of thinking a low SWR means a perfect antenna. You can have a beautiful 1.1:1 ratio and still have a total lack of radiation if your ground plane is non-existent or your height above ground is insufficient. I always check the impedance matching techniques I’ve implemented by looking at the real-world resistance. If your radiation resistance is tiny, you aren’t going to push much current into the ether, no matter what that little needle on your SWR meter says. Measure the Smith Chart, not just the ratio.
Why Your Antenna Vswr Measurement Might Be Lying to You
Here is the reality: a low SWR reading on your meter doesn’t always mean you have a good antenna; it just means you have a good match. I’ve seen plenty of setups where the antenna VSWR measurement looks beautiful—near 1.1:1—only for the signal to vanish into the ether the moment the operator keys the mic. This usually happens because you’ve accidentally created a high-impedance trap or a resonant point that is so narrow it’s practically useless for real-world operating. If you aren’t looking at the actual impedance, you’re only seeing half the picture.
Another trap is forgetting that your measurement environment is a liar. If you’re testing your wire antenna while it’s still coiled on the ground or sitting next to a metal fence, your readings are junk. The proximity to the earth or nearby conductive objects will shift your resonance and mask the true performance. I always insist on measuring at the intended operating height—even if it’s just a few feet up a tree—because a measurement taken at ground level is nothing more than a mathematical ghost.
Five Things Your Manual Won't Tell You About Real-World Testing
- Get away from the shack. If you’re testing a wire antenna while it’s still coiled on the ground or sitting next to your transceiver, your readings are garbage. You need to test it in its final operating position—at least 5 meters up—because the proximity to the earth and nearby structures changes the impedance more than most people care to admit.
- Watch the cable, not just the antenna. I’ve seen plenty of people tear their hair out over a “bad” antenna only to realize they were using a coax with a micro-fracture in the shield or a connector that was barely making contact. If your SWR jumps every time you nudge the feedline, the antenna isn’t the problem; your cable is.
- Test in the rain (or at least when it’s damp). It’s not the most fun way to spend a Saturday, but if you’re building something for outdoor use, you need to see how moisture affects your resonant frequency. A dipole that looks perfect in a dry garage might shift significantly when water gets into the insulators or clings to the element.
- Check your ground plane, even if you think you don’t need one. If you’re testing a vertical and your SWR is behaving erratically, look at your radial system. I once spent three hours troubleshooting a “faulty” antenna only to find that my makeshift ground stake was barely touching anything but dry sand.
- Keep a log of the conditions, not just the numbers. A reading of 1.5:1 on a clear, calm day is one thing; the same reading during a heavy thunderstorm or when the sun is screaming at the ionosphere tells a different story. If you want to actually understand your antenna, you have to track the environment alongside the data.
The Bottom Line: Don't Trust the Numbers Alone
SWR is a useful starting point, but it’s a blunt instrument; you need an antenna analyzer to see the actual impedance and resonance to know if you’re actually tuned or just lucky.
Height is everything—an antenna measured on a workbench will never behave like the same antenna hanging 10 meters up a pine tree, so always test in its final environment if you can.
If your measurements look perfect but you aren’t making contacts, stop staring at the meter and look at your ground plane or your feedline; the problem is rarely where the SWR meter says it is.
## The Truth About Your Measurements
Stop treating your SWR meter like an oracle; it’s just a snapshot of a single point in time. If you haven’t measured the impedance across the whole band, and if you haven’t accounted for how much height you actually have above the ground, you aren’t testing an antenna—you’re just guessing with a digital display.
Wren Castellano
Final Thoughts Before You Head Out
At the end of the day, testing an antenna isn’t just about chasing a perfect 1:1 SWR reading on a screen. It’s about understanding the relationship between your feed point, your ground plane, and the actual height you’ve managed to get that wire off the dirt. We’ve talked about why your meter might be lying to you due to cable loss or impedance mismatches, and why an analyzer is your best friend when you need to see the real impedance curve. Remember: a low SWR doesn’t guarantee a great signal if your antenna is sitting in a ditch or if the radiation pattern is being choked by nearby metal. Measure the reality, not the theory, and always keep an eye on how your environment changes those numbers.
Radio is one of the few places left where you can actually bridge the gap between a mathematical model and the physical world. There is a specific kind of satisfaction that comes from tuning a wire, seeing the resonance shift on your display, and then finally hearing a weak station break through the noise because you actually understood your setup. Don’t let the gear intimidate you, and don’t let the old-timers’ anecdotes replace your own data. Get out there, get your measurements, and most importantly, get on the air. The ionosphere doesn’t care how pretty your spreadsheet looks, but it certainly rewards a well-tuned antenna.
Frequently Asked Questions
If my analyzer shows a perfect 1:1 SWR but I'm still barely making contacts, is it the antenna or is the ionosphere just being difficult?
If your SWR is a flat 1:1 but you’re hitting a wall, stop blaming the antenna for a second. If that reading is true, your power is getting into the wire, but it’s not necessarily getting to the other side. Check your ground plane—if you’re operating a portable setup 1.5 meters off the ground, your radiation pattern might be squashed toward the dirt. Otherwise? It’s the ionosphere. Some nights the skip just isn’t there.
How much does the actual height of my wire above the ground change my resonance frequency when I'm testing it in the backyard versus on a hill?
It changes more than most people realize. When you’re testing in a flat backyard, the ground’s capacitance is pulling your resonance lower. If you measure a perfect match at 14.150 MHz in the yard, don’t be surprised when you haul that wire up to a ridge and find it’s shifted up toward 14.200 MHz. The ground isn’t just a reference; it’s part of your circuit. Measure in the field, not just in the garden.
Do I really need to worry about the loss in my coax when I'm measuring, or can I just trust the SWR reading at the rig?
If you’re just checking if your rig is going to blow a final, the SWR at the radio is fine. But if you’re trying to troubleshoot a bad antenna, you can’t trust that number. If you have fifty feet of cheap, lossy coax between the rig and the antenna, your SWR will look “good” while your actual power is being turned into heat in the cable. Measure at the feedpoint, or you’re just guessing.
