
I was standing on a ridge in the Blue Ridge Mountains last October, shivering in a light wind, trying to reach a repeater that I knew was active. I had the radio strapped to my chest, the battery was full, and my signal strength was showing a solid green bar, but I was getting nothing but digital silence. It turns out I hadn’t actually learned how to configure a code plug correctly for that specific digital protocol; I had just blindly copied a template from a forum post written in 2014. Most people think a code plug is just a glorified contact list, but if your color codes, slot timings, or repeater offsets are even slightly off, you aren’t just missing calls—you’re essentially shouting into a void.
In this guide, I’m going to strip away the manufacturer’s jargon and show you how to actually get it right. We aren’t going to rely on “trial and error” or praying the ionosphere fixes your mistakes. I’ll walk you through the precise logic of setting up your channels so that when you finally hit that PTT, the handshake actually happens. You’ll learn exactly what to look for in your software to ensure your digital settings match the real-world repeater requirements, without wasting an entire afternoon staring at a spreadsheet.
Table of Contents
- Step-by-Step Instructions
- Mastering Dmr Color Code and Slot Configuration Without the Fluff
- Precision Dmr Contact List Management for Reliable Field Use
- Five Things the Manual Won't Tell You About a Clean Code Plug
- The Bottom Line: Don't Let Your Settings Get in the Way of the Signal
- The Reality of the Digital Code Plug
- Don't Let the Software Win
- Frequently Asked Questions
Guide Overview
Tools & Supplies
- Programming Cable (USB to radio interface cable)
- PC/Laptop (with compatible OS and USB ports)
- Programming Software (manufacturer-specific software like CPS or CHIRP)
- Digital Radio (the device being configured)
- Configuration File (the .dat, .csv, or .img file containing channel data)
Step-by-Step Instructions
- 1. First, stop trying to use the tiny, frustrating buttons on the radio itself. Unless you’re performing a quick frequency change in the field, you’re going to end up with a mess of typos and missed channels. Grab the manufacturer’s programming cable—and if you’re using one of those cheap, unbranded clones from a marketplace, make sure your drivers are actually installed before you plug it in, or you’ll just be staring at a “device not recognized” error for an hour.
- 2. Once you’ve got the software open, don’t just start typing in numbers. Look at your frequency list first. I always start by importing a basic CSV file if I have one, or at least setting up my primary repeater offsets before I touch a single channel name. If you get the offset wrong—say, you’re trying to hit a 600kHz offset on a band that expects 5MHz—you’re going to be transmitting into nothingness and wondering why no one is answering you.
- 3. Now, let’s talk about the actual channel entries. This is where most people get lazy. For every channel, you need to define the frequency, the tone, and the name. I recommend keeping names short; if you try to cram “North County Emergency Repeater” into a display that only supports six characters, the software will either truncate it or, worse, throw a fit. Keep it simple: “N.Co.E” is much easier to read when you’re moving through a menu quickly.
- 4. This is the step that separates the pros from the hobbyists: setting your CTCSS or DCS tones. If the local repeater requires a sub-audible tone to open the squelch, and you haven’t entered it in the code plug, you’ll hear people talking but you’ll never be able to break in. I’ve spent more than one afternoon sitting on a ridge feeling like a total amateur because I forgot to check the tone requirement for a local repeater.
- 5. Check your power settings per channel. Just because your radio is capable of 5 watts doesn’t mean you should use it every time. If you’re operating near a repeater site, dialing it down to 1 or 2 watts will save your battery and, more importantly, it won’t desensitize your receiver when you try to listen. It’s about efficient energy management, not just screaming at the top of your lungs.
- 6. Before you hit that “Write to Radio” button, do a quick sanity check on your scan list. There is nothing more annoying than a radio that scans through forty empty channels before it finds the one you actually want to hear. Group your most frequent channels together and set your scan search pattern to prioritize them. It makes the radio feel responsive rather than sluggish.
- 7. Finally, hit the write command and wait. Do not—and I mean do not—tweak the cable or bump the laptop while the progress bar is moving. If you interrupt the data stream mid-transfer, you risk corrupting the firmware or at least leaving you with a very expensive, very silent brick. Once it’s done, pull the cable, power the radio off, pop the battery back in, and test the first three channels manually to ensure the offsets are actually working.
Mastering Dmr Color Code and Slot Configuration Without the Fluff
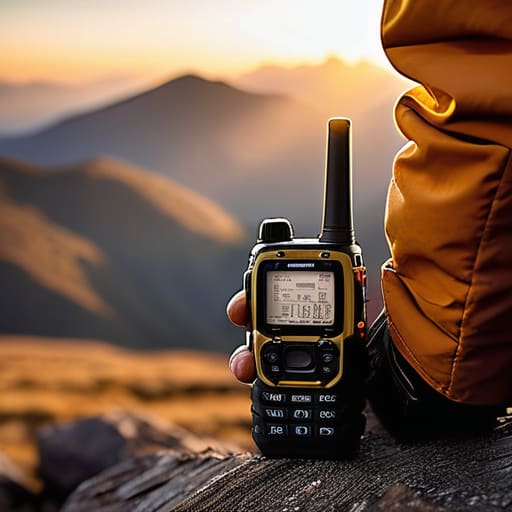
Look, once you’ve got the basic steps down, you’re going to hit the part where most people just start clicking buttons and hoping for the best: the DMR color code and slot configuration. Here’s the reality: if you get the color code wrong, you aren’t just “missing” a transmission; you’re essentially shouting into a void where no one can hear you. I’ve spent too many afternoons on a ridge, battery levels dropping, only to realize I’d entered a color code of 1 instead of 3 because the local repeater owner decided to be different. Check your local repeater directory twice. And don’t ignore the slots. If you’re trying to jump onto a busy repeater but you’re hard-coded to Slot 2 when the local traffic is all on Slot 1, you might as well be using a walkie-talkie from a toy store.
When you’re deep in the digital mobile radio programming software, don’t treat the contact list like a junk drawer. Efficient DMR contact list management is what separates the operators from the people just making noise. Group your contacts by local repeaters first, then by distant simplex groups. It keeps your workflow clean and prevents that frantic scrolling when you actually have something worth saying.
Precision Dmr Contact List Management for Reliable Field Use
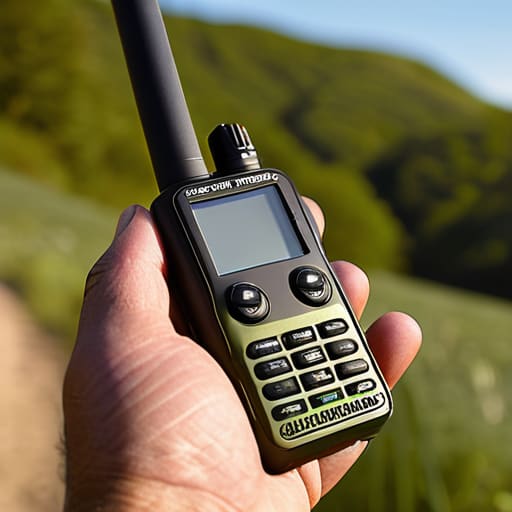
Look, once you’ve wrestled with the digital repeater settings and the technical side of the handshake, you’re left with the part that actually makes the radio usable in the field: the contact list. I’ve seen too many folks spend hours on a complex CPS software tutorial only to end up with a directory that looks like a phone book from 1994. If you’re out on a hill or in a crowded park, you don’t have the luxury of scrolling through three hundred names just to find your local repeater or your buddy’s callsign. My rule is simple: curate for speed, not for completeness.
Effective DMR contact list management is about hierarchy. I group my contacts by “Local/Home,” “Travel/Regional,” and “Emergency/Priority.” When I’m operating portable, I want my most frequent repeaters at the very top of the list so I can hit them in three seconds flat. If you’re using generic digital mobile radio programming software, don’t just dump every name you find into the memory. If a contact isn’t something you’ll actually talk to while standing in the wind, leave it out. A clean, lean list is the difference between a successful contact and a frustrating afternoon of scrolling.
Five Things the Manual Won't Tell You About a Clean Code Plug
- Stop overstuffing your contact list. I’ve seen people try to upload five hundred names into a handheld, and they wonder why the radio hangs for three seconds every time they hit the PTT. Keep your active field list lean; if you aren’t going to call them this weekend, they don’t need to be in the primary memory.
- Double-check your scan lists before you head out. There is nothing more frustrating than hiking three miles up a ridge only to realize your scan list is configured to skip the very repeater you need. I always run a quick test in the driveway to make sure the radio actually jumps to the signals I’ve told it to look for.
- Don’t trust the default group call settings. Manufacturers love to give you a “factory” setup that works for exactly zero people in your local area. Manually verify your Talk Groups against your local repeater’s map; if you’re on the wrong TG, you’re just shouting into a void that nobody is listening to.
- Group your channels by logic, not by how they were entered. I organize my code plug by frequency range or by local repeater clusters. When you’re out in the field and the weather is turning, you don’t want to be scrolling through a disorganized mess of fifty channels just to find your home base.
- Verify your power levels per channel. Not every repeater needs you to blast at max wattage, especially if you’re sitting right next to the tower. I’ve measured enough local sites to know that dropping to mid-power on certain channels saves your battery life and prevents you from overdriving the repeater’s input, which is just bad etiquette.
The Bottom Line: Don't Let Your Settings Get in the Way of the Signal
Stop treating your code plug like a “set it and forget it” menu; if you haven’t verified your talkgroups against the local repeater’s actual configuration, you’re just transmitting into a void.
Keep your contact list lean and your slot assignments precise—cluttering your radio with every frequency you’ve ever heard makes it harder to find what you actually need when you’re out in the field.
Remember that a perfectly configured radio is useless if you’re chasing a dead repeater; always double-check your color codes and slots against the specific site you’re targeting, because “close enough” doesn’t work in digital mode.
The Reality of the Digital Code Plug
A code plug isn’t just a list of frequencies you copy-paste from a repeater directory; it’s the difference between actually working a contact and staring at a silent screen while your battery drains. If you don’t take the time to map your slots and color codes correctly, you aren’t operating a radio—you’re just carrying a very expensive, very heavy brick.
Wren Castellano
Don't Let the Software Win
At the end of the day, a code plug isn’t just a list of frequencies; it’s the roadmap for how you actually interact with the digital landscape. We’ve covered the essentials—from getting your contact list pruned so you aren’t scrolling through three hundred dead IDs in the middle of a field, to the precision required for color codes and time slots. If you get the slots wrong, you’re just shouting into a void, and if your contact list is a mess, you’re wasting precious battery life and time. Remember, the goal isn’t to have the most complex file possible; it’s to have a configuration that is lean, logical, and reliable when you’re actually on the move.
I know that staring at a spreadsheet on a laptop screen feels a world away from the magic of hearing a signal pull through the noise, but this is where the real work happens. There is a specific kind of satisfaction that comes from knowing your rig is tuned exactly how it should be, rather than just hoping the factory defaults do the job. Don’t get discouraged if you have to rebuild your file three times before it sticks—that’s just part of the process. Once you stop fighting the software and start mastering the logic behind it, the radio stops being a complicated gadget and starts being the tool it was meant to be. Now, get out there and find some signals.
Frequently Asked Questions
If I update my code plug to add a new repeater, do I risk wiping out my existing contact list or saved scan lists?
The short answer is: yes, you absolutely risk it. Most CPS software is a blunt instrument; when you hit “Write to Radio,” it doesn’t just patch in the new repeater, it overwrites the entire memory map. If your contact list lives in the radio’s internal memory and not in your computer’s database, it’s gone. Always pull a full read from the radio before you start tinkering. Treat your current configuration like a backup—don’t assume the software is being polite.
How much does the specific brand of programming software actually matter, or am I just paying for a prettier interface?
Look, you aren’t paying for a prettier interface; you’re paying for the stability of the data stream. The “free” or generic software often handles memory addresses like a toddler handles eggs—it’s messy and prone to corruption. I’ve seen people spend hours on a configuration only to have the radio brick because the software sent a malformed hex string. Use the manufacturer’s tool if you want reliability, or an established third-party like CPS if you want sanity.
I’ve got the digital settings right, but why am I still getting nothing but digital noise when I try to hit the local repeater?
If your digital settings are perfect but you’re just hearing digital “hash,” you’re likely looking at a synchronization failure. Check your Color Code first—if you’re off by even one digit, the repeater won’t acknowledge you. If that’s solid, check your slot. Most people assume they’re on Slot 2, but some local repeaters are configured for Slot 1 only. It’s frustrating, but it’s usually a mismatch in the handshake, not a broken radio.
