I was halfway up a ridge in the Blue Ridge Mountains last autumn, shivering in a damp wind, when I realized I’d spent forty minutes wrestling with a coax connection that was actually fine—it was my tuner that was failing to track the impedance shift. I had been so focused on the “magic” of the propagation that I completely neglected the basics of how to test before you transmit. We’ve all been there: you’re sitting in the dark, staring at a signal strength meter that’s dancing like a ghost, and you can’t tell if you’re actually making contact or if the ionosphere is just playing tricks on your ego.
I’m not here to sell you a $500 proprietary analyzer or tell you that you need a PhD to verify your setup. My goal is to show you how to use the tools you actually have—and the ones you should actually own—to confirm your station is behaving before you dump power into a line. I’ll give you the real-world numbers on SWR, common-mode current, and noise floors, and I promise to tell you when a “fix” is just a temporary patch for a fundamental design flaw.
Table of Contents
- Measuring Standing Wave Ratio Instead of Relying on Luck
- Rf Signal Testing Procedures That Actually Validate Your Setup
- Five Real-World Checks Before You Key Up
- The Bottom Line: Don't Let Luck Be Your Only Metric
- ## The Difference Between Operating and Guessing
- Stop Guessing, Start Operating
- Frequently Asked Questions
Measuring Standing Wave Ratio Instead of Relying on Luck
I’ve seen too many people walk up to a new setup, key the mic, and just pray that the needle doesn’t peg into the red. If you’re relying on a “feeling” that your feedline is okay, you aren’t operating; you’re gambling with your hardware. Measuring standing wave ratio isn’t just about checking a number on a screen to satisfy a manual; it’s about understanding how much energy is actually leaving your rig versus how much is bouncing straight back into your finals. I once spent a weekend on a ridge with a custom-built dipole at 12 meters, and even though the math looked perfect on paper, my SWR was hovering at 3:1 because I hadn’t accounted for the proximity of a granite outcrop.
When you ignore the mismatch, you aren’t just losing efficiency; you are actively preventing transmitter damage from happening by ensuring the heat stays where it belongs—in the antenna, not the power amplifier. Don’t let a bad connection or a poorly terminated end fool you into thinking your antenna is tuned. If you haven’t verified your antenna impedance matching with a decent meter or an analyzer, you’re just waiting for a component to fail at the worst possible moment.
Rf Signal Testing Procedures That Actually Validate Your Setup
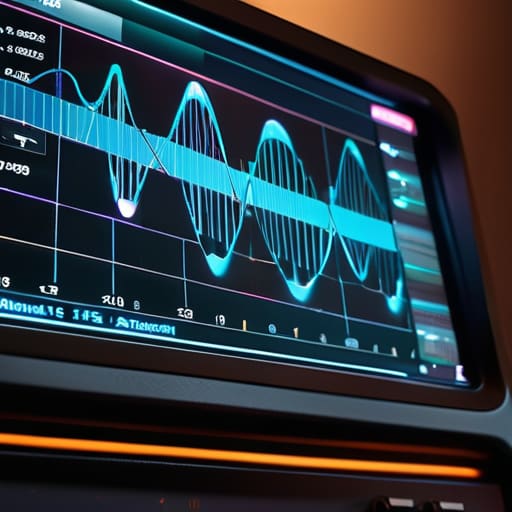
Once you’ve moved past the SWR readings, you need to look at what’s actually happening at the feed point. I’ve seen too many operators assume that because their tuner says “matched,” they’re golden. They aren’t. If you really want to validate your setup, you need to verify your antenna impedance matching under load. I usually pull out a vector network analyzer (VNA) to check the complex impedance across the entire band of interest. It’s one thing to see a low SWR at 14.150 MHz; it’s quite another to realize your resonant point is so narrow that a slight thermal drift or a gust of wind will send your reflected power spiking.
If you’re working with higher power or more sensitive SDR gear, don’t skip the step of checking your signal’s actual footprint against the noise floor. Use a dummy load for your initial sweeps to ensure you are preventing transmitter damage before you ever introduce a real antenna into the equation. This isn’t about being pedantic; it’s about knowing that your rig is actually outputting what the meter claims. If your signal looks clean into a load but disappears into the weeds when you switch to the wire, you don’t have a radio problem—you have a system problem.
Five Real-World Checks Before You Key Up
- Check your ground plane—or lack thereof. If you’re running a vertical and you haven’t actually measured the impedance change when you move your radial wires (or your counterpoise) six inches, you aren’t testing, you’re just hoping. I’ve seen plenty of “perfect” SWR readings on a bench that tanked the moment the antenna was hung 15 meters up a pine tree because the ground coupling changed everything.
- Verify your noise floor with the radio actually off. It’s easy to think you’re “making contacts” when you’re actually just riding a localized spike of RFI from a nearby switching power supply. Turn off the rig, check your waterfall, and see what the actual ambient noise looks like. If you can’t see a signal clearly above the local floor, you’re going to have a hard time being heard by anyone else.
- Test your coax under load, not just with a dummy load. A dummy load is a great tool, but it doesn’t simulate the reactive environment of a real antenna. I always do a quick check with the antenna connected to see how the cable behaves when it’s actually seeing the feedpoint impedance. If your SWR jumps wildly the moment you switch from the dummy load to the wire, you’ve got a cable or connector issue you’re about to fry your finals on.
- Use a field strength meter or a simple sniff loop if you can. Don’t just trust the numbers on your transceiver’s screen; those are often just mathematical guesses based on the internal software. If you want to know if your antenna is actually radiating where you think it is, you need to physically move around the near field. It tells you more about your pattern than a digital readout ever will.
- Watch the thermal drift. If you’re using a budget SDR or a rig that’s been sitting in a hot car, give it twenty minutes to stabilize before you start your measurements. I’ve ruined more “perfect” test sessions because I took a reading five minutes after power-up, only to have the frequency drift half a channel once the components actually reached operating temperature.
The Bottom Line: Don't Let Luck Be Your Only Metric
Stop treating a low SWR reading as a “set it and forget it” victory; if you haven’t verified that your signal actually clears the local noise floor, you’re just looking at a pretty number on a screen while your real performance stays buried.
Always document your antenna height and ground conditions alongside your measurements, because an antenna that performs beautifully at 2 meters above a concrete slab is going to behave completely differently when you’ve lugged it up a ridge to 10 meters of clearance.
Trust your meter more than your memory; if a contact felt “strong” but your signal chain wasn’t verified, you didn’t have a good station setup, you just had a lucky ionospheric opening that won’t necessarily show up tomorrow.
## The Difference Between Operating and Guessing
“If you’re just watching a needle bounce and assuming your setup is solid, you aren’t engineering; you’re just hoping. A low SWR tells you the antenna isn’t going to blow your finals, but it doesn’t tell you if your signal is actually clearing the noise floor or if you’re just shouting into a void because your ground plane is non-existent.”
Wren Castellano
Stop Guessing, Start Operating
At the end of the day, testing isn’t about following a manual just to check a box; it’s about knowing exactly what your gear is doing before you dump power into it. We’ve covered why a low SWR reading is only half the story, why you need to verify your signal actually clears the local noise floor, and why measuring your actual output is the only way to know if your coax hasn’t decided to fail you mid-contact. If you skip these steps, you aren’t really operating—you’re just throwing energy at the sky and hoping the universe decides to cooperate. Don’t let a preventable hardware failure or a poorly tuned radiator be the reason you miss a rare DX contact.
There is a specific kind of satisfaction that comes from sitting on a ridge, looking at a steady signal on your analyzer, and knowing—with absolute certainty—that your setup is ready for whatever the ionosphere throws at it. Radio is a beautiful, unpredictable science, and while we can’t control the solar cycle, we can certainly control the quality of the signal we send out. Take the time to measure your results and respect the physics of your setup. When you stop guessing and start understanding the numbers, the whole hobby changes from a game of luck into a genuine craft. Now, get out there and find some signals.
Frequently Asked Questions
My SWR looks perfect on the meter, but I'm still seeing high reflected power—could it be my coax or is my antenna just too close to the ground?
If your meter says you’re fine but you’re still seeing reflected power, your meter is lying to you—or more likely, it’s not seeing the whole picture. Check your connections first; a loose connector can create a localized mismatch that confuses a cheap meter. But if the connections are solid, look at your mounting. If that antenna is sitting less than 1/4 wavelength above the ground, your pattern is collapsing and your impedance is shifting in ways a simple meter won’t catch.
When I'm out on a portable setup, is it worth lugging around a dedicated antenna analyzer, or can I get away with just a decent SWR meter and a bit of trial and error?
Look, if you’re just checking if a wire is resonant on 40m, a decent SWR meter and some patience will get you home. But if you’re lugging a portable setup, an analyzer is worth every gram. An SWR meter tells you if you’re about to fry a finals; an analyzer tells you why the impedance is shifting when the wind hits that wire. Don’t waste an hour tuning by ear when a handheld tool gives you the answer in ten seconds.
If I'm testing a new rig, how do I actually know if the noise floor I'm seeing is my equipment's fault or just the local environment acting up?
The easiest way to tell is the “isolation test.” First, disconnect your antenna entirely and check the noise floor on the rig. If it’s still high, you’ve got internal RFI or a bad power supply. If it drops, the problem is external. Now, swap your antenna for a known-good, shielded cable or a different wire. If the noise stays, your environment is just loud; if it changes, your new rig’s front end might be more sensitive to local interference than you’d like.
