Stop wasting your money on those shiny, “all-in-one” shortwave receivers that promise the world but deliver nothing but static and disappointment. I’ve seen too many beginners head to the shop thinking they need a three-thousand-dollar rig just to figure out how to listen to shortwave, when the reality is that most of those expensive pre-built units have mediocre front ends that choke on local interference. If you think a fancy digital display is going to make up for a poorly designed tuner or a lack of actual signal gain, you’re being sold a dream. Most of the time, you don’t need a bigger budget; you need better physics.
I’m not here to sell you a lifestyle or a brand name. My goal is to show you what actually works when you’re sitting in your chair at 2:00 AM, trying to pull a weak signal out of the noise. I’ll give you the real numbers on antenna heights, tell you which SDRs are actually worth the silicon they’re printed on, and I’ll be the first to admit when a station is only audible because the ionosphere is behaving for once. This is about building a setup that actually performs.
Table of Contents
- The Best Shortwave Receivers for Beginners Who Value Data
- A Shortwave Listening Equipment Guide That Actually Works
- Five Things the Manuals Won't Tell You About Actually Hearing Something
- The Bottom Line
- ## The Reality of the Signal
- Final Thoughts Before You Hit the Airwaves
- Frequently Asked Questions
The Best Shortwave Receivers for Beginners Who Value Data
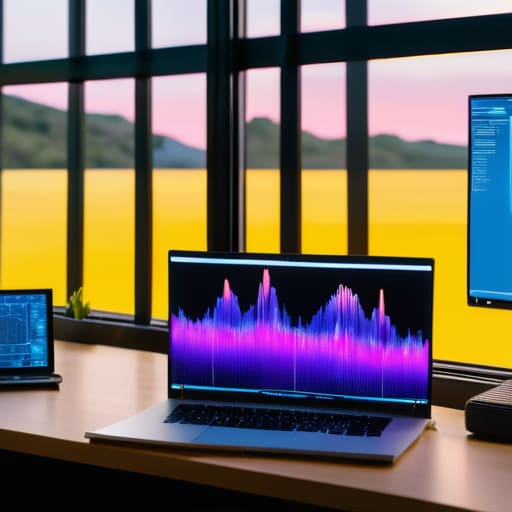
Look, you don’t need a $3,000 laboratory-grade receiver to start, but you do need something that doesn’t drift every time the sun comes out from behind a cloud. If you’re looking for the best shortwave receivers for beginners, my first instinct is to steer you toward a decent SDR (Software Defined Radio) setup. I’ve spent enough time with hardware to know that while a dedicated tabletop rig feels more “real,” a mid-range RTL-SDR dongle paired with a solid antenna will give you more visual data on the spectrum than most entry-level commercial radios. Seeing the signal rise and fall on a waterfall display helps you actually see the physics of what’s happening.
If you prefer something tactile—and I still do—don’t just buy the first shiny box you see on an ad. Look for something with a decent selectivity and a stable local oscillator. You want to be able to move across the various shortwave radio frequency bands without the signal turning into a mess of noise the moment you touch the dial. I once tried a budget “all-in-one” unit that promised the world; it was useless because it couldn’t distinguish between a legitimate broadcast and local interference. Get something that lets you control the gain, or you’ll spend more time fighting the noise floor than actually hearing the stations.
A Shortwave Listening Equipment Guide That Actually Works
Look, you can spend a fortune on a high-end DSP receiver and still hear nothing but static if your setup is fundamentally flawed. Most people think the magic happens inside the box, but the real work is done by your antenna and your connection to the ground. If you’re just using the telescopic whip that came with a cheap portable, you aren’t really listening; you’re just hoping for a miracle. For a decent shortwave listening equipment guide, my first rule is this: invest in a long-wire antenna. Even a simple piece of copper wire strung up 20 feet in a tree will outperform a thousand-dollar receiver paired with a junk antenna.
Once you have the wire up, you have to deal with the reality of understanding ionospheric propagation. I’ve sat on ridges during perfect solar cycles and still struggled because my antenna was too low to the ground to capture the reflected signals. You need to realize that the different shortwave radio frequency bands behave like different lanes on a highway; some are wide open during the day, while others only wake up after sunset. If you aren’t accounting for the height of your wire and the time of day, you’re just spinning your wheels.
Five Things the Manuals Won't Tell You About Actually Hearing Something
- Stop relying on the built-in telescopic whip. It’s fine for FM radio in your car, but for shortwave, it’s practically useless. If you want to pull in anything beyond local stations, you need a dedicated wire antenna. I put a simple 25-foot length of copper wire out my window last Tuesday—at least 15 feet above the ground—and the difference in signal-to-noise ratio was night and day.
- Learn the difference between signal strength and signal quality. Just because your S-meter is hitting the red doesn’t mean you’re actually hearing a station; you might just be listening to a local burst of interference or a heavy-duty solar flare. I’ve spent many nights chasing a “strong” signal only to realize it was just local RFI from a poorly shielded LED driver in my kitchen.
- Watch the clock, not just the frequency. The ionosphere isn’t a static thing; it’s a moving target. A band that’s dead at 10:00 AM might be wide open at 10:00 PM. I don’t bother checking the 40m band during the heat of the day unless I’m looking for something specific; I wait for the sun to go down and the layers to settle.
- Get comfortable with the “noise floor.” Before you start hunting for DX, tune to a completely empty part of the band to see what your baseline noise looks like. If your floor is already high because of your neighbor’s switching power supply, you aren’t going to find much of anything, no matter how expensive your receiver is.
- Don’t get married to a single piece of gear. I’ve seen people spend three months’ salary on a high-end SDR only to realize they were placing it right next to a computer monitor that was flooding the room with RF noise. Sometimes a cheap, used analog receiver and a well-placed wire antenna will outperform a $1,000 setup that’s buried in electronic smog.
The Bottom Line
Don’t sink your entire budget into a fancy receiver if you haven’t sorted your antenna first; a $50 SDR with a well-placed wire at 10 meters will outperform a $2,000 tabletop rig sitting on a desk with no elevation.
Stop chasing “magic” specs in marketing brochures and start looking at real-world measurements like selectivity and dynamic range, because a radio that looks good on paper won’t mean a thing when a local AM station is screaming across the band.
Accept that some nights you’ll hear everything and some nights you’ll hear nothing; if the ionosphere isn’t cooperating, no amount of expensive gear is going to fix a dead band.
## The Reality of the Signal
You can spend five thousand dollars on a receiver with the prettiest waterfall display in the world, but if you’re trying to pull in signals with a ten-foot wire draped over a bookshelf, you aren’t listening to shortwave—you’re just listening to your neighbor’s microwave oven. Get your antenna up, get it away from the house, and stop blaming the hardware when the problem is actually your geometry.
Wren Castellano
Final Thoughts Before You Hit the Airwaves
At the end of the day, getting into shortwave listening isn’t about owning the most expensive SDR or the shinyest transceiver on the shelf. It’s about understanding the relationship between your gear, your antenna, and the sky above you. I’ve spent enough time staring at waterfall displays to know that a $500 receiver won’t save you if your wire is dragging in the dirt; you need to prioritize a decent antenna and get it at least 15 to 20 feet up if you want to see anything more than local noise. Don’t get caught in the trap of chasing specs on a datasheet without considering your actual operating environment. Measure your signal, test your connections, and remember that a simple wire antenna, when placed correctly, will often outperform a piece of gear twice its price.
There is something deeply grounding about tuning into a distant signal and realizing that, despite all our fiber optics and satellites, the ionosphere is still doing the heavy lifting. It’s a hobby that demands patience and a bit of a scientific temperament, but the payoff is worth the trial and error. When you finally pull a clear signal out of the static on a band you thought was dead, you’ll realize it wasn’t just luck—it was the result of understanding the physics at play. So, stop overthinking the perfect setup and just start listening. The airwaves are waiting, and they have plenty to tell you if you know how to tune in.
Frequently Asked Questions
I have a decent receiver, but can I actually get anything decent with just a long wire thrown over a tree, or am I dead in the water?
You aren’t dead in the water, but don’t expect miracles. A long wire is a fine start, provided you actually get some height. If that wire is just draped over a low bush at six feet, you’re mostly just collecting local noise. Get it up at least 20 or 30 feet into a tree to clear the ground losses. It’ll be noisy, sure, but it’s better than nothing—and it’s a hell of a lot better than a piece of wire sitting on your desk.
Is it worth spending the extra money on an SDR with a wide bandwidth, or should I just stick to a dedicated single-band receiver for now?
If you’re just starting, don’t dump your entire budget into a high-end SDR. A wide bandwidth is flashy, but if you can’t parse the signal from the noise, you’re just looking at a pretty waterfall of chaos. I’d suggest a mid-range SDR for the visual data, but keep some cash aside for a decent dedicated receiver or a better antenna. Realistically, you’ll spend more time tuning the antenna than chasing wide bandwidths anyway.
How much of my signal strength is actually my gear, and how much is just the ionosphere deciding to cooperate for an hour?
The honest answer? It’s a toss-up, and most days the ionosphere is winning. I’ve had $3,000 SDR setups go silent while a cheap, noisy analog rig pulls in a station from halfway across the globe. Good gear gives you the floor—it lowers the noise and clarifies the signal—but it can’t manufacture physics. If the MUF drops or the solar flux is garbage, even the best front-end in the world won’t save you.
