Category: Gear

  • What You Need for a Clean Mobile Installation

    What You Need for a Clean Mobile Installation

    I remember sitting in the passenger seat of an old Land Rover ten years ago, watching a friend try to run a VHF rig using nothing but some scrap wire and a cigarette lighter plug. He thought he had a “setup,” but between the massive voltage drop and the interference from his alternator, he couldn’t have picked up a local repeater if his life depended on it. Most people see a product listing and think a mobile install kit is just a fancy way of saying “a box of wires,” but that’s a dangerous way to look at it. If you don’t understand what is a mobile install kit from a grounding and power-stability perspective, you aren’t building a radio station; you’re just building a very expensive way to waste battery life.

    I’m not here to sell you a pre-packaged bundle of overpriced connectors that claim to be “professional grade” just because they come in a nice plastic case. Instead, I’m going to break down the actual components you need to ensure your signal stays clean and your rig stays powered, even when you’re bouncing down a washboard road. I’ll tell you which cables are worth the extra five dollars and which ones are just expensive paperweights.

    Table of Contents

    The Essential Mobile Radio Installation Components You Need

    The Essential Mobile Radio Installation Components You Need

    When you start looking at a box of parts, it’s easy to get overwhelmed by the sheer variety of mobile radio installation components available. You don’t just need a radio; you need a way to keep it from becoming a projectile during a hard brake. I always tell people to start with your mounting solutions. Whether you’re using a heavy-duty bracket or a custom dash mount, it has to be rigid. If the rig is vibrating against the plastic of your console, you aren’t just going to hate the noise; you’re going to eventually fatigue those solder joints or loosen a connector.

    Then there’s the actual power. Don’t just tap into your cigarette lighter and call it a day. For a reliable vehicle communication hardware setup, you need dedicated fused power leads connected as close to the battery as is practical. I’ve seen too many people try to run a high-wattage mobile rig off a flimsy wire that wasn’t rated for the current, only to wonder why their signal is dropping out during transmit. It’s about managing the voltage drop before it becomes a headache.

    Why Your Vehicle Antenna Installation Kit Determines Your Range

    Why Your Vehicle Antenna Installation Kit Determines Your Range

    Look, you can buy the most expensive transceiver on the market, but if your signal is bleeding out into the chassis before it even hits the coax, you’re essentially just broadcasting expensive noise. A decent vehicle antenna installation kit isn’t just about the hardware; it’s about managing the impedance and ensuring your ground plane isn’t a complete disaster. I’ve seen people drop a grand on a high-end rig only to wonder why they can’t reach anyone beyond the next county. Usually, it comes down to a poor connection or a cheap mounting bracket that introduces more loss than the antenna itself can overcome.
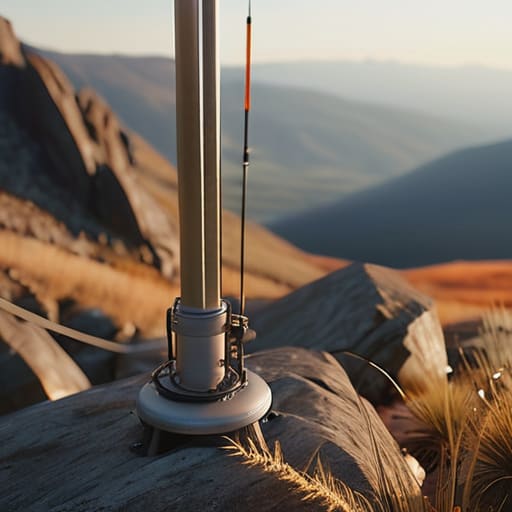
    When you’re putting together your vehicle communication hardware setup, you have to think about the signal path as a single, unbroken chain. If you use thin, low-quality coax or a mounting solution that lets moisture seep into the connector, your SWR is going to climb faster than a summer heatwave. I always tell people: the antenna is only as good as the connection that feeds it. Don’t let a five-dollar part be the reason your expensive radio can’t make a contact.

    Five Things I’ve Learned the Hard Way (So You Don't Have To)

    • Don’t skimp on the coax. I’ve seen people spend a fortune on a high-end transceiver only to choke their signal with cheap, thin RG-58 that’s basically just a glorified extension cord. If you’re running a long cable from the dash to the roof, get something with actual shielding; otherwise, you’re just turning your vehicle into a giant, noisy antenna for everything else on the road.
    • Check your mounting point’s ground. A mobile kit isn’t just about the parts; it’s about the connection to the chassis. If you’re mounting an antenna on a fender or a roof rack, make sure you’ve scraped away the paint down to the bare metal. I’ve sat on hillsides waiting for a signal that never came, only to realize later my ground connection was sitting on a layer of clear coat and hope.
    • Match your fuse to the reality of your rig. Most kits come with a fuse, but don’t just assume it’s the right one for your specific power draw. I’ve seen guys blow a fuse three minutes into a heavy SSB session because they were trying to pull more juice than the kit’s wiring could handle. It’s better to spend ten minutes checking your amp requirements now than to be stuck in the dark later.
    • Mind the vibration. Your car isn’t a laboratory; it’s a vibrating, bouncing box of metal. If your install kit relies on flimsy plastic clips or cheap, thin brackets, they will fail. I always look for heavy-duty mounting hardware that can handle a washboard dirt road without shaking your expensive radio loose from the dash.
    • Plan your cable routing before you start drilling. It sounds simple, but if you don’t map out how that coax is going to get from the antenna to the radio, you’ll end up with a mess of wires crossing near the ignition or the alternator. That’s a recipe for massive RFI (radio frequency interference) that’ll make your signal look like garbage on the waterfall.

    The Bottom Line for Your Mobile Setup

    Don’t skimp on the coax or the connectors; a cheap, poorly crimped connection will introduce more loss than a poorly tuned antenna ever could.

    Your antenna’s performance is nothing without a solid mounting point, so make sure your kit includes hardware that can actually handle the vibration and weather of a moving vehicle.

    Measure your SWR before you ever key the mic—a mobile install kit is only as good as the signal it actually lets you get out of the car.

    More Than Just a Box of Brackets

    A mobile install kit isn’t just a convenient pile of hardware; it’s the difference between a radio that actually talks to the world and one that just sits there making noise while your connections vibrate loose on the first pothole you hit. If you skimp on the grounding or the shielding, you aren’t saving money—you’re just building a very expensive way to listen to your own engine noise.

    Wren Castellano

    Getting It Right the First Time

    Getting It Right the First Time installation.

    At the end of the day, a mobile install kit isn’t just a box of parts; it’s the difference between a rig that actually performs and one that just sits there looking pretty while your SWR climbs into the danger zone. We’ve talked about why you can’t skimp on the coax, why that mounting bracket needs to survive a pothole at forty miles per hour, and why your antenna choice is useless if you don’t have the right cabling to get the signal out of the car. If you try to save twenty bucks by using unshielded wire or a cheap, flimsy connector, you aren’t actually saving money—you’re just investing in future frustration. Buy the components that match the quality of your radio, and make sure your connections are tight enough that you don’t have to worry about them every time you turn a corner.

    There is a specific kind of satisfaction that comes from hitting a distant station on a mobile setup that you built yourself, piece by piece, with the right gear. When you’re out on a trail or stuck in traffic and that signal breaks through the noise, you’ll know it wasn’t just a lucky bounce off the ionosphere; it was because you built a solid, reliable foundation. Don’t let a mediocre install kit hold your signal hostage. Take the time to do it properly, measure your results, and then get out there and see who is listening.

    Frequently Asked Questions

    Do I really need a dedicated power distributor, or can I just tap into my cigarette lighter socket and hope for the best?

    If you’re just running a low-power handheld or a small QRP rig for a quick chat, the lighter socket might get you through the afternoon. But if you’re planning on actually moving some DX, skip the socket. Those plugs are notorious for high resistance and voltage drops the moment you key up. I’ve seen rigs reset themselves mid-transmission because the voltage sagged too low. Get a dedicated distributor; it’s about stable power, not just convenience.

    If I'm installing a high-gain antenna, how much does the mounting location on the roof actually affect my signal compared to the kit itself?

    Look, the kit is what keeps the magic from leaking out, but the mounting location is what actually lets the signal out. You can buy the most expensive, low-loss coax and heavy-duty brackets in the world, but if you mount that high-gain antenna in the middle of a steel roof or tucked behind a cab, you’re just wasting money. The kit provides the foundation, but the roof placement dictates your actual radiation pattern. Height and clearance are everything.

    Should I invest in high-quality shielded coax right away, or is that overkill for a basic mobile setup?

    Look, if you’re just trying to talk to the local repeater from your driveway, cheap coax will get the job done. But if you’re actually planning to use that mobile rig for anything beyond basic chatter, don’t skimp. I’ve seen too many people spend a fortune on a high-end transceiver only to choke their signal with a cheap, unshielded cable that acts like a giant antenna for engine noise. Buy the good stuff now; it’s cheaper than replacing it later.

  • How to Choose a Handheld That Is Not Disappointing

    How to Choose a Handheld That Is Not Disappointing

    I spent three hours hiking up a ridge in the Cascades last weekend, only to realize my “top-of-the-line” handheld was nothing more than a glorified paperweight because I’d fallen for the marketing fluff. Everyone tells you that more features or a higher wattage means a better radio, but they’re usually just reading from a spec sheet designed to empty your wallet. If you’re staring at a dozen different models trying to figure out how to choose a handheld that actually works when you’re miles from the nearest repeater, stop listening to the sales reps. Most of the “must-have” specs are just noise that won’t help you when the terrain gets difficult or the signal drops to the noise floor.

    I’m not here to give you a curated list of the most expensive gear on the market. Instead, I’m going to walk you through the actual metrics that matter—things like receiver sensitivity, real-world battery drain under load, and how much that flimsy stock antenna is actually sabotaging your range. I’ll tell you which rigs are worth the investment and which ones are just overpriced plastic. My goal is to make sure that when you finally pull your radio out of your pack, you actually hear something worth responding to.

    Table of Contents

    Decoding Walkie Talkie Specifications Beyond the Marketing Fluff

    Decoding Walkie Talkie Specifications Beyond the Marketing Fluff

    When you flip through a spec sheet, the marketing department wants you to fixate on the “watts.” They’ll slap a big, shiny number on the box, but a five-watt transmitter is useless if the antenna is a piece of junk or the receiver sensitivity is bottom-of-the-barrel. I’ve seen radios that claim massive radio signal range on paper, only to fall silent the moment you step behind a single granite outcrop. Instead of looking at the output power, look at the receiver’s selectivity. If the rig can’t filter out the noise floor or the adjacent channel interference, you aren’t communicating; you’re just shouting into a vacuum.

    Then there’s the matter of how “tough” these things actually are. Everyone talks about handheld radio durability like it’s a binary thing—it either works or it doesn’t—but you need to look at the actual IP rating. If you’re planning on using these as emergency communication devices in the backcountry, a “water-resistant” label is a polite way of saying “don’t drop this in a puddle.” I don’t care how many features it has if a bit of mist from a mountain trail fries the PCB. Check the waterproof rating for handhelds specifically; if it isn’t at least IP67, don’t trust it when the weather turns.

    The Truth About Radio Signal Range and Real World Obstacles

    The Truth About Radio Signal Range and Real World Obstacles.

    Look, if you see a box in a big-box store claiming a “30-mile range,” put it back. That number is a fantasy born in a vacuum, usually measured with a clear line of sight between two high-gain antennas in a field. In the real world—the one where you’re actually hiking or working in a dense urban environment—your radio signal range is going to be dictated by physics, not marketing. I’ve spent more nights than I can count realizing that a “high-power” handheld is useless if you’re sitting in a valley or behind a concrete slab that eats VHF like it’s nothing.

    The truth is that obstacles like foliage, terrain, and even buildings are the real deciders. If you are relying on these as emergency communication devices, you need to understand that frequency is your best friend or your worst enemy. Higher frequencies give you better resolution but hate obstacles; lower frequencies will bend around things a bit better. I always tell people: don’t just look at the wattage. Look at where you’ll be standing, because the antenna height and your surroundings matter infinitely more than a few extra milliwatts of output power.

    Five Things I Actually Look For Before I Pull the Trigger

    • Don’t get blinded by the wattage on the box. A 5-watt handheld with a decent, well-tuned antenna will beat a 10-watt rig with a stubby piece of rubber that’s essentially a glorified paperweight. If the manufacturer won’t tell you the actual antenna gain or the receiver sensitivity in dBm, they’re hiding something.
    • Check the build quality of the RF connector. I’ve seen too many “pro” handhelds where the SMA connector is so flimsy that a single drop on a granite countertop turns your expensive radio into a very heavy doorstop. I want something that feels like it can handle being shoved into a backpack and dragged up a ridge.
    • Look at the battery chemistry, not just the capacity. A high mAh rating looks great on a spec sheet, but if it’s an old-school NiMH pack that loses its charge sitting on a shelf, you’re going to be dead in the water halfway through your hike. I stick to Lithium-ion, and I check if the charger is actually portable or if I need a dedicated AC outlet to get back in the game.
    • Test the interface without a manual in your hand. If you’re out in the wind or wearing gloves, you aren’t going to be navigating five sub-menus just to change a CTCSS tone. If the buttons feel mushy or the screen is unreadable in direct sunlight, it doesn’t matter how good the filtering is—you won’t be able to use it when it counts.
    • Verify the frequency coverage actually matches your intent. Some cheap imports claim “wideband” capability, but they’re often just poorly filtered junk that picks up everything from the local FM station to your neighbor’s baby monitor, drowning out the actual signal you’re trying to pull from the noise floor. If they can’t show me a clean spectrum analyzer reading, I’m not buying it.

    The Bottom Line Before You Tap 'Buy'

    Stop obsessing over the “wattage” on the box; a 5-watt handheld with a decent, tuned antenna at 2 meters above ground will outrun a 10-watt brick with a rubber ducky every single time.

    If the manufacturer won’t give you the actual sensitivity figures or the receiver selectivity specs, they’re hiding a noisy front-end, and you’ll spend more time hearing static than actual signals.

    Always factor in the weight and the battery reality; a rig that’s powerful on paper is useless if it’s too heavy for a long hike or if the battery dies before you’ve even reached your summit.

    ## Stop Chasing Decibels on a Spreadsheet

    “Stop looking at the glossy spec sheet and start looking at the antenna. I’ve seen handhelds with ‘massive’ wattage that couldn’t punch through a thick hedge because the factory gave them a rubber duck antenna that’s basically a glorified paperweight. If you want to know what a radio can actually do, stop reading the marketing fluff and start measuring the real-world loss between the transceiver and the air.”

    Wren Castellano

    The Bottom Line

    The Bottom Line: Match radio to terrain.

    At the end of the day, choosing a handheld isn’t about finding the one with the most colorful box on the shelf or the highest “claimed” wattage. It’s about matching the tool to the terrain. If you’re hiking through heavy timber, a high-wattage rig won’t save you if your antenna is a glorified piece of wire with no gain. Pay attention to the receiver sensitivity and the actual footprint of the device; a radio that’s too bulky to carry is just a paperweight in your pack. I’ve seen plenty of folks blow their budget on flagship models only to realize they should have spent that extra money on a high-quality whip antenna or a better battery. Measure your needs against the reality of your environment, not the marketing brochure.

    Don’t let the technical jargon or the fear of making a “wrong” choice keep you from getting out there. Radio is a living, breathing thing, and sometimes the best gear is the stuff that actually makes it out of the house with you. Whether you end up with a ruggedized beast or a simple, reliable unit, just remember that the connection matters more than the spec sheet. Once you get that first clear signal through the static—even if it was just a lucky break with the ionosphere—you’ll realize why we bother with all this math in the first place. Now, stop reading and go get some air.

    Frequently Asked Questions

    If the spec sheet says it has high gain, how do I actually verify if that's a real measurement or just something they wrote to move units?

    Look, “high gain” is the oldest trick in the book. Most manufacturers are measuring gain in a vacuum using a theoretical dipole, which tells you nothing about how that handheld will perform when you’re actually holding it. If they don’t specify the antenna type or the measurement method, assume it’s marketing fluff. I always check if they’re quoting dBi or dBd, and honestly? If they don’t list the antenna’s physical dimensions, I don’t trust the number.

    I've heard people argue about whether a larger battery is worth the extra weight in a pack; where is the actual tipping point for a day in the field?

    Look, I’ve lugged enough gear up ridges to know that weight is a tax you pay in sweat. If you’re just doing local repeater work, a standard 2000mAh cell is fine. But if you’re running a high-gain whip and hitting the PTT hard, that extra weight is worth it once you cross the 3500mAh mark. Anything more than that, and you’re just carrying dead weight because the radio’s efficiency won’t catch up to the battery’s bulk.

    Does the antenna height on my handheld really matter as much as it does for my wire antennas, or am I just fighting a losing battle against physics?

    You aren’t fighting a losing battle, but you are fighting a different one. With a wire antenna, I’m looking at resonant length and ground plane geometry. With a handheld, you’re mostly fighting the “near-field” problem. That tiny whip is inefficient by design, but height still dictates your first Fresnel zone. If you’re hunkered down in a valley, no amount of wattage will save you. Get your antenna as high as your arm allows; every foot counts.

  • Headsets: Comfort Matters More Than Frequency Response

    Headsets: Comfort Matters More Than Frequency Response

    I remember sitting on a ridge in the Cascades three years ago, shivering in a light drizzle, trying to pull a weak signal out of a pile of QRM. I had spent a small fortune on a high-end transceiver, but I was using a pair of generic, consumer-grade earbuds I’d scavenged from my junk drawer. Every time the wind kicked up, the rustle in my ears drowned out the station I was chasing. It was a frustrating lesson: you can have the most perfect antenna geometry in the world, but if you don’t understand what is a headset for radio specifically, you’re essentially flying blind. A headset isn’t just some fancy peripheral to make you look like a pro; it is your only interface with the spectrum.

    I’m not here to sell you on the latest overpriced boutique gear just because it has a sleek logo on the side. Instead, I’m going to give you the practical truth about impedance, microphone isolation, and why most “gaming” headsets are actually garbage for HF work. I’ll tell you what works when you’re sitting in a quiet shack and what actually survives a windy hilltop. No marketing fluff—just the real-world specs you need to hear the signal, not the noise.

    Table of Contents

    The Real Difference Between Professional Radio Communication Gear and Toys

    The Real Difference Between Professional Radio Communication Gear and Toys.

    There is a massive gulf between the plastic junk you find in a toy aisle and actual professional radio communication gear. I’ve seen too many people walk into a shop, buy a cheap set of earbuds, and then wonder why they can’t hear a thing over the hum of a nearby transformer or the wind on a ridge. A real headset is engineered to handle the physics of sound in a way a consumer gadget simply isn’t. We aren’t just talking about comfort; we are talking about the ability to isolate a signal from the ambient noise floor.

    When you move into serious territory, you start seeing the real distinction in how these devices manage radio frequency interference protection. A toy might let that electromagnetic noise leak straight into your ear, but a proper piece of kit is shielded to ensure you’re hearing the operator, not the interference. Whether you are looking at different walkie talkie headset types for a job site or something more rugged for portable operation, the goal is the same: reliability. If you can’t trust that the audio will be there when the signal gets weak, you don’t have a communication tool—you have a paperweight.

    Headset vs Earpiece for Radio Which One Actually Survives the Field

    Headset vs Earpiece for Radio Which One Actually Survives the Field

    I’ve spent enough time on wind-swept ridges to know that what looks good in a catalog usually fails the moment the temperature drops or the wind picks up. When you’re weighing headset vs earpiece for radio use, you have to stop thinking about comfort for a second and start thinking about survival. An earpiece—the kind that just tucks into your concha—is fine for a quiet office or a controlled security environment. But the moment you’re dealing with high ambient noise or a heavy breeze, that tiny driver is going to lose the battle. You’ll find yourself cranking the squelch and volume just to hear a whisper, which is a fast track to ear fatigue.

    If you’re doing actual field work, you want a proper headset with some physical presence. A real headset provides a seal that an earpiece simply can’t match, which is vital when you’re trying to maintain hands-free radio operation while your hands are busy with a tuner or a map. I’ve seen too many people rely on those flimsy acoustic tubes only to have them snap or slip out the moment they actually need to move. If you want gear that survives, go for something with a decent headband and padded cups; it’s the difference between hearing the signal and just hearing the wind.

    Five Things I’ve Learned the Hard Way (So You Don't Have To)

    • Check the impedance before you plug in. If you’re trying to drive a high-impedance studio-grade headset into a low-impedance handheld transceiver, you aren’t going to hear a thing, and you’ll spend an hour cursing your equipment when the problem was just a mismatch in the physics.
    • Don’t trust “waterproof” claims blindly. I’ve seen headsets rated for heavy use fail the moment a bit of condensation hits the driver during a cold morning on a ridge. If you’re operating in the field, look for seals that actually feel substantial, not just a marketing bullet point.
    • Prioritize the microphone’s noise rejection over the speaker’s volume. It doesn’t matter if you can hear the signal perfectly if your own transmit audio sounds like you’re talking through a wet sock or if the wind is drowning out your voice. A decent noise-canceling element is worth its weight in gold.
    • Test the cable strain relief. I’ve lost more good sessions because a cheap plastic housing cracked at the connector joint after three weeks of being shoved in and out of a gear bag. If the cable feels stiff or brittle, walk away; it won’t survive a real field deployment.
    • Remember that comfort is a technical requirement, not a luxury. If you’re wearing a headset for a four-hour DX session and it’s pinching your temples or crushing your ears, your concentration is going to slip. A distracted operator is a bad operator, and a bad operator misses the openings.

    The Bottom Line: Don't Waste Your Money

    Stop buying “radio-compatible” headsets from generic sites that are really just glorified smartphone earbuds; if they don’t have a locking connector and decent impedance, they’re going to fail you when you actually need to hear a weak signal.

    A headset is an investment in your hearing and your sanity—choose something that balances isolation from environmental noise with the ability to actually hear the nuances in the audio, rather than just a loud, distorted mess.

    Match your gear to your environment, not your budget; an earpiece is fine for a quiet office, but if you’re out in the field or dealing with any real ambient noise, you need the physical seal and driver quality of a proper headset.

    ## It's Not Just About Hearing; It's About Isolation

    “A lot of people think a headset is just a way to hear the other person, but in the field, it’s actually a way to shut the rest of the world out. If you’re sitting in a windstorm or next to a running generator and you’re relying on a pair of cheap earbuds, you aren’t listening to the signal—you’re just listening to the noise, and you’re going to miss the contact entirely.”

    Wren Castellano

    The Bottom Line: Don't Compromise Your Ears

    The Bottom Line: Don't Compromise Your Ears.

    At the end of the day, choosing a headset isn’t about picking the most expensive piece of plastic in the catalog; it’s about matching the gear to your specific environment. If you’re sitting in a quiet shack, a lightweight earpiece might suffice, but if you’re out on a ridge with wind howling through your antenna wires, you need something that actually isolates the signal from the chaos. We’ve talked about the difference between professional-grade builds and the cheap toys that fail the first time they hit a bit of moisture, and we’ve looked at why the physical design of a headset dictates whether you’ll actually hear that weak DX station or just end up straining your ears. Remember, a headset is a functional component of your signal chain, just like your coax or your tuner. If you can’t hear the signal, it doesn’t matter how good your SWR looks.

    Radio is a hobby built on the connection between two people, often separated by thousands of miles of atmosphere and a whole lot of noise. When you finally pull a faint, crackling voice out of the static, that moment of clarity is why we all do this. Don’t let a sub-par piece of audio gear be the thing that stands between you and that contact. Invest in something that works, something that lasts, and something that lets you actually listen to the magic happening on the airwaves. Get the right gear, get out there, and I’ll see you on the bands.

    Frequently Asked Questions

    Can I just use my high-end studio headphones, or is there a real technical reason why they’ll fail me in the field?

    You could, but don’t. Studio cans are built for a controlled room and a high-impedance jack, not for a transceiver’s output. Most radio rigs expect a specific impedance level; if you plug in 250-ohm studio gear, you’re going to end up with audio so quiet you’ll think the rig is dead. Plus, they aren’t ruggedized. One gust of wind or a bit of condensation on a hillside, and those expensive drivers are toast.

    How do I figure out if a headset is actually designed for high-impedance radio ports or if I'm going to need a bulky adapter?

    Don’t just trust the box; look for the impedance rating in the fine print. If it says 16 or 32 ohms, it’s a consumer-grade toy meant for a smartphone, not a transceiver. You’re looking for something in the 200 to 600-ohm range for most serious rigs. If the manual doesn’t explicitly state the impedance, grab a multimeter. If you can’t verify it, assume you’ll be lugging a bulky impedance transformer around your kit.

    If I'm operating in a noisy environment—like near a generator or a crowded repeater—what specific mic type should I be looking for to keep my audio from sounding like a bag of gravel?

    If you’re battling a generator or a crowded repeater, stop looking at the headset and start looking at the mic element. You want a dynamic microphone with a tight cardioid or even a hypercardioid pattern. Condenser mics are too sensitive; they’ll pick up every rhythmic thrum of that generator and turn your signal into a mess. A robust dynamic element ignores the ambient noise and focuses on your voice, keeping the audio clean instead of gravelly.

  • How to Lay Out a Shack You Can Sit at for Hours

    How to Lay Out a Shack You Can Sit at for Hours

    You don’t need a $5,000 desk, a dedicated cooling system, or a room full of gear that looks like it belongs in a NASA control center to get on the air. Most of the “expert” advice you’ll find online about how to set up a shack is just a glorified shopping list designed to separate you from your hard-earned money. I spent years thinking I needed the ultimate rack-mount setup to make a difference, only to realize that my most successful DX sessions happened in a cramped corner of a shed with a single transceiver and a well-organized mess of cables. It’s not about the aesthetic of the gear; it’s about the ergonomics of the operator and the signal integrity of the connections.

    In this guide, I’m stripping away the fluff and the marketing hype to give you a blueprint that actually works in the real world. I’ll show you how to organize your workspace so you aren’t fighting your own cables mid-contact, how to manage your power distribution without creating a nightmare of interference, and—most importantly—how to build a station that is actually functional for the way you intend to operate. No shiny brochures, just the practical reality of building a station that performs when the bands open up.

    Table of Contents

    Guide Overview

    Total Time: 1-2 days
    Estimated Cost: $200-500
    Difficulty: Intermediate

    Tools & Supplies

    • Hammer for driving nails and securing framing
    • Measuring tape for accurate cuts and spacing
    • Hand saw or circular saw for cutting lumber
    • Level to ensure a flat and even foundation
    • Pressure-treated wooden posts (4 units)
    • Dimensional lumber for framing (10-15 boards)
    • Plywood sheets for walls and roof (4-6 sheets)
    • Roofing felt or shingles (1 roll/pack)
    • Box of exterior grade nails or screws (1 large box)

    Step-by-Step Instructions

    • 1. Start with your power supply, and don’t skimp here. I’ve seen too many people buy a high-end transceiver only to choke it with a cheap, noisy switching power supply that sounds like a jet engine on the HF bands. You want a clean, regulated DC source that can handle the current spikes when you’re keying up a heavy load. If you’re running a big rig, make sure that supply has enough headroom so you aren’t seeing the voltage sag every time you transmit; nothing kills a signal faster than a voltage drop.
    • 2. Map out your RF isolation before you even unbox a piece of gear. A shack isn’t just a desk; it’s a collection of potential interference sources. I always tell people to separate your digital life from your analog life. If your computer is sitting right next to your transceiver, those USB bus noises and monitor switching frequencies are going to show up in your receiver as a constant, annoying floor of hash. Get some distance, or at the very least, use high-quality shielded cables to keep the noise from migrating.
    • 3. Get your grounding and bonding sorted early, and I don’t mean just a single wire stuck into a garden stake. You need a dedicated ground bus that connects your equipment chassis, your power supply, and your antenna system. I’ve measured the common-mode current on poorly grounded stations, and it’s a mess—it turns your coax into part of the antenna and ruins your SWR readings. Do it right the first time so you aren’t chasing phantom interference for the next six months.
    • 4. Choose your control layout based on how you actually operate, not how it looks in a catalog. If you’re a CW enthusiast, you need your key right where your hand naturally rests; if you’re running digital modes, you need a clear line of sight to your monitor. I personally prefer a modular setup where I can move things around. You don’t want to be fighting your own desk layout when the ionosphere finally opens up and you’re trying to catch a rare DX station.
    • 5. Invest in decent, high-quality coaxial cable and connectors. This is where people get lazy, and it shows. I’ve tested cheap, thin coax that had more loss at 144 MHz than a heavy-duty LMR-400, and it’s a complete waste of your transmit power. Use high-quality, low-loss coax for your main runs, and for heaven’s sake, learn how to properly crimp an N-type or PL-259 connector. A loose connection or a poorly seated shield will introduce enough reflected power to make your tuner work harder than it ever should.
    • 6. Set up your monitoring station—the “eyes and ears” of your shack. You need more than just your main rig; a dedicated SDR (Software Defined Radio) or even a simple well-tuned receiver allows you to scout the bands without interrupting your primary station. I like to have a separate screen dedicated solely to waterfall displays. It lets me see the band opening happening in real-time, so I’m not just blindly tuning through the noise hoping for a hit.

    Minimalist Shack Design That Actually Works Under Load

    Minimalist Shack Design That Actually Works Under Load

    When people talk about a minimalist shack design, they usually think about aesthetics—clean lines and matching gear. That’s fine if you’re building a showroom, but if you’re actually operating, you need to think about thermal management and cable routing. I’ve seen too many setups where a beautiful, compact desk becomes a heat trap because the transceiver is tucked into a corner with zero airflow. If you’re squeezing a high-power amp and a radio into a tight footprint, you aren’t just fighting for space; you’re fighting physics. I always leave at least three inches of clearance around the vents, even if it means the rig looks a little lopsided on the desk.

    For those of us leaning into a portable workstation setup, the real secret is modularity. Don’t try to bolt everything down in a way that requires a screwdriver and an hour of frustration to move. I use ruggedized, stackable cases that act as both storage and a stable base. If you’re looking for off-grid power solutions, skip the cheap, unbranded lithium packs you see in every online ad. Get a battery with a known discharge curve and a high-quality regulator. I’ve lost more contact windows to voltage sag than I care to admit, and trust me, it’s never because the ionosphere was being difficult.

    Efficient Workspace Layouts Beyond the 1987 Standards

    Efficient Workspace Layouts Beyond the 1987 Standards

    Most people look at old amateur radio magazines and think a shack requires a massive, dedicated desk that occupies half the room. That’s a relic of a different era. If you’re working with limited square footage, you need to stop thinking about “furniture” and start thinking about compact living ergonomics. I’ve spent years squeezing rigs into spare corners and even the back of a van, and the secret isn’t just getting smaller gear—it’s about verticality. Use wall-mounted racks for your power supplies and heavy transformers. If it’s sitting on your desk, it’s taking up precious real estate where your hands and your signal analyzer should be.

    When I’m designing an efficient workspace layout, I prioritize the “reach zone.” Your transceiver, your tuner, and your primary control interface need to be within a natural arc of your arms without you having to lean forward and strain your lower back. If you’re transitioning into a portable workstation setup, this becomes even more critical. You can’t afford to hunt for a patch cable in a cluttered bag when the band is opening. Organize by frequency or function, not just by size. If you can’t find your coax in under five seconds, your layout is failing you.

    Five Things Your Manual Won't Tell You About Real-World Setup

    • Stop treating your power supply like an afterthought; if you’re running a high-duty cycle mode on a cheap, unshielded switching supply, you’re just inviting a floor of RFI into your RX chain that no amount of filtering will fix.
    • Cable management isn’t just about looking tidy—if you bundle your power leads right next to your coax, you’re creating an induction loop that’ll turn your signal into a mess, so keep the high-current lines and the RF lines in their own lanes.
    • Don’t skimp on the grounding, and I don’t mean just sticking a wire to a copper rod in the backyard; I mean a dedicated, low-impedance ground plane for your equipment that actually separates your signal ground from your chassis ground.
    • Lighting is a practical engineering problem, not an aesthetic one; if you’re squinting at a tiny frequency readout under a harsh fluorescent bulb, you’re going to miss the subtle drift on your VFO, so get some adjustable, dimmable task lighting.
    • Thermal management is non-negotiable—I’ve seen too many people cram a high-power transceiver into a tight corner of a desk only to have the internal components cook themselves after twenty minutes of contesting; give your gear room to breathe.

    The Real-World Essentials

    Stop building for a floor plan and start building for your signal; a compact, efficient layout is useless if your desk is so cluttered you can’t actually reach your tuner when the propagation opens up.

    Prioritize cable management and power distribution from day one, because nothing kills the joy of a weekend DX session faster than a tangled mess of coax and a dying power supply.

    Don’t mistake “expensive” for “effective”—invest your budget in high-quality, low-loss interconnects and a solid ground loop solution rather than overpaying for a radio brand name that won’t fix a poor station setup.

    ## Stop Building Museums

    A shack isn’t a collection of shiny gear you’ve gathered to impress your neighbors; it’s a tool for communication. If you can’t reach into your rack and swap a connector without knocking over your coffee, or if your layout makes it impossible to see your signal chain at a glance, you haven’t built a station—you’ve built a museum. Build for the way you actually operate, not the way you think a radio operator is supposed to look.

    Wren Castellano

    Final Thoughts Before You Plug In

    Final Thoughts Before You Plug In.

    At the end of the day, setting up a shack isn’t about buying the most expensive transceiver or having a desk that looks like a showroom floor. It’s about intentionality. We’ve talked about why you need a layout that respects your physical movement, why a minimalist approach keeps you from drowning in cable clutter, and why your gear needs to be accessible when the propagation finally turns in your favor. Remember, a shack is a living tool, not a museum piece. If your workspace is organized around how you actually operate—rather than how some magazine told you to do it in 1987—you’re already ahead of most of the operators I meet. Keep your measurements honest, keep your connections tight, and don’t overcomplicate the signal path just because you have the budget for it.

    Once the last bit of coax is routed and your power supply is humming, the real work begins. A shack is just a collection of metal and silicon until you actually put a signal out into the world. There is a specific, quiet magic in sitting in a space you built with your own hands, knowing exactly how every component behaves, and hearing a faint signal pull itself out of the noise. Radio is one of the few things left where you can truly understand the entire chain, and that understanding is what makes the hobby worth doing. So, get your station set up, get your antenna up at the right height, and then go out there and see who’s listening.

    Frequently Asked Questions

    If I'm building a minimalist shack in a small apartment, how much do I actually need to worry about RFI from my neighbor's electronics?

    If you’re in an apartment, RFI isn’t just a possibility; it’s your primary adversary. I’ve spent too many nights chasing phantom signals that turned out to be a neighbor’s cheap LED driver or a poorly shielded switching power supply. Don’t ignore it. Invest in a decent SDR to see the noise floor, and for heaven’s sake, get some high-quality ferrite beads for your cables. If your noise floor is high, your signal-to-noise ratio dies before it even hits the antenna.

    You mentioned layout efficiency, but what's the real-world impact of putting my transceiver right next to a high-current power supply?

    If you put them side-by-side, you’re asking for a headache. It’s not just about the physical space; it’s about the magnetic fields. A high-current switching power supply can dump enough EMI right into your transceiver’s front end to raise your noise floor significantly. I’ve sat in shacks where the S-meter was jumping just because the power supply was idling. Keep them separated, or at the very least, use high-quality shielded cables.

    For someone transitioning from a desk setup to a portable one, what are the non-negotiable pieces of test gear I should actually carry?

    Leave the benchtop spectrum analyzer at home; it’s dead weight. If you’re moving to portable, you need a solid NanoVNA—it’s small, and I’ve measured its accuracy enough to trust it for tuning wire antennas at 10 feet up. Pair that with a decent, rugged multimeter and a high-quality directional antenna tester if you’re running beams. If you can’t verify your SWR and ground plane in the field, you’re just guessing in the dark.

  • When a Linear Amplifier Is Worth It and When It Is Not

    When a Linear Amplifier Is Worth It and When It Is Not

    I remember sitting in a cramped workshop back in the late nineties, staring at a vintage tube amp that a guy was trying to sell me for more than my first car. He kept talking about “harmonic richness” and “soul,” but all I could see were leaking capacitors and a transformer that looked like it had been through a war. It’s the same dance I see every day on the swap meets and auction sites: people slapping a “collector’s item” label on gear that hasn’t seen a clean workbench in a decade. If you’re staring at a listing and wondering what is an amplifier worth, you need to stop listening to the adjectives and start looking at the actual components.

    I’m not here to give you a sales pitch or tell you that every piece of gear with a glowing vacuum tube is a goldmine. I’m going to give you the math and the reality. We are going to look at component health, power output under real loads, and why that “vintage” badge often just means you’re paying a premium for obsolete engineering. By the time we’re done, you’ll know exactly how to spot a bargain and, more importantly, how to avoid paying a “nostalgia tax” on something that’s destined for the scrap heap.

    Table of Contents

    Decoding Real Audio Amplifier Resale Value vs Internet Myth

    Decoding Real Audio Amplifier Resale Value vs Internet Myth

    If you spend ten minutes on any major auction site, you’ll see people asking astronomical prices for gear that hasn’t been serviced since the Reagan administration. This is where the “internet myth” takes hold: the idea that a piece of gear is inherently valuable just because it has a certain brand name on the faceplate. In reality, vintage amplifier market trends are often driven by nostalgia rather than actual performance. I’ve seen “collector grade” units go for three times their actual utility because someone wrote a glowing review on a forum in 2004.

    To get a real sense of determining audio equipment worth, you have to look past the patina and the heavy chassis. I always check the internal guts first. A unit with original, leaking electrolytic capacitors might look beautiful on a shelf, but it’s a liability, not a high-end audio investment. If the amplifier component quality has been compromised by sloppy repairs or cheap modern replacements, that “investment” value evaporates the moment you plug it in. Real value is found in the intersection of a solid build and a documented service history, not in a high starting bid on an unverified listing.

    Why High End Audio Investment Often Fails the Measurement Test

    Why High End Audio Investment Often Fails the Measurement Test

    The problem with the “high-end” label is that it’s often used as a shield against actual scrutiny. I’ve sat at a workbench with a spectrum analyzer and a signal generator, looking at gear that carries a five-figure price tag, only to find that the amplifier component quality is barely better than something you’d find in a mid-range consumer unit. People buy into the prestige of a brand name, thinking they are securing a stable high-end audio investment, but they often forget that prestige doesn’t hold up under a thermal stress test or a rigorous measurement of Total Harmonic Distortion.

    In my experience, the gap between marketing hype and actual performance is where most people lose their shirts. You see these massive vintage amplifier market trends driving prices into the stratosphere for units that haven’t been serviced in thirty years. If you aren’t looking at the electrolytic capacitors or the state of the output transistors, you aren’t investing; you’re gambling. True value lies in the engineering tolerances, not in how heavy the transformer is or how much gold plating is on the input jacks.

    Five Ways to Spot a Bargain (and Avoid a Paperweight)

    • Ignore the “Vintage” Label: A piece of gear from 1974 isn’t valuable just because it’s old. If the electrolytic capacitors have leaked or the output transistors are original and brittle, you aren’t buying a classic; you’re buying a weekend of soldering and a potential fire hazard. Factor the cost of a full recap into your offer immediately.
    • The Measurement Reality Check: If a seller claims an amplifier is “audiophile grade” but can’t provide a THD (Total Harmonic Distortion) spec or a signal-to-noise ratio, they’re selling you an emotion, not a component. I’d rather buy a mid-range unit with a documented, clean power supply than a “boutique” rig that sounds great in a showroom but falls apart under a real load.
    • Check the Terminals, Not Just the Faceplate: I’ve seen plenty of beautiful brushed-aluminum chassis that hide oxidized, corroded binding posts or cracked PCB traces near the heat sinks. If the knobs feel gritty or the output terminals look like they’ve been through a salt marsh, walk away—that’s more work than the discount is worth.
    • Scrutinize the “Proven” Models: Some amplifiers hold their value because they are industry standards, like certain old Brytons or Marantz units. But be careful: because they are “safe” buys, the resale price is often artificially inflated. If the asking price is within 15% of a mint-condition unit with a warranty, save your money and buy something newer with actual headroom.
    • Account for the “Good Mood” Variable: Just like a DX contact that only happens when the sun hits the ionosphere just right, a used amplifier might sound perfect during a five-minute test in a seller’s living room. If you can’t test it under load, assume the thermal stability is a question mark and deduct at least 20% from your maximum bid to cover the risk.

    The Bottom Line: Don't Buy the Hype

    Stop equating “vintage” with “valuable”; unless you have a service history or a measurement showing the THD isn’t spiking, you’re just buying an expensive paperweight that’s going to leak DC into your speakers.

    If the price tag is driven by a brand name rather than the actual component quality or the spec sheet, you’re paying a premium for a logo, not for better fidelity.

    Always prioritize the condition of the internals over the shine of the chassis; a mint-looking unit with dried-out electrolytic capacitors is a liability, not an investment.

    ## The Real Cost of "Vintage"

    Stop looking at the patina on the chassis or the name on the faceplate to determine value; if you aren’t checking the ESR on the electrolytic caps and measuring the THD under load, you aren’t buying a piece of high-fidelity history—you’re just buying an expensive, unmeasured liability.

    Wren Castellano

    The Bottom Line on Your Gear

    The Bottom Line on Your Gear.

    At the end of the day, determining what an amplifier is worth requires you to look past the brand name and the polished wood veneer. We’ve looked at how resale value is often decoupled from actual performance, and why a high price tag rarely correlates with better THD or power delivery. If you aren’t checking the service history or verifying the specs against a real measurement, you’re essentially gambling. Remember: a vintage tube amp might be a masterpiece, but if it hasn’t been serviced in thirty years, its value is largely theoretical until you factor in the cost of a technician. Don’t let the “collector” label trick you into paying for nostalgia instead of engineering.

    I know the allure of the “holy grail” piece of gear is strong—I’ve chased my fair share of them up steep hills and through dusty flea markets. But the real joy of this hobby isn’t in owning an expensive trophy that sits on a shelf; it’s in the signal actually hitting the speaker. Whether you’re driving a high-impedance load or just listening to a local broadcast, the best gear is the stuff that works reliably when you need it to. Focus on the measurable performance and the build quality, and you’ll find that the most valuable piece of equipment is the one that actually lets you hear the music.

    Frequently Asked Questions

    If the specs on the box look incredible, how do I know if I'm paying for actual performance or just a well-designed faceplate?

    Look, a spec sheet is just a promise, not a guarantee. I’ve seen rigs with “unbelievable” THD numbers that fall apart the second you load a real antenna. If you want to know if you’re buying performance or just a pretty faceplate, stop reading the brochure and start looking for third-party bench tests. If they aren’t showing you the noise floor or the transient response under load, they’re selling you marketing, not engineering.

    Is it actually worth hunting down vintage gear, or am I just paying a premium for "nostalgia" that doesn't show up on a scope?

    Look, if you’re chasing a specific sound profile that only a certain transformer topology can deliver, then yes, hunt it down. But if you’re buying a piece of gear just because it looks good on a wooden shelf, you’re paying a nostalgia tax. I’ve put vintage iron on the scope; sometimes the THD is beautiful, but more often, you’re just paying for aged capacitors and a high failure rate. Buy for the specs, not the sentiment.

    When a seller claims an amplifier is "mint condition," what specific red flags should I be looking for to see if they're lying?

    “Mint” is a marketing term, not a technical one. If they can’t show you a photo of the underside—specifically the heat sinks and the terminal posts—they’re hiding something. Look for discoloration on the chassis; that’s a sign of heat soak from overworked components, regardless of how shiny the faceplate is. Also, if they say “it works perfectly” but won’t let you test the DC offset or noise floor, they’re selling you a pretty box, not a reliable piece of gear.

  • How to Choose a Microphone and Set Its Gain

    How to Choose a Microphone and Set Its Gain

    I spent three weeks last summer trying to figure out why my new digital voice recorder sounded like I was talking through a wet wool blanket, even though I’d spent a small fortune on a “studio-grade” setup. I kept reading forums filled with people arguing about phantom power and frequency curves, but nobody mentioned the most obvious thing: your room is a mess of reflections. If you’re staring at a wall of expensive gear and wondering how to choose a microphone that won’t just amplify your neighbor’s lawnmower or the hum of your refrigerator, you’re likely falling for the same marketing trap I did. Most of these “pro” recommendations assume you’re sitting in a soundproofed bunker, not a living room with hardwood floors.

    I’m not here to sell you on a specific brand or tell you that a thousand-dollar condenser is a magic wand for bad acoustics. My goal is to give you the actual physics of the situation. I’ll walk you through the real-world trade-offs between dynamic and condenser types, and I’ll tell you exactly when a cheap setup is actually better than a high-end rig. We’re going to look at the practical reality of your environment, because a microphone is only as good as the space it’s sitting in.

    Table of Contents

    Condenser vs Dynamic Microphones Beyond the Marketing Hype

    Condenser vs Dynamic Microphones Beyond the Marketing Hype

    Look, the sales reps love to tell you that a condenser is “professional” and a dynamic is “entry-level,” but that’s a massive oversimplification that usually ends with someone wasting money. In my experience, it comes down to the physics of your environment. A condenser has a much wider microphone frequency response range, which means it captures all those lovely, tiny details in a voice. But those same details include the hum of your refrigerator and the neighbor’s leaf blower. If you aren’t sitting in a room with actual acoustic treatment, that high sensitivity is going to work against you.

    On the other hand, if you’re working in a typical spare bedroom or a home office, a dynamic mic is often the smarter play. They are much more forgiving; they don’t care about the ambient noise nearly as much because they require more physical energy to move the diaphragm. Just keep in mind the phantom power requirements if you decide to go the condenser route—you can’t just plug those into a battery and expect a signal. It’s not about which one is “better” on a spec sheet; it’s about which one won’t make your recording sound like a cluttered mess.

    Microphone Frequency Response Range What the Specs Actually Mean

    Microphone Frequency Response Range What the Specs Actually Mean

    When you look at a spec sheet, you’ll see a line that says something like “20Hz to 20kHz.” It looks impressive, like a wide-open highway, but don’t let the numbers fool you. In my experience, a wide microphone frequency response range doesn’t automatically mean a better recording; it just means the mic is capable of capturing more air. If you’re sitting in a room with zero acoustic treatment—basically a box of hard surfaces—a mic that captures everything down to 20Hz is just going to dutifully record the low-end rumble of your neighbor’s HVAC system or the hum of your fridge.

    I’ve seen people obsess over these numbers while ignoring the actual shape of the response curve. A flat response is the gold standard in a controlled studio, but in the real world, a little “color” can be your friend. Some mics have a natural bump in the upper mids that makes a voice pop through a muddy mix, while others might roll off the lows to hide a boomy environment. Don’t just chase the widest range on the paper; look for the curve that matches the room you actually live in.

    Stop Reading Spec Sheets and Start Listening to Your Room

    • Forget the frequency response graph for a second and look at your walls. If you’re operating out of a spare bedroom with hardwood floors and bare plaster, a sensitive condenser mic is going to turn your voice into a muddy mess of room reflections. In a room that isn’t treated, a rugged dynamic mic isn’t a “downgrade”—it’s a necessity to keep the signal clean.
    • Don’t get blinded by the “Pro” label on a high-end condenser. I’ve seen plenty of expensive gear that’s far too delicate for a real-world environment. If you’re planning on setting up a station in a garage or a shed, you want something with a decent SPL rating and a build quality that doesn’t make you hold your breath every time you move a cable.
    • Check your gain staging before you commit. Some of these modern USB mics claim to be “plug and play,” but if the internal preamp is garbage, you’ll be cranking the gain so high that you’re just amplifying the floor noise. I’d rather have a mediocre mic paired with a solid interface than a “fancy” mic that sounds like it’s underwater because the electronics can’t handle the signal.
    • Polar patterns aren’t just technical jargon; they are your primary defense against noise. If you have a noisy computer fan or a neighbor’s AC unit running, a cardioid pattern is your best friend. Don’t buy an omnidirectional mic thinking it’ll sound “natural” if you haven’t actually measured the noise floor in your operating space first.
    • Watch out for the “YouTube Effect.” Just because a reviewer says a mic is the “gold standard” doesn’t mean it works for your specific setup. They are usually recording in a soundproofed studio with thousands of dollars of acoustic treatment. If your setup isn’t a controlled environment, that “gold standard” mic might actually be the worst thing you could buy.

    The Bottom Line: Stop Reading Spec Sheets and Start Listening

    Forget the “wide frequency response” marketing fluff; if you’re operating from a room with hard floors and no acoustic treatment, a high-end condenser is just going to make your QRM worse by picking up every reflection in the house.

    Match the tool to the environment, not the price tag: use a rugged dynamic mic if you’re working in a noisy shack or a crowded field day, and save the sensitive condensers for when you actually have a controlled space to work in.

    Real-world performance beats a laboratory graph every single time; a microphone is only as good as the signal-to-noise ratio it provides in your specific setup, so test it in your actual operating position before you commit your budget.

    Stop Reading the Spec Sheet and Start Listening to Your Room

    You can spend three months chasing a microphone with a flat frequency response and a gold-sputtered diaphragm, but if you’re sitting in a room with bare hardwood floors and a ceiling that echoes like a cathedral, you aren’t recording a voice—you’re recording a disaster. Don’t choose a mic based on what a spreadsheet says it can do; choose it based on what your actual environment will allow it to capture.

    Wren Castellano

    Stop Overthinking the Spec Sheet

    Stop Overthinking the Spec Sheet for microphones.

    At the end of the day, choosing a microphone isn’t about finding the one with the widest frequency response or the most expensive diaphragm; it’s about matching the tool to your actual environment. If you’re sitting in a bedroom with bare walls and a noisy computer fan, a high-end condenser is just going to be a very expensive way to broadcast your echo. Stick to a solid dynamic mic that ignores the room noise, or accept that you’ll need acoustic treatment before you even plug in the XLR. I’ve seen more people struggle with poor room acoustics than I have with subpar equipment, and I’ll take a well-placed piece of foam over a $500 microphone any day of the week.

    Don’t let the gear acquisition syndrome paralyze you. You don’t need a studio-grade setup to start making something meaningful, whether you’re recording a podcast or just trying to get your voice clearly through a digital mode. The best microphone is the one that gets you out of the planning phase and into the actual practice of communicating. Build your signal, test your levels, and remember that once the transmission starts, the listener cares much more about the clarity of your message than the brand name on your mixer. Get moving and start testing.

    Frequently Asked Questions

    I've got a noisy room with a lot of background hum; should I just bite the bullet and get a dynamic mic regardless of what the specs say?

    Yes, you should. If your room sounds like a server closet or a busy kitchen, a condenser is just going to be a high-fidelity way to broadcast your neighbor’s lawnmower. Specs don’t matter if your noise floor is sitting at 50dB. A dynamic mic has much lower sensitivity, which acts like a physical filter for everything not directly in front of it. It’s not about the frequency range; it’s about signal-to-noise ratio in the real world.

    Is there actually a measurable difference in audio quality between a cheap USB mic and a professional XLR setup, or is it mostly just placebo for the hobbyist?

    It isn’t just placebo, but it’s also not magic. A cheap USB mic is a closed system; you’re stuck with whatever mediocre preamp and converter they soldered inside. With an XLR setup, I can choose a high-quality interface to handle the conversion. If you’re sitting in a room with untreated walls, that $500 preamp is just going to capture your echo more accurately. Measure the environment before you measure the gear.

    How much does the distance from the mic—the "proximity effect"—actually change the sound when I'm trying to record voice logs or casual QSOs?

    Look, if you’re recording voice logs or just chatting on a QSO, proximity effect is your best friend or your worst enemy depending on your setup. Get too close to a directional mic and those low frequencies bloom—it sounds “radio-pro,” but if you’re in a small room with bad acoustics, you’re just making a muddy mess. I’ve found that staying about six inches back keeps the bass tight without losing the character of your voice.

  • Rig Control: Getting a Computer and Radio Talking

    Rig Control: Getting a Computer and Radio Talking

    I remember sitting in my workshop three years ago, staring at a pile of expensive cables and a software manual that read like a legal deposition, wondering why I couldn’t just talk to my transceiver. I had spent a small fortune on what was supposed to be a “seamless integration kit,” only to realize I was essentially trying to teach two different languages to machines that refused to shake hands. Most of the marketing fluff out there treats the concept like some mystical black box, but if you’re actually sitting at a desk trying to figure out what is a rig control interface, you don’t need a sales pitch—you need to know which pins are actually doing the heavy lifting.

    I’m not here to sell you on the latest overpriced proprietary dongle just because it has a shiny logo. My goal is to strip away the jargon and tell you exactly how these interfaces function in the real world, from basic CAT control to complex audio bridging. I’ll show you what actually works when you’re trying to automate a station, what’s a total waste of your bench space, and how to avoid the common mistakes that turn a productive DX session into a frustrating troubleshooting marathon.

    Table of Contents

    Decoding Radio Transceiver Control Protocols and Cat Command Sets

    Decoding Radio Transceiver Control Protocols and Cat Command Sets

    Once you’ve got your hardware physically linked, you have to deal with the language they’re actually speaking. Most people think they’re just sending data, but you’re really negotiating a conversation between two very different architectures. At the heart of this are the radio transceiver control protocols, which act as the grammar for your station. In the old days, this was almost exclusively RS-232 serial communication for ham radio, which meant dealing with baud rates, parity bits, and the constant headache of ground loops. Nowadays, most of us are just connecting radio to PC via USB, but don’t let that fool you into thinking the complexity has vanished; the underlying logic is still there, tucked inside those virtual COM ports.

    When you dive into the documentation, you’ll run into the CAT command set explained in a way that usually makes my eyes glaze over. Essentially, a command set is just a list of specific strings—like “FREQ 14.025″—that tell the radio to change its state. Some manufacturers use proprietary, closed-source nonsense that requires specific drivers, while others stick to more open standards. I’ve spent many a late night troubleshooting why a software suite couldn’t “see” a rig, only to realize the command set was expecting a carriage return that the interface simply wasn’t sending. It’s not magic; it’s just precise, sometimes finicky, digital handshaking.

    Why Connecting Radio to Pc via Usb Actually Matters

    Why Connecting Radio to Pc via Usb Actually Matters

    Back in the day, if you wanted to get a computer talking to your station, you were wrestling with bulky DB9 connectors and the temperamental nature of RS-232 serial communication for ham radio. It was a headache of baud rates and parity bits that could ruin a perfectly good evening. Today, connecting radio to PC via USB has simplified the physical layer, but don’t mistake that simplicity for magic. The USB cable is just the pipe; the real work is happening in how that digital data is packaged and sent to your transceiver’s processor.

    The real advantage isn’t just about ditching the old serial cables, though. It’s about the granularity of control you gain. When you move to a modern, computer-controlled radio setup, you aren’t just sending a signal; you are integrating your transceiver into a wider ecosystem. You can automate frequency sweeps, log every contact with millisecond precision, and let your software handle the heavy lifting of DSP. It turns your radio from a standalone box into a fully integrated node in your digital workflow, provided you actually understand the logic flowing through that USB port.

    Five Real-World Lessons from the Bench: Making the Interface Work for You

    • Don’t assume “Plug and Play” means “Works Perfectly.” Even with a modern USB-to-CAT connection, your computer might see a generic serial device instead of your specific transceiver. I’ve spent more nights than I’d like to admit troubleshooting COM port assignments and driver conflicts just to get a single frequency change to register. Check your Device Manager before you start cursing the hardware.
    • Prioritize isolation. If you are using an older rig with a serial-to-USB adapter, you’re introducing a potential path for ground loops or even transient spikes from your power supply to hit your computer’s motherboard. I always prefer interfaces that provide some level of electrical isolation; it’s much easier to replace a $30 interface than a $1,500 laptop.
    • Watch your baud rates like a hawk. It sounds basic, but if your software is screaming at 115,200 bps and your interface or radio is expecting 9,600, you’re going to get nothing but gibberish or, worse, erratic behavior where the radio jumps frequencies randomly. If the connection feels “laggy” or unstable, the baud rate is the first place I look.
    • Remember that CAT control is a one-way street unless you verify it. Just because your software says you’re on 14.250 MHz doesn’t mean the radio actually moved there. I always keep my hand near the VFO knob; if the interface is sending commands but the radio isn’t responding, you’ll find yourself chasing signals on the wrong frequency while thinking you’re dead on target.
    • Test your interface’s latency during a contest or a heavy DX pileup. An interface might work fine when you’re just casually tuning, but if it can’t handle a rapid-fire stream of commands from a digital mode or a high-speed logging program, it’s going to choke. If you’re planning on doing anything more intense than casual CW, find out exactly how many commands per second that little box can actually handle.

    The Bottom Line: What You’re Actually Buying Into

    Don’t mistake a USB cable for a magic wand; an RCI is about the language (CAT protocols) your computer uses to talk to your radio, and if they aren’t speaking the same dialect, you’re just staring at a screen.

    Modern USB-direct connections are a massive win for signal integrity, but they don’t bypass the need to understand your rig’s command set if you want to automate anything more complex than simple frequency changes.

    A good interface isn’t just about convenience; it’s about moving from manual knob-turning to a system where your software handles the heavy lifting, letting you focus on the signal rather than the hardware.

    The Real Purpose of the Interface

    At the end of the day, a rig control interface isn’t just some fancy way to avoid touching your radio; it’s about turning a standalone box into a cohesive system where your software can actually talk to your hardware. If you’re just clicking buttons on a screen but your radio is still running on its own clock, you haven’t built a station—you’ve just bought a very expensive way to stay confused.

    Wren Castellano

    Cutting Through the Complexity

    Cutting Through the Complexity of rig interfaces.

    At the end of the day, a rig control interface isn’t just another piece of kit to clutter your desk; it is the glue that holds a modern station together. We’ve looked at how CAT commands turn a pile of hardware into a cohesive system and why that USB connection is often the difference between a seamless workflow and a headache involving serial drivers and baud rate mismatches. Whether you are using a dedicated hardware interface or a direct USB connection to your transceiver, the goal remains the same: reducing the friction between your brain and the airwaves. Don’t get too bogged down in the proprietary weeds of every manufacturer’s command set, but do ensure you understand how your software is actually talking to your hardware. If you don’t know the protocol, you’re just guessing at the handshake.

    My advice? Don’t let the automation make you a passive operator. There is a certain magic in the hands-on feel of a physical tuning knob, and no amount of sophisticated software should replace your fundamental understanding of how your station functions. Use these interfaces to handle the heavy lifting—the logging, the frequency hopping, the digital modes—so that you can focus on what actually matters: the signal. Use the technology to expand your reach, but keep your eyes on the waterfall and your ears tuned to the noise floor. Radio is still a game of physics and patience, even when it’s being driven by a computer.

    Frequently Asked Questions

    If I'm using an older rig without a USB port, can I still get CAT control, or am I stuck with manual tuning?

    You aren’t stuck with manual tuning, not by a long shot. If your rig lacks a USB port, you’re likely looking at a serial connection—RS-232 is the old reliable here. You’ll just need a decent USB-to-Serial adapter to bridge the gap to your PC. Just a heads-up: don’t cheap out on the adapter. I’ve seen more “ghost” commands and dropped connections caused by $5 unbranded chips than I have by actual software bugs.

    Does the interface actually affect the signal quality, or is it strictly for the computer's benefit?

    Strictly speaking? No. The interface handles the “brain” work—the CAT commands and timing—not the actual RF path. Your signal quality is determined by your power supply, your filters, and your antenna’s height above ground. However, if you’re using a cheap, noisy USB interface that dumps digital interference right into your rig’s control lines, you might see some unexpected noise floor issues. But for the most part, the interface manages the logic, not the physics.

    How do I know if my specific radio's command set is actually compatible with the software I want to run?

    Don’t just trust the marketing fluff on the box. The real way to know is to dig into the manufacturer’s manual—look specifically for the “CAT Control” or “Programming” section. If they don’t explicitly list a command set like Kenwood’s GS-232 or Icom’s CI-V, you’re playing a guessing game. I usually check the software’s supported hardware list first, but if your rig isn’t there, I’ll pull up a terminal emulator and see if the radio actually responds to a basic query command.

  • How to Choose a Power Supply That Will Not Wreck Reception

    How to Choose a Power Supply That Will Not Wreck Reception

    I remember sitting in my garage ten years ago, staring at a brand-new transceiver that I’d spent six months saving for, only to have it sputter and die the moment I keyed the mic on a high-power mode. I had followed every “expert” guide on how to choose a power supply for a radio, buying a unit that boasted a fancy digital display and a sleek chassis, but the moment the rig demanded real juice, the voltage sagged like a wet paper bag. It wasn’t a radio problem; it was a current problem. Most people get blinded by the shiny specs on the box and forget that a radio is essentially a hungry beast that needs steady, reliable meals to perform.

    I’m not here to sell you on some overpriced, boutique power brick that promises “audiophile grade” purity for a transceiver. My goal is to give you the actual numbers you need to look at—the stuff the marketing brochures conveniently leave out. We are going to talk about real-world current draw, thermal stability under load, and why that “13.8V” label on a cheap transformer is often a total lie. By the time we’re done, you’ll know exactly how to match your power to your rig so you can stop chasing ghosts in the noise floor and start actually making contacts.

    Table of Contents

    Why Amperage Requirements for Ham Radio Arent Just Suggestions

    Why Amperage Requirements for Ham Radio Arent Just Suggestions

    Here is the reality: that little sticker on the back of your transceiver that says “10A” is a minimum, not a ceiling. When you’re just idling on receive, sure, you’re barely sipping juice. But the second you key up for a high-duty cycle mode like FT8 or a heavy SSB transmission, your rig is going to demand a massive, sudden surge of current. If your amperage requirements for ham radio aren’t met by the supply, you aren’t just going to lose signal strength; you’re going to see the voltage sag. I’ve seen plenty of operators think they have a bad antenna or a failing radio, only to realize their power supply was choking the moment the rig tried to actually work.

    It isn’t just about the raw current, either. If you’re using a cheap, poorly filtered setup, you’re going to deal with significant power supply ripple noise. This isn’t just a theoretical concern from a textbook; it shows up as a constant, annoying hum in your audio or, worse, as a floor of broadband noise that makes weak-signal work impossible. You want a supply that stays rock-steady even when the load shifts, or you’ll spend your entire evening chasing ghosts instead of making contacts.

    Regulated vs Unregulated Power Supplies the Math That Matters

    Regulated vs Unregulated Power Supplies the Math That Matters

    Here’s the thing about the “Regulated vs Unregulated” debate: it’s not just a theoretical distinction in a textbook. If you’re running an old-school linear supply with a heavy transformer, you’re getting a massive, stable reservoir of current that handles sudden spikes like a champ. However, if you don’t have a decent filter stage, that power supply ripple noise is going to find its way right into your receiver. I’ve spent more nights than I care to admit chasing a hum in my audio only to realize my “clean” supply was leaking AC leakage straight into the signal path.

    Switching to a modern switching power supply (SMPS) makes things compact, but you have to be careful. They are efficient, but they can be incredibly noisy if they aren’t well-shielded. If you don’t check the dc power supply specifications for high-frequency noise, you might find yourself dealing with unexpected electromagnetic interference in radio that makes your local noise floor look like a mountain range. My rule of thumb? If you’re using a switching supply for a sensitive SDR setup, measure the noise floor with the radio on and the power supply connected before you commit to your station layout.

    Five Things to Check Before You Plug In

    • Stop looking at the “peak” current rating on the box and start looking at the continuous rating. If your rig pulls 20 amps during a heavy FT8 session or a high-duty cycle SSB call, and your power supply is only rated for 20 amps at its absolute limit, you aren’t running a station—you’re running a heater. Aim for a supply that can handle your maximum expected draw at about 70% capacity if you want it to last more than one summer.
    • Watch out for the “ripple” in the noise floor. I’ve seen plenty of cheap switching supplies that look great on a spec sheet but dump so much high-frequency switching noise back into the DC line that your SDR looks like a solid wall of static. If you’re using a switching supply, make sure it’s actually shielded for RF, or better yet, keep a decent LC filter handy to clean up that mess before it hits your rig.
    • Don’t forget the voltage drop over your cables. You can have a perfect 13.8V at the terminal of the power supply, but if you’re running fifty feet of thin, 18-gauge wire to your shack, you might only be seeing 12.5V by the time it hits the radio. I measure the voltage at the actual radio terminals while transmitting; if that number dips significantly when you key the mic, your wire is too thin or your connections are garbage.
    • Consider your environment, especially if you’re doing portable work. If you’re taking your gear up a ridge in the wind, a heavy, old-school linear transformer is going to be a pain in the neck to carry, but it’s much more resilient to temperature swings than a cheap switching unit. If you go with a lightweight switching supply for portability, make sure it actually has decent thermal management, because those things can throttle their output the second they get warm.
    • Check the connector quality and the fuse type. I’ve lost count of how many “professional” power supplies come with flimsy terminals that barely grip the lug. If the connection is loose, you’re creating resistance, and resistance creates heat and voltage drops. Use heavy-duty lugs, tighten them down, and for heaven’s sake, make sure the fuse is actually rated for the load you’re pulling, not just a random piece of wire that happens to fit the holder.

    The Bottom Line Before You Plug In

    Stop looking at the voltage and start looking at the current headroom; if your rig pulls 20 amps during a heavy SSB call, a 20-amp supply is going to struggle, and you want at least a 25% buffer to keep the voltage from sagging.

    Don’t get fooled by “peak” ratings on a spec sheet—measure what the supply actually delivers when the rig is under load, because a supply that can’t hold its steady state is just a very expensive way to introduce noise into your receiver.

    If you’re running an unregulated supply, you better have a plan for that voltage rise, or you’re going to spend your afternoon replacing blown protection diodes instead of making contacts.

    ## The Real Cost of Underpowering

    “Stop looking at the sticker on the box and start looking at the transient spikes. If your power supply is rated for 20 amps but starts sagging the second you key the mic on a high-duty cycle, you aren’t just losing signal strength—you’re inviting frequency drift and noise that’ll make you think your antenna is the problem when it’s actually just your juice.”

    Wren Castellano

    Stop Guessing and Start Measuring

    Stop Guessing and Start Measuring power draw.

    At the end of the day, choosing a power supply isn’t about matching a label on a box; it’s about understanding the reality of your rig’s draw. If you’ve ignored the difference between steady-state current and those massive, momentary spikes during a transmit cycle, you’re asking for trouble. Remember that a regulated supply might give you that clean 13.8V you want, but if it doesn’t have the headroom to breathe when you key up, you’ll just be troubleshooting a “faulty” radio that was actually just starving for juice. Don’t settle for “close enough” when it comes to your amperage; measure your actual peak draw before you commit to a piece of gear, or you’ll spend more time chasing voltage sags than actually making contacts.

    There is a certain kind of magic in knowing exactly why your station is working—and more importantly, why it isn’t. When you stop relying on the marketing fluff and start looking at the actual electrical stability of your setup, you move from being someone who just operates a radio to someone who truly understands the machine. Radio is a hobby of physics, not of guesswork. Build your power plant with the same precision you’d use for your antenna system, and you’ll find that when the ionosphere finally decides to cooperate, your gear will be ready to deliver exactly what you built it to do.

    Frequently Asked Questions

    If I’m using a switching power supply instead of a heavy linear one, how do I know if the high-frequency noise is going to bleed right into my receive audio?

    The short answer? Don’t guess; use your rig. Set your radio to a quiet frequency, turn up the gain, and listen. If you hear a rhythmic “chirp” or a constant high-pitched whine that changes when you adjust the power supply’s load, you’ve got switching noise bleeding into your audio. If you’re feeling proactive, grab an oscilloscope and check the DC line for ripple. If that ripple is messy, your receiver’s front end is going to pay the price.

    I’ve seen some cheap supplies claim 30 amps on the label, but how do I actually test if they can sustain that load without the voltage dropping when I key the mic?

    Don’t trust the sticker on the box; manufacturers love a big, round number that only exists for a millisecond. To test it, you need a dummy load and a decent multimeter. Set your rig to a high-power mode, key the mic, and watch the voltage rail. If that 13.8V dips below 12.5V the moment you transmit, that 30-amp claim is a lie. You aren’t looking for peak capacity; you’re looking for stability under load.

    Is it worth spending the extra money on a supply with a built-in remote control port, or is that just something designed to make my shack look more professional?

    It’s not about looking professional; it’s about where you actually put the gear. If you’re running a standard desk setup, skip it. But if you’re building a dedicated rack or, like me, tucking the heavy, heat-generating stuff into a ventilated cabinet under the desk to clear up workspace, that port is a lifesaver. Being able to toggle the output or monitor current from your transceiver means you aren’t crawling on the floor every time you want to adjust something.

  • What to Check Before You Buy a Used Radio

    What to Check Before You Buy a Used Radio

    I spent three hours last Tuesday sitting in a damp field, staring at a spectrum analyzer that was telling me absolutely nothing useful because the rig I’d just picked up on a local forum had a dying receiver stage. The seller had been adamant that it “worked like a charm,” but they were clearly just riding a massive solar spike that masked the noise floor issues. When you’re hunting for gear, people will try to sell you on the shiny knobs and the brand name, but knowing what to look for in a used radio has very little to do with how much it cost in 1995. If you aren’t checking the actual stability of the local oscillator or looking for signs of acid leakage from old electrolytic capacitors, you aren’t buying a radio—you’re buying a very expensive paperweight.

    I’m not here to give you a checklist of marketing buzzwords or tell you which brand is “legendary.” My promise to you is simpler: I’m going to tell you how to test the components that actually matter. We’re going to talk about signal purity, thermal stability, and how to spot the difference between a rig that’s well-maintained and one that’s been beaten on a workbench for twenty years.

    Table of Contents

    Inspecting Vintage Radio Components Without Getting Fooled

    Inspecting Vintage Radio Components Without Getting Fooled

    When you crack open a chassis, don’t just look for dust; look for the story the components are telling you. If you see a graveyard of leaking electrolytic capacitors or those telltale dark scorch marks around a power transistor, walk away—or prepare to spend your entire weekend with a soldering iron and a desoldering pump. Common radio hardware failures often start with heat, so check the mounting of the final transistors. If they look like they’ve been baked in a kiln, the heat sinking was likely inadequate, and you might be looking at a rig with compromised traces or even a failing transformer.

    I also tell people to keep a sharp eye on the mechanical side of things. If it’s a tube rig, check the sockets for oxidation; if it’s solid-state, look at the potentiometers. If the tuning feels “crunchy” or gritty, those contacts are oxidized, and you’ll be fighting intermittent signal drops for months. Inspecting vintage radio components is as much about touch and smell as it is about sight. If it smells like ozone or burnt phenolic resin, that radio has been pushed far beyond its design limits, and no amount of cleaning will fix the underlying damage.

    Common Radio Hardware Failures That Kill Your Budget

    Common Radio Hardware Failures That Kill Your Budget

    When you’re digging through a pile of gear, you have to look past the shiny chassis and check the stuff that actually matters. One of the most frequent common radio hardware failures I see in older rigs involves the electrolytic capacitors. They’re essentially little chemical batteries that dry out over twenty years; if you see any leaking fluid or bulging tops, walk away. Even if the rig seems fine on the bench, those aging caps can cause erratic frequency drift. I’ve spent far too many afternoons chasing used radio frequency stability issues only to find a single dried-out capacitor in the PLL loop was the culprit.

    Then there’s the power amplifier stage. If the previous owner pushed a heavy load or used a poorly matched antenna, they might have cooked the final transistors. You can sometimes spot this during audio output quality testing—if the signal distorts or loses power significantly as you increase the gain, the PA is likely wounded. It’s a costly fix that can easily turn a “bargain” into a money pit. Always ask if they’ve seen a high VSWR alarm lately; if they hesitate, they might be hiding a dying final.

    Five Red Flags That Should Make You Walk Away

    • Check the connector integrity. If you see a rig with mismatched PL-259s or connectors that look like they’ve been soldered and desoldered a dozen times, walk away. It’s usually a sign that the previous owner was fighting a high SWR issue they couldn’t solve, and they likely cooked the final transistors trying to force it through.
    • Demand a real test, not just a “it powers on” claim. A radio might look fine on the bench, but if the seller can’t demonstrate a clean signal on a band with moderate solar activity, you’re just buying a paperweight. I don’t care if the screen lights up; I want to see the frequency stability under a slight load.
    • Look for “modding” scars. If the chassis is covered in non-standard drill holes or there’s a mess of jumper wires visible through the vents, be careful. I’ve seen plenty of “upgraded” rigs where a well-meaning amateur accidentally bypassed a critical protection circuit, turning a reliable transceiver into a ticking time bomb.
    • Inspect the display and knobs for physical fatigue. If the tuning knob feels gritty or the LCD has those inevitable dark patches, it tells me how the radio was treated. A rig that’s been bounced around in a truck bed or left in a damp shack is going to have internal corrosion that no amount of contact cleaner will fix.
    • Verify the cooling system. Open the vent and look for dust buildup or signs of dried-out electrolytic capacitors near the heat sinks. If the radio has been run hard—like in a contest environment or a high-duty cycle repeater—the thermal stress on the components is much higher, and you’ll likely be replacing something within the first six months of owning it.

    The Bottom Line Before You Hand Over the Cash

    Never buy a rig based on a “looks good in photos” assessment; if you can’t see a steady, clean signal on a spectrum analyzer or a decent SWR reading on a known load, you’re just buying a very expensive paperweight.

    Check the cooling fans and heat sinks—if the previous owner ran this thing at full tilt on HF without any airflow, the internal components have likely been cooking for years, and you’ll be replacing them sooner rather than later.

    Always ask for a specific test report or a video of the radio operating under low solar activity; anyone can claim a rig is “perfect” when the ionosphere is wide open, but you want to know how it performs when the conditions are actually working against you.

    The Real Cost of a "Good Deal"

    Don’t let a shiny chassis or a low price tag distract you; a radio that looks mint but has drifted ten kilohertz off-frequency because of a dying crystal or a leaking electrolytic capacitor isn’t a bargain—it’s a project you didn’t sign up for.

    Wren Castellano

    The Final Check

    Performing The Final Check on used gear.

    At the end of the day, buying used gear is a trade-off between a bargain and a potential headache. You’ve looked at the capacitors, you’ve checked for the tell-tale signs of overheating on the PCB, and you’ve hopefully verified that the power amplifier isn’t just screaming into a void of high VSWR. Don’t let a shiny chassis distract you from a messy internal layout or a history of questionable repairs. If the seller can’t walk you through a basic test—showing you a clean signal or a stable frequency lock—then you aren’t buying a radio, you’re buying a lottery ticket. Stick to the measurements, trust your eyes more than the marketing fluff, and remember that a cheap rig becomes the most expensive thing you own the moment it fails on a clear night.

    But don’t let the fear of a bad deal keep you from the workbench. There is a specific kind of satisfaction that comes from taking a piece of gear that someone else gave up on, cleaning the oxidation off the contacts, and hearing that first clear DX contact after a successful repair. Radio is about more than just clicking buttons on a modern SDR; it’s about the connection between the hardware and the physics of the air around us. If you do your homework and buy with a bit of measured skepticism, you won’t just be acquiring a tool—you’ll be continuing the cycle of keeping this hobby alive, one well-maintained transceiver at a time.

    Frequently Asked Questions

    Should I be worried about the signal drift on these older VFOs, or is that just part of the charm?

    “Charm” is a nice word for it, but in practice, it’s just a headache. If you’re looking at a rig with a VFO that drifts more than a few hundred Hertz after it warms up, it’s usually a sign of aging capacitors or a poorly compensated temperature coefficient in the oscillator circuit. I’ve seen it a dozen times. If you can live with constant retuning, go for it; if you want to actually work a station, it’s a problem.

    If the seller says the rig "works perfectly," what specific tests should I demand to see before I hand over the cash?

    “Works perfectly” is a phrase that scares me. It’s too broad. If they won’t let you see it in action, walk away. I want to see a clean signal on a band with low solar activity—don’t let them claim a miracle just because the ionosphere was wide open. Ask to see the SWR reading on a known good load, and if it’s a transceiver, make sure the receiver isn’t deaf when you’re testing it away from a high-power source.

    Is it worth paying a premium for a radio with a low number of operating hours, or does that tell me nothing about how well it was actually maintained?

    Low hours are a bit of a vanity metric. I’ve seen rigs with 50 hours that sat in a damp garage and died, and rigs with 5,000 hours that were kept in a climate-controlled shack and are still pristine. Instead of obsessing over the hour meter, look at the chassis. Is there dust buildup in the fan housing? Are the connectors oxidized? I’d rather buy a well-loved rig with high hours than a “mint” one that’s been rotting in storage.

  • How to Choose a First Hf Radio Without Overbuying

    How to Choose a First Hf Radio Without Overbuying

    Stop listening to the guys in the forums who swear you need a $3,000 transceiver just to hear a signal through the noise. I’ve spent twenty years designing front ends and sitting on damp hillsides, and if there’s one thing I’ve learned, it’s that most of the “essential” gear lists you see online are just expensive ways to solve problems you don’t actually have. When you start researching how to choose your first hf radio, you’re going to run into a wall of marketing fluff and outdated advice from people who haven’t measured a signal-to-noise ratio since the Reagan administration. It’s frustrating, it’s expensive, and frankly, it’s unnecessary.

    I’m not here to sell you a dream or push a specific brand just because they have a shiny logo. My promise to you is simple: I will give you the unvarnished truth based on actual measurements and real-world operating. We’re going to look at what actually matters—receiver sensitivity, bandwidth, and how a rig handles a messy antenna—without the hype. If a radio is a waste of your hard-earned money, I’ll tell you, and if a budget rig performs like a champ under the right conditions, you’ll be the first to know.

    Table of Contents

    Dont Waste Money on Overpriced Entry Level Ham Radio Gear

    Dont Waste Money on Overpriced Entry Level Ham Radio Gear

    Look, I like the big manufacturers as much as the next person, but don’t let a shiny marketing brochure trick you into buying a rig that’s overpriced just because it has a familiar logo on the front. When you’re looking at entry level ham radio gear, you’ll notice a massive price gap between “budget” rigs and “premium” ones. Often, that gap isn’t going toward better receivers or lower noise floors; it’s going toward a fancy touchscreen or a chassis that looks good on a desk. If you’re just starting out, you don’t need a $2,000 machine to learn the ropes. You need something with a decent dynamic range and a tuner that doesn’t give up the ghost the moment your antenna isn’t perfectly resonant.

    I’ve seen too many newcomers get caught in the trap of choosing an expensive hf transceiver vs base station setup before they even know if they prefer CW or SSB. If you’re planning on being portable—which, if you follow my lead, you should be—don’t sink your entire budget into a heavy, power-hungry desktop unit. Buy a mid-range rig that actually performs, and take the money you saved to buy a better power supply or a decent antenna tuner. Measure twice, buy once.

    Hf Transceiver vs Base Station What the Manuals Wont Tell You

    Hf Transceiver vs Base Station What the Manuals Wont Tell You

    The brochures will try to blur the lines between a compact transceiver and a dedicated base station, but they’re two different animals. A transceiver is built for mobility—think lighter chassis, maybe a smaller display, and a focus on being “good enough” for a variety of settings. It’s fine for a desk, but the moment you try to push it, you’ll see the compromises. When I’m out on a ridge, I want a transceiver because I can carry it, but I’m not expecting it to drive a massive, high-power amplifier without sweating.

    The real issue is how they handle the workload. A true base station setup is designed to sit there, connected to a heavy-duty power supply and a permanent antenna system that isn’t going anywhere. When comparing hf transceiver vs base station setups, you have to look at the thermal management and the stability of the internal oscillator. If you’re planning on spending hours in CW or digging weak signals out of the noise, a budget transceiver might start drifting once it gets warm. Don’t mistake portability for versatility; if you want to sit in a comfortable chair and work the world, build for a station, not a backpack.

    Five Things to Check Before You Swipe Your Card

    • Look at the actual receiver performance, not just the “wattage” on the box. A 100-watt rig is a paperweight if the dynamic range is so poor that a single nearby station wipes out the weak signal you’re actually trying to hunt. I’ve sat in the dirt with rigs that had plenty of power but couldn’t pull a signal out of a noisy floor to save their lives.
    • Check the interface options. If you aren’t planning on spending your entire life turning physical knobs—and let’s be honest, most of us eventually want to use a computer or a tablet—make sure the rig has decent USB connectivity or at least a robust CAT control implementation. Don’t get stuck in 1985 because the manufacturer decided “modern connectivity” was an optional luxury.
    • Don’t ignore the tuner situation. You can buy a rig with a built-in antenna tuner, but don’t assume that’s the end of your story. I always recommend having an external tuner in your kit, especially if you’re planning to move away from a perfect dipole and start throwing wires up in trees or on hills. A built-in tuner is a convenience; a good external tuner is a necessity.
    • Verify the build quality of the connectors and the cooling. I’ve seen “entry-level” rigs where the chassis feels like it was made from a recycled soda can and the cooling fan sounds like a jet engine taking off. If you’re going to be operating in a shack that gets warm, or if you’re lugging gear into the field, you want something that won’t thermal throttle the moment you try to work a DX station.
    • Figure out your real operating environment before you commit. If you’re building a dedicated shack, a heavy desktop rig is fine. But if you have even a slight itch to take your gear outside, look at the footprint and the power requirements. There is nothing more frustrating than buying a beautiful, heavy piece of gear only to realize it requires a dedicated 20-amp circuit and a custom-built desk just to turn it on.

    The Bottom Line Before You Swipe Your Card

    Stop chasing specs on a page; a radio is only as good as the signal it can actually pull out of the noise, so prioritize receiver sensitivity and dynamic range over a fancy color touchscreen.

    Don’t get trapped in the “all-in-one” lie—if you’re buying a portable rig, make sure the power draw won’t kill your battery bank in twenty minutes, and if you’re going base station, ensure you have the bench space for the actual test gear you’ll need to tune it.

    Budget for the antenna and the feedline first, not the radio; I’ve seen more money wasted on mediocre transceivers paired with junk wires than I have on high-end rigs running well-tuned, properly elevated dipoles.

    The Real Metric of Success

    Stop looking at the feature list on the box and start looking at the signal-to-noise ratio in your actual backyard; a high-end rig with a cheap, poorly mounted antenna is just an expensive way to listen to static, but a modest transceiver paired with a well-placed wire can pull DX out of the ether when the ionosphere actually decides to cooperate.

    Wren Castellano

    The Bottom Line

    Choosing your first HF rig: The Bottom Line.

    At the end of the day, choosing your first HF rig isn’t about finding the most expensive box with the most buttons; it’s about matching the hardware to your actual life. If you’re planning to sit in a dedicated shack, get a base station with decent thermal management. If you’re like me and want to drag your gear up a ridge to see what the view looks like, prioritize weight and power efficiency. Remember that a transceiver is only as good as the antenna you feed it, and no amount of high-end circuitry will compensate for a poorly placed wire or a lack of ground plane. Don’t get distracted by the marketing fluff—look at the actual specs, check the build quality, and buy for your intended use, not for a version of yourself that doesn’t exist yet.

    Once you finally make that first contact—the one where the signal is weak, the noise floor is high, and the ionosphere is being particularly difficult—you’ll realize that the gear is just the tool. The real magic is in the connection you’ve made through the ether. Radio is one of the few places left where you can truly understand the physics of what is happening between your antenna and a station halfway across the world. So, stop overthinking the perfect setup, get something reliable, and get on the air. The bands are waiting, and I promise, the first time you hear a voice through the static, it’s worth every penny.

    Frequently Asked Questions

    Should I prioritize a radio with a built-in antenna tuner, or is it better to invest that money into a dedicated external tuner and better coax?

    Look, if you’re planning to stay at a desk, a built-in tuner is fine. But if you want to actually use the radio, buy the external tuner and better coax. Internal tuners are often just glorified impedance matching circuits that struggle when your antenna isn’t perfectly resonant. An external tuner gives you more headroom and better stability, especially if you’re working with wire antennas at low heights. Spend the money on the tuner; your SWR will thank you.

    Does a high-end SDR-based transceiver actually offer a measurable advantage over a traditional analog rig when I'm working in noisy conditions?

    Look, the marketing says SDRs have “infinite dynamic range,” but that’s a theoretical number that doesn’t account for your local noise floor. In my testing, a high-end SDR-based rig shines when you’re hunting weak signals in a clean environment because of that superior selectivity. But if you’re working in a noisy urban area, a well-built analog rig with a robust front end often holds its own better. It’s not magic; it’s just how the filters handle the garbage.

    If I plan on doing a lot of portable operating, how much weight am I realistically going to sacrifice for a radio that actually has a decent receiver?

    You’re going to feel it in your shoulders. If you want a receiver that can actually pull a signal out of the noise rather than just amplifying the local interference, you’re looking at a weight penalty. A lightweight QRP rig is great for a quick summit, but you’ll sacrifice dynamic range and filtering. Realistically, expect to carry an extra 1.5 to 2 kilograms for a radio with a decent front end. It’s a trade-off between your knees and your signal-to-noise ratio.