Blog

  • What an Oscilloscope Shows You That a Meter Cannot

    What an Oscilloscope Shows You That a Meter Cannot

    I remember sitting in a cramped lab back in the late nineties, staring at a multimeter reading that insisted my power supply was perfectly steady, while my transceiver was behaving like it had a fever. I was chasing a ghost in the circuit, relying on a little two-digit LCD to tell me the truth when the truth was actually a high-frequency oscillation that no voltmeter could ever catch. People often ask me, “what is an oscilloscope for?” and they expect a textbook definition about visualizing voltage over time. But if you’re just looking for a definition, go buy a dictionary; if you’re looking to stop flying blind during a build, you need to understand that an oscilloscope is actually your eyes for the invisible chaos happening in your wires.

    I’m not here to sell you on some shiny, overpriced benchtop unit with more features than you’ll use in a lifetime. My goal is to give you the straight talk on how to use this tool to actually solve problems, from debugging a noisy SDR front-end to seeing exactly why your filter is clipping. I’ll tell you when a cheap handheld is plenty and when you’re just wasting your money on bandwidth you’ll never touch.

    Table of Contents

    Mastering Electrical Waveform Analysis Beyond Simple Voltmeter Readings
    Mastering Electrical Waveform Analysis Beyond Simple Voltmeter Readings

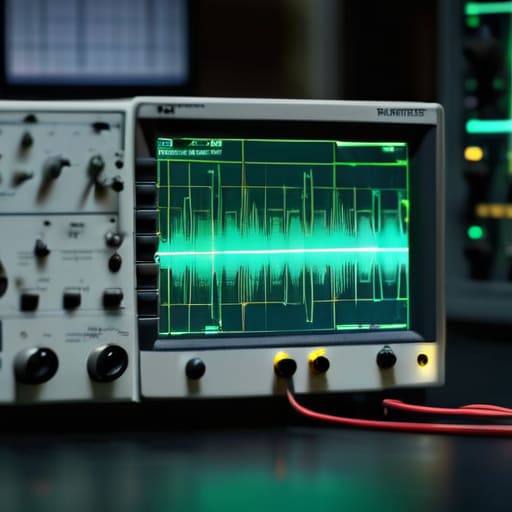
    If you’re still relying solely on a multimeter to diagnose a circuit, you’re essentially trying to describe a movie by looking at a single, frozen photograph. A multimeter is great for telling me if a battery is dead or if a trace is broken, but it’s useless when you need to see how a signal actually behaves. When I’m troubleshooting a poorly filtered power supply for my SDR, I don’t just want to know the average voltage; I need to see the ripple. This is where electrical waveform analysis becomes the difference between “I think this is the problem” and “I know exactly where the noise is coming from.”

    Real-world signals aren’t perfect sine waves living in a textbook. They are messy, they glitch, and they spike. By mastering measuring voltage over time, you start to see the transient spikes that happen when a relay clicks or a switching regulator kicks in—events that happen too fast for a digital readout to ever catch. Whether you are using an older analog unit or a modern digital one, the goal is the same: stop looking at numbers and start looking at the shape of the electricity.

    Measuring Voltage Over Time to Catch the Glitches You Miss
    Measuring Voltage Over Time to Catch the Glitches You Miss

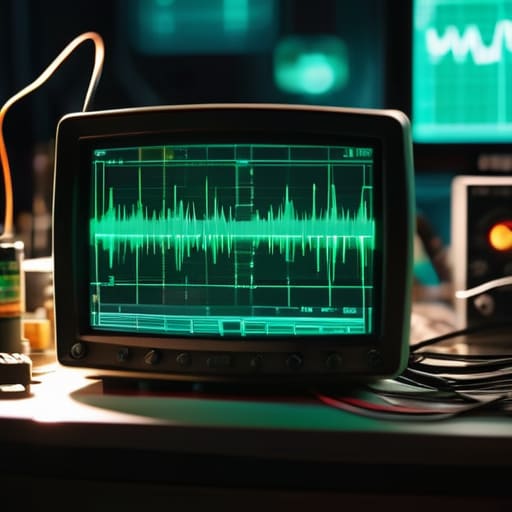
    If you’ve only ever used a multimeter, you’re essentially looking at a photograph of a race and trying to tell me who won. A multimeter gives you a number—a snapshot of the average or the peak—but it tells you nothing about the chaos happening in between those readings. When I’m troubleshooting a power supply for a portable rig or checking the output of a small amplifier, I’m not just looking for 13.8 volts; I’m looking for the transient spikes that occur the moment the PTT is keyed. Measuring voltage over time is the only way to catch those millisecond-long glitches that can fry a sensitive SDR front-end before your eyes even blink.

    This is where actual oscilloscope signal visualization becomes your best friend. Instead of seeing a steady line, you see the reality: the ripple from a poorly filtered DC source or the momentary sag when a high-power stage draws current. I remember once spending three hours chasing a “ghost” interference on a VHF setup, only to realize with an oscilloscope that my regulator was oscillating at a frequency I couldn’t see with a DMM. If you aren’t looking at the waveform, you’re just guessing.

    Stop Guessing and Start Seeing: 5 Ways an Oscilloscope Actually Saves Your Sanity

    • Stop trusting your multimeter for high-speed transients. A DMM is great for telling me my power supply is sitting at 13.8V, but it’s blind to the microsecond voltage spikes that are currently cooking your sensitive SDR front-end. If you aren’t seeing the spike on a scope, it’s probably already broken something.
    • Use it to hunt down parasitic oscillations. I’ve spent more nights than I care to admit chasing a “noisy” amplifier only to find it was oscillating at a frequency my eyes couldn’t see and my ears couldn’t hear. An oscilloscope lets you see that unintended sine wave dancing on top of your carrier before you blow a transistor.
    • Check your signal integrity, not just your signal strength. It’s one thing to have a signal; it’s another to have a clean one. If your square waves look more like rounded hills, your rise times are trash, and no amount of gain is going to fix the data errors you’re about to encounter.
    • Validate your filter designs in the real world. You can run all the SPICE simulations you want on your laptop, but those models don’t know about the component tolerances or the stray capacitance in your breadboard. I always probe the output of a new low-pass filter to see if the actual roll-off matches what I calculated.
    • Debugging your clock sources. If your microcontroller or your radio’s local oscillator is drifting or jittering, a multimeter will just show you a steady average. You need to see the actual period and the stability of that waveform to know if your timing is actually reliable or just lucky.

    The Bottom Line: When to Put Down the Multimeter

    If you’re looking for a steady DC voltage or a slow-moving signal, stick to your multimeter; don’t waste your time or your budget trying to “catch” a transient with a tool that isn’t built for it.

    An oscilloscope is your only way to see the actual shape of a signal, which is the difference between knowing a circuit is “on” and knowing that your power supply is actually dumping high-frequency noise into your sensitive RF front end.

    Use an oscilloscope to hunt for the “ghosts” in your system—those millisecond-long glitches or ringing edges that cause a microchip to reset or a radio to lose lock—because if you can’t see the waveform, you’re just chasing your tail.

    ## Stop Guessing and Start Seeing

    A multimeter tells you the average of what happened, but an oscilloscope tells you the truth about what is actually happening; it’s the difference between reading a summary of a storm and actually standing out in the rain to see where the lightning is hitting.

    Wren Castellano

    Stop Guessing and Start Seeing

    Stop Guessing and Start Seeing waveforms.

    At the end of the day, an oscilloscope isn’t just another expensive piece of kit to clutter your workbench; it is the difference between knowing your circuit is working and actually knowing why it isn’t. We’ve talked about moving past the limitations of a multimeter, catching those transient voltage spikes that wreak havoc on your RF front end, and finally being able to visualize the actual shape of your signal. If you are still trying to troubleshoot a noisy power supply or a drifting oscillator using nothing but a DMM and a prayer, you are essentially flying blind. You need to see the waveform in real-time to understand the relationship between time, voltage, and frequency, rather than just staring at a static number that might be lying to you.

    I remember my first decent scope—it was a hand-me-down analog unit that felt like it belonged in a museum—but the moment I saw a square wave actually behaving like a square wave, everything changed. It turns the “magic” of electronics into something tangible and measurable. Don’t let the intimidating interface or the price tags scare you off; every bit of data you pull from a screen is a step toward mastering your craft. Whether you’re building a simple filter or a complex SDR interface, stop relying on luck and the ionosphere’s mood. Get the data, see the truth, and build something that actually works when you flip the switch.

    Frequently Asked Questions

    I’ve got a decent multimeter, so when am I actually going to hit the point where a voltmeter just isn't enough?

    You’ll hit that wall the second you stop measuring steady DC and start chasing something that moves. A multimeter is great for telling me a battery is dead or a trace is continuous, but it’s essentially a blind man feeling a wall. It gives you an average, but it won’t tell you if that average is hiding a 50ns spike that’s frying your transceiver’s front end. If it happens faster than a human blink, your meter is useless.

    Do I really need a high-bandwidth scope for basic antenna tuning, or am I just paying for features I'll never touch?

    Look, if you’re just checking for DC offsets or looking at a slow-moving signal on a low-frequency transceiver, a cheap, entry-level scope is fine. But don’t get caught out. If you’re trying to debug a high-speed digital controller or look at actual RF transients, a low-bandwidth scope will just lie to you by smoothing everything out. Buy enough bandwidth to see the actual shape of your signal, not just a rounded-off ghost of it.

    If I'm working with high-frequency RF signals, how do I stop the scope itself from becoming part of the circuit and messing up my measurements?

    You’ve hit on the classic trap. Once you move into RF, your probe isn’t just a sensor; it’s a component. If you use a long, floppy ground lead, you’ve basically just built a tiny loop antenna that’s going to soak up every bit of EMI in the room and dump it right into your signal. Stop using those long alligator clips. Use a short ground spring or a coaxial probe instead. If you don’t minimize that inductance, you aren’t measuring your circuit—you’re measuring your probe.
  • How to Use an Antenna Analyser Properly

    How to Use an Antenna Analyser Properly

    I spent three hours last Tuesday on a ridge in the Blue Ridge Mountains, sweating through my shirt and wrestling with a dipole that I swore was tuned perfectly back in my garage. I was staring at a flat SWR reading on my rig, wondering why I couldn’t pull a single signal out of the noise, only to realize my ground clearance was practically non-existent. That was the moment I realized that knowing how to use an antenna analyser isn’t just about reading a number on a screen; it’s about understanding the relationship between your wire, your height, and the actual impedance of the system. If you aren’t measuring the reality of your setup, you’re just guessing in the dark.

    In this guide, I’m going to skip the academic fluff and show you how to actually get useful data from your gear. We’ll walk through the practical steps of setting your frequency ranges, interpreting what those Smith charts are actually trying to tell you, and—most importantly—how to account for the environment around your antenna. I’ll give you the honest truth on what matters and what’s just noise, so you can stop wasting your weekends tuning antennas that were never going to work in the first place.

    Table of Contents

    Guide Overview

    Total Time: 1-2 hours
    Estimated Cost: $30-150
    Difficulty: Beginner

    Tools & Supplies

    • Antenna Analyser (NanoVNA or similar device)
    • Coaxial Cable (Connection between antenna and device)
    • Laptop or Smartphone (For viewing graphs/data)
    • Antenna under test (The target wire or dipole)
    • Dummy Load (To prevent RF transmission during testing)
    • Measuring Tape (To verify physical dimensions)

    Step-by-Step Instructions

    • 1. First things first, get your gear set up and calibrate the instrument. Most people skip this or do it half-heartedly, but if you don’t account for the length of your test lead, every reading you take is going to be a lie. Connect your lead to the analyzer, run the calibration routine, and make sure you’re telling the device exactly how much cable is sitting between the port and the antenna. If you don’t zero out that capacitance, you’re just chasing ghosts.
    • 2. Once you’re calibrated, set your frequency range. Don’t just leave it on auto-scan if you’re looking for something specific; it’ll take forever and the resolution will be garbage. If you’re working a 20-meter dipole, center your sweep around 14.150 MHz. I’ve found that a wider sweep is fine for a general idea, but if you want to see the actual shape of the resonance, you need to tighten that window down.
    • 3. Now, get your antenna in position—and I mean actually in position. I see people sitting in their living rooms trying to measure a wire that’s still coiled on the floor or draped over a chair. That’s not a measurement; that’s a fantasy. Get the antenna up at its intended height above ground. A dipole at two meters behaves completely differently than one at ten meters, and your SWR readings will reflect that reality.
    • 4. Connect your lead to the antenna and start your sweep. Watch the SWR curve, but pay more attention to the impedance plot if your device allows it. Everyone obsesses over SWR being 1:1, but I’d much rather see if my antenna is sitting at 50 ohms or if it’s swinging wildly between 20 and 100. Knowing the real impedance tells you if you need to add a loading coil or if you just need to adjust the physical length of the element.
    • 5. Look for the “dip”—that’s your resonant frequency. When the SWR hits its lowest point, take note of that frequency and compare it to what you actually intended to build. If your 40-meter band antenna is resonating up in the 30-meter range, you haven’t just missed the mark; you’ve built a different antenna entirely. Use this moment to decide if you’re going to trim the wire or add some length.
    • 6. Don’t stop at the first successful dip. If you’re working with a multi-band antenna, you need to sweep the entire spectrum you plan to use. I’ve lost count of how many times I’ve seen a “40/20 meter” antenna that works beautifully on 20 but is a complete disaster on 40 because the designer didn’t bother to check the lower end. Verify every band you care about before you climb the ladder to hang it for good.
    • 7. Finally, do a sanity check on your results. If the numbers look too perfect—like a flat, beautiful 1:1 line across a massive bandwidth—something is wrong. Either your lead is too long, your calibration was botched, or you’re measuring a piece of equipment that isn’t actually connected to the antenna. Trust the math, but always double-check that your physical setup isn’t fooling the sensor.

    Mastering Frequency Sweep Settings to Find Real Resonance

    Mastering Frequency Sweep Settings to Find Real Resonance

    If you just hit the “auto-scan” button and walk away, you’re going to miss the nuance that actually matters. Most people treat their analyzer like a toaster—press a button and hope for toast—but if your frequency sweep settings are too wide, you might gloss right over a narrow resonance point on a higher harmonic. I’ve seen plenty of folks think their wire is perfectly tuned for 40 meters, only to realize later that the sweep was so coarse it missed a massive impedance spike just a few hundred kHz away. Slow down the sweep speed and tighten that window; it takes an extra ten seconds, but it’s the difference between a “good enough” reading and knowing exactly where your dip is.

    Once you have a clean sweep, don’t just stare at the SWR numbers. If you’re feeling adventurous, switch over to some basic return loss analysis to see how much power is actually being reflected back at you. A low SWR is great, but seeing the depth of that null tells you how much headroom you actually have before the ionosphere decides to stop cooperating. I always tell my students: the SWR tells you if you’re safe, but the return loss tells you how efficient you really are.

    Beyond the Swr Why Return Loss Analysis Matters More

    Beyond the Swr Why Return Loss Analysis Matters More

    Most people get stuck on the SWR reading because it’s the one number the radio gives them, but if you want to actually understand your system, you need to look at the return loss analysis. SWR is a bit of a blunt instrument; it tells you if you’re in trouble, but it doesn’t tell you why. I’ve spent plenty of afternoons looking at a “fine” 1.5:1 ratio, only to realize through return loss that the impedance was swinging wildly across the band. If you only chase a low SWR, you might miss the fact that your antenna is essentially a narrow-band trap that will fail you the moment the sunspots shift or the temperature drops.

    If you really want to level up, stop treating the analyser like a digital thermometer and start looking at the shape of the curve. When I’m out in the field, I’m looking for how deep that dip is and how wide it stays. A shallow dip might give you a decent standing wave ratio measurement, but it won’t give you the bandwidth you need for SSB or digital modes. Don’t just settle for a single point of resonance; use the analyser to see the behavior of the entire segment. That’s the difference between an antenna that “works” and one that actually performs.

    Five Things the Manual Won't Tell You About Real-World Testing

    • Calibrate at the end of the coax, not at the radio. If you calibrate with the analyzer sitting on your desk and then run fifty feet of RG-8 through a window to your antenna, your readings are going to be junk. Always perform your open and short calibrations at the very end of the cable run you’re actually using.
    • Watch your ground plane, or don’t complain when the numbers lie. I’ve seen so many people get frustrated because their dipole looks great on the analyzer, but the moment they hoist it up, the resonance shifts five hundred kHz. If you’re testing a vertical near a metal fence or a wet hillside, your analyzer is measuring the environment, not just the wire.
    • Don’t trust a single point measurement. A single SWR reading is a snapshot in time, but a sweep tells the story. If you see a narrow, sharp dip, you’ve got a high-Q resonant circuit that’s going to be a nightmare to tune if the temperature changes or the wind blows. Look for a broad, stable dip; that’s what you want for a reliable antenna.
    • Keep an eye on your frequency step size. If you’re hunting for a resonance on the 20m band and your step size is set too wide, you’ll jump right over the actual dip and think the antenna is off-resonance. Slow down the sweep and tighten the steps when you’re getting close to the target; it takes longer, but it beats guessing.
    • Remember that the analyzer doesn’t know how high your antenna is. I’ve spent many a morning looking at a perfect 1.1:1 SWR on a field antenna, only to find out it only works when it’s sitting on a plastic chair. Once you get that wire ten meters up in a tree, the impedance is going to change. Measure the antenna in its “as-deployed” state whenever you possibly can.

    The Bottom Line Before You Pack Up

    Stop chasing a single SWR number like it’s the Holy Grail; look at the return loss curve to see how much bandwidth you actually have to play with before the signal starts reflecting back at you.

    Never trust a measurement taken on your workbench that you can’t replicate in the field; always test your antenna at its final operating height, because a wire that looks perfect at six inches off the ground is a different animal entirely when it’s ten meters up.

    Use the sweep settings to your advantage by slowing things down; a fast, sloppy sweep might miss a narrow-band resonance that’s the difference between a dead station and a solid DX contact.

    ## Stop Chasing SWR Numbers Like They're Gospel

    An antenna analyser isn’t a magic wand that fixes a bad design; it’s a diagnostic tool that tells you exactly how much you’ve messed up. Don’t just stare at a single SWR reading and walk away satisfied—sweep the frequency, watch how the impedance behaves, and remember that a “good” reading at three meters above a shed floor is going to look completely different when you actually get that wire up on the hill where you intend to use it.

    Wren Castellano

    Put Down the Manual and Trust the Data

    Put Down the Manual and Trust the Data.

    At the end of the day, an antenna analyser is just a tool, but it’s the one that stops you from chasing ghosts. We’ve covered how to stop blindly looking at SWR and why you need to start paying attention to return loss if you actually want to understand your match. You’ve learned that sweeping the right frequency range isn’t just a suggestion—it’s the difference between finding a true resonance and seeing a mathematical fluke. Remember: a low SWR reading on a screen means nothing if your antenna is sitting two feet off the ground in a way that kills your radiation pattern. Measure the impedance, check your height, and verify your results in the actual environment where the antenna will live.

    There is a specific kind of satisfaction that comes from seeing that Smith Chart align perfectly with what you expected, or finally figuring out why that wire was acting so temperamental. It’s about moving past the “it seems to work” stage and into the “I know why it works” stage. Radio is a physical, messy, and beautiful science, and once you stop guessing and start measuring, the whole hobby opens up in a way that no manual can teach you. So, get out there, get your gear in the field, and stop guessing at your signal. The physics won’t lie to you, even when the ionosphere does.

    Frequently Asked Questions

    My analyser shows a perfect 1:1 SWR, but my signal is still barely getting out—what am I missing?

    A 1:1 SWR just means your antenna is matched to the feedline, not that it’s actually radiating. If your analyzer says everything is perfect but you’re still shouting into a void, check your ground plane and your height. If that dipole is sitting two feet off the ground in a field, it’s not an antenna; it’s a heater. You might have a great match, but if you haven’t got enough elevation or a decent ground, you’re just wasting power.

    Should I be measuring the antenna at the feed point or right at the radio's connector to get an accurate reading?

    If you want to know if your antenna is actually resonant, you have to measure at the feed point. If you measure at the radio, you aren’t just testing the antenna; you’re testing every inch of coax, every connector, and every bit of shielding in between. I’ve seen plenty of people sweat over a high SWR at the rig, only to realize they just have a bad crimp on a PL-259. Measure the antenna where it lives.

    Is it worth using a high-quality coax for the measurement itself, or will a cheap test lead throw off my impedance readings?

    Use the good stuff. If you’re using a cheap, flimsy test lead with high capacitance or a dodgy shield, you aren’t measuring your antenna; you’re measuring your cable. I’ve seen plenty of people chase phantom resonances only to realize their “impedance mismatch” was just a low-quality lead acting like a capacitor. Treat your test setup like part of the circuit. If the lead is garbage, your data is just noise.

  • How to Choose a Power Supply That Will Not Wreck Reception

    How to Choose a Power Supply That Will Not Wreck Reception

    I remember sitting in my garage ten years ago, staring at a brand-new transceiver that I’d spent six months saving for, only to have it sputter and die the moment I keyed the mic on a high-power mode. I had followed every “expert” guide on how to choose a power supply for a radio, buying a unit that boasted a fancy digital display and a sleek chassis, but the moment the rig demanded real juice, the voltage sagged like a wet paper bag. It wasn’t a radio problem; it was a current problem. Most people get blinded by the shiny specs on the box and forget that a radio is essentially a hungry beast that needs steady, reliable meals to perform.

    I’m not here to sell you on some overpriced, boutique power brick that promises “audiophile grade” purity for a transceiver. My goal is to give you the actual numbers you need to look at—the stuff the marketing brochures conveniently leave out. We are going to talk about real-world current draw, thermal stability under load, and why that “13.8V” label on a cheap transformer is often a total lie. By the time we’re done, you’ll know exactly how to match your power to your rig so you can stop chasing ghosts in the noise floor and start actually making contacts.

    Table of Contents

    Why Amperage Requirements for Ham Radio Arent Just Suggestions

    Why Amperage Requirements for Ham Radio Arent Just Suggestions

    Here is the reality: that little sticker on the back of your transceiver that says “10A” is a minimum, not a ceiling. When you’re just idling on receive, sure, you’re barely sipping juice. But the second you key up for a high-duty cycle mode like FT8 or a heavy SSB transmission, your rig is going to demand a massive, sudden surge of current. If your amperage requirements for ham radio aren’t met by the supply, you aren’t just going to lose signal strength; you’re going to see the voltage sag. I’ve seen plenty of operators think they have a bad antenna or a failing radio, only to realize their power supply was choking the moment the rig tried to actually work.

    It isn’t just about the raw current, either. If you’re using a cheap, poorly filtered setup, you’re going to deal with significant power supply ripple noise. This isn’t just a theoretical concern from a textbook; it shows up as a constant, annoying hum in your audio or, worse, as a floor of broadband noise that makes weak-signal work impossible. You want a supply that stays rock-steady even when the load shifts, or you’ll spend your entire evening chasing ghosts instead of making contacts.

    Regulated vs Unregulated Power Supplies the Math That Matters

    Regulated vs Unregulated Power Supplies the Math That Matters

    Here’s the thing about the “Regulated vs Unregulated” debate: it’s not just a theoretical distinction in a textbook. If you’re running an old-school linear supply with a heavy transformer, you’re getting a massive, stable reservoir of current that handles sudden spikes like a champ. However, if you don’t have a decent filter stage, that power supply ripple noise is going to find its way right into your receiver. I’ve spent more nights than I care to admit chasing a hum in my audio only to realize my “clean” supply was leaking AC leakage straight into the signal path.

    Switching to a modern switching power supply (SMPS) makes things compact, but you have to be careful. They are efficient, but they can be incredibly noisy if they aren’t well-shielded. If you don’t check the dc power supply specifications for high-frequency noise, you might find yourself dealing with unexpected electromagnetic interference in radio that makes your local noise floor look like a mountain range. My rule of thumb? If you’re using a switching supply for a sensitive SDR setup, measure the noise floor with the radio on and the power supply connected before you commit to your station layout.

    Five Things to Check Before You Plug In

    • Stop looking at the “peak” current rating on the box and start looking at the continuous rating. If your rig pulls 20 amps during a heavy FT8 session or a high-duty cycle SSB call, and your power supply is only rated for 20 amps at its absolute limit, you aren’t running a station—you’re running a heater. Aim for a supply that can handle your maximum expected draw at about 70% capacity if you want it to last more than one summer.
    • Watch out for the “ripple” in the noise floor. I’ve seen plenty of cheap switching supplies that look great on a spec sheet but dump so much high-frequency switching noise back into the DC line that your SDR looks like a solid wall of static. If you’re using a switching supply, make sure it’s actually shielded for RF, or better yet, keep a decent LC filter handy to clean up that mess before it hits your rig.
    • Don’t forget the voltage drop over your cables. You can have a perfect 13.8V at the terminal of the power supply, but if you’re running fifty feet of thin, 18-gauge wire to your shack, you might only be seeing 12.5V by the time it hits the radio. I measure the voltage at the actual radio terminals while transmitting; if that number dips significantly when you key the mic, your wire is too thin or your connections are garbage.
    • Consider your environment, especially if you’re doing portable work. If you’re taking your gear up a ridge in the wind, a heavy, old-school linear transformer is going to be a pain in the neck to carry, but it’s much more resilient to temperature swings than a cheap switching unit. If you go with a lightweight switching supply for portability, make sure it actually has decent thermal management, because those things can throttle their output the second they get warm.
    • Check the connector quality and the fuse type. I’ve lost count of how many “professional” power supplies come with flimsy terminals that barely grip the lug. If the connection is loose, you’re creating resistance, and resistance creates heat and voltage drops. Use heavy-duty lugs, tighten them down, and for heaven’s sake, make sure the fuse is actually rated for the load you’re pulling, not just a random piece of wire that happens to fit the holder.

    The Bottom Line Before You Plug In

    Stop looking at the voltage and start looking at the current headroom; if your rig pulls 20 amps during a heavy SSB call, a 20-amp supply is going to struggle, and you want at least a 25% buffer to keep the voltage from sagging.

    Don’t get fooled by “peak” ratings on a spec sheet—measure what the supply actually delivers when the rig is under load, because a supply that can’t hold its steady state is just a very expensive way to introduce noise into your receiver.

    If you’re running an unregulated supply, you better have a plan for that voltage rise, or you’re going to spend your afternoon replacing blown protection diodes instead of making contacts.

    ## The Real Cost of Underpowering

    “Stop looking at the sticker on the box and start looking at the transient spikes. If your power supply is rated for 20 amps but starts sagging the second you key the mic on a high-duty cycle, you aren’t just losing signal strength—you’re inviting frequency drift and noise that’ll make you think your antenna is the problem when it’s actually just your juice.”

    Wren Castellano

    Stop Guessing and Start Measuring

    Stop Guessing and Start Measuring power draw.

    At the end of the day, choosing a power supply isn’t about matching a label on a box; it’s about understanding the reality of your rig’s draw. If you’ve ignored the difference between steady-state current and those massive, momentary spikes during a transmit cycle, you’re asking for trouble. Remember that a regulated supply might give you that clean 13.8V you want, but if it doesn’t have the headroom to breathe when you key up, you’ll just be troubleshooting a “faulty” radio that was actually just starving for juice. Don’t settle for “close enough” when it comes to your amperage; measure your actual peak draw before you commit to a piece of gear, or you’ll spend more time chasing voltage sags than actually making contacts.

    There is a certain kind of magic in knowing exactly why your station is working—and more importantly, why it isn’t. When you stop relying on the marketing fluff and start looking at the actual electrical stability of your setup, you move from being someone who just operates a radio to someone who truly understands the machine. Radio is a hobby of physics, not of guesswork. Build your power plant with the same precision you’d use for your antenna system, and you’ll find that when the ionosphere finally decides to cooperate, your gear will be ready to deliver exactly what you built it to do.

    Frequently Asked Questions

    If I’m using a switching power supply instead of a heavy linear one, how do I know if the high-frequency noise is going to bleed right into my receive audio?

    The short answer? Don’t guess; use your rig. Set your radio to a quiet frequency, turn up the gain, and listen. If you hear a rhythmic “chirp” or a constant high-pitched whine that changes when you adjust the power supply’s load, you’ve got switching noise bleeding into your audio. If you’re feeling proactive, grab an oscilloscope and check the DC line for ripple. If that ripple is messy, your receiver’s front end is going to pay the price.

    I’ve seen some cheap supplies claim 30 amps on the label, but how do I actually test if they can sustain that load without the voltage dropping when I key the mic?

    Don’t trust the sticker on the box; manufacturers love a big, round number that only exists for a millisecond. To test it, you need a dummy load and a decent multimeter. Set your rig to a high-power mode, key the mic, and watch the voltage rail. If that 13.8V dips below 12.5V the moment you transmit, that 30-amp claim is a lie. You aren’t looking for peak capacity; you’re looking for stability under load.

    Is it worth spending the extra money on a supply with a built-in remote control port, or is that just something designed to make my shack look more professional?

    It’s not about looking professional; it’s about where you actually put the gear. If you’re running a standard desk setup, skip it. But if you’re building a dedicated rack or, like me, tucking the heavy, heat-generating stuff into a ventilated cabinet under the desk to clear up workspace, that port is a lifesaver. Being able to toggle the output or monitor current from your transceiver means you aren’t crawling on the floor every time you want to adjust something.

  • How to Make Your First Contact Without Freezing Up

    How to Make Your First Contact Without Freezing Up

    I remember sitting on a damp ridge in the Peak District at 4:00 AM, shivering and staring at a transceiver that cost more than my first car, wondering why I was only hearing static. I had followed every “beginner’s guide” to the letter, bought the most expensive handheld on the market, and yet I couldn’t pull a single signal out of the noise. Everyone tells you that you need a high-end rig or a perfect setup to learn how to make your first contact, but they’re selling you a fantasy. Most of that gear is just expensive window dressing if you don’t understand the physics of what you’re actually doing with the air around you.

    In this post, I’m stripping away the marketing fluff and the outdated textbook nonsense. I’m going to show you how to actually get on the air by focusing on the variables that actually move the needle: antenna height, ground plane reality, and timing the ionosphere. I won’t promise you a magic button, but I will give you the measured reality of what works when you’re out in the field. If you’re ready to stop guessing and start listening, let’s get to work.

    Table of Contents

    Mastering Amateur Radio Operating Procedures Without the Fluff

    Mastering Amateur Radio Operating Procedures Without the Fluff

    Look, you can own a piece of gear that costs more than my first car, but if you don’t understand the etiquette, you’re just making noise. Mastering amateur radio operating procedures isn’t about memorizing a dry manual; it’s about respect for the spectrum and the person on the other end. When you’re learning how to use a transceiver, don’t just mash the PTT and hope for the best. Start with a clear, concise call sign, wait a beat to ensure you’ve actually broken through, and listen for the response. If you’re working on HF bands, remember that brevity is your best friend. The airwaves are crowded, and nobody wants to listen to a ten-minute monologue when they’re trying to work a pileup.

    I’ve sat on plenty of ridges where the signal was weak and the noise floor was high. In those moments, precision beats volume every single time. If you’re struggling to get a word in, don’t just crank the power; check your frequency and ensure you aren’t stepping on someone else’s operating window. It’s about being a part of the conversation, not an interruption to it.

    How to Use a Transceiver Beyond the Factory Presets

    How to Use a Transceiver Beyond the Factory Presets

    When you unbox a new rig, the factory presets are essentially a polite suggestion, not a rulebook. Most people just stick to the default filters and power settings, but if you want to actually hear something through the noise, you need to get comfortable with the manual overrides. I’ve spent more nights than I can count tweaking narrow-band filters just to squeeze a weak signal out of a crowded band. Learning how to use a transceiver effectively means understanding how your specific hardware handles selectivity versus sensitivity. If you’re operating on HF bands, don’t just rely on the auto-tuner to do the thinking for you; learn to listen to how the S-meter reacts to the noise floor before you even touch the mic.

    It’s also about realizing that your settings have to dance with the environment. I’ve seen operators struggle with terrible ham radio signal propagation simply because they were fighting their own internal settings. If the ionosphere is behaving, great—but if it’s acting up, you might need to drop your power and tighten your bandwidth to keep from stepping on everyone else. Don’t let the machine dictate your workflow; instead, learn to manipulate the sub-menus until the rig feels like an extension of your own ears.

    Stop Blasting into the Void: 5 Real-World Tactics for Your First Contact

    • Check your antenna height before you even touch the mic. I’ve seen plenty of beginners get frustrated because they’re trying to work DX with a wire strung only three feet off the ground in a backyard. If you don’t have the clearance, you’re just wasting battery and heating up your coax; get that wire up into a tree or onto a pole if you can, because ground clearance is the difference between a signal that travels and a signal that just dies in the dirt.
    • Learn to listen to the “rhythm” of the band rather than just hunting for a callsign. Don’t just key up and scream your signal; spend twenty minutes just absorbing the flow. You need to hear how people are actually breaking in, how much they’re stepping on each other, and when the band feels “open.” If you can’t hear the cadence of the traffic, you’re going to be the person everyone wants to mute.
    • Don’t get married to a single frequency. People treat their tuning dial like it’s sacred, but the ionosphere doesn’t care about your preferences. If you’re sitting on 7.150 MHz and it’s nothing but static, move. I’ve had sessions where I had to scan three different spots just to find a gap where the noise floor wasn’t swallowing my signal whole.
    • Keep your signal concise and your “QSO” efficient. This isn’t a long-form podcast; it’s a handshake. Give your callsign clearly, keep your signal reports brief, and don’t try to tell your whole life story on the first contact unless the conditions are absolutely incredible and the other person is clearly leaning into the conversation. If you’re being too wordy, you’re just blocking someone else from getting a turn.
    • Accept that sometimes, you just won’t make it. I’ve had setups that were mathematically perfect—measured, tested, and verified—that still resulted in nothing but silence because the solar cycle decided to take a nap that evening. If you’ve checked your SWR, confirmed your antenna height, and your settings are right, but the band is dead, don’t beat yourself up. Pack up the gear, go for that walk I mentioned, and try again when the sun is actually cooperating.

    The Real-World Essentials

    Stop relying on the “magic” of your gear; if you aren’t checking your antenna height and SWR before you start calling, you’re just burning power to talk to yourself.

    Learn the actual protocol, not just the textbook version—knowing when to stay quiet and when to step in is what separates a real operator from someone just making noise.

    Don’t get discouraged when the bands are dead; sometimes the ionosphere is just having a bad day, and no amount of turning the squelch knob is going to fix that.

    ## Stop Aiming at the Void

    “Don’t just crank the power and hope for the best; if you’re hunting for that first contact, stop obsessing over your rig’s settings for a second and check your antenna height. If you’re running a dipole ten feet off the ground in a backyard, you aren’t making a contact, you’re just heating up the grass.”

    Wren Castellano

    Getting Out There

    Ham radio operator getting out there.

    At the end of the day, making that first contact isn’t about having a thousand-dollar transceiver or a perfectly tuned dipole sitting twenty meters up. It’s about the fundamentals: knowing your gear, understanding that your antenna height is just as important as its length, and having the patience to sit through the static. We’ve talked about moving past the factory presets and cleaning up your operating procedure so you aren’t just shouting into the noise. If you can manage your power levels and actually listen to the rhythm of the band, you’re already ahead of half the people I see on the air. Remember, if you aren’t getting anything, don’t just turn up the gain; check your connections and your ground plane first.

    There will be nights when you feel like you’re just wasting battery life, staring at a SWR meter that won’t budge while the ionosphere decides to take a nap. That’s part of the game. But I promise you, that first time you hear a voice—real, human, and distant—crackling through the atmospheric noise, it changes something. It stops being about circuits and impedance matching and starts being about connection. So, pack your kit, find a spot with a decent view of the horizon, and just start calling. The airwaves are waiting, and honestly, the best lessons are learned when things don’t go according to the manual.

    Frequently Asked Questions

    My SWR is low, but I'm still getting zero signal—could my antenna height be the reason I'm not reaching anything?

    Short answer: Yes, absolutely. A low SWR just means your antenna is resonant and your coax isn’t reflecting much power back to the rig, but it doesn’t mean you’re actually radiating that energy into the sky. If you’ve got a dipole sitting two feet off the ground in a damp field, you’re mostly just coupling into the earth. Get that wire up—at least a quarter-wavelength, ideally more—and stop wasting your precious battery power on a ground-plane soak.

    Should I be focusing on specific bands for my first contact, or does it just depend on what time of day it is?

    It’s both, but don’t let the “it depends” answer frustrate you. If you’re hunting for something immediate, look at the clock. During the day, higher frequencies like 20m are your best bet because the solar noise is lower and the bands are open. At night, the HF bands drop down—move toward 40m or 80m. But remember: a perfect band won’t save a bad setup. If your antenna is only six feet off the ground, you’re fighting physics, not just the time of day.

    Is it better to wait for a clear signal, or should I try to work someone even if they sound like they're underwater?

    If they sound like they’re underwater, you’ve got a choice: wait for the gray line to shift, or take the shot. Personally? I say try it. If you can pull a callsign out of the noise, do it. Sometimes those “weak and local” or marginal DX contacts are the most rewarding because you actually had to work for them. Just don’t waste twenty minutes shouting at a wall of static; if there’s no rhythm to the signal, move on.

  • How to Use a Multimeter Without Blowing the Fuse

    How to Use a Multimeter Without Blowing the Fuse

    I remember sitting in my dad’s garage at fifteen, staring at a circuit board that refused to wake up, convinced I had broken something expensive. I had a brand-new digital meter in my hand, but I was just spinning the dial and praying for a number that made sense. Most manuals will tell you how to use a multimeter by walking you through every button and menu like you’re operating a flight simulator, but they rarely teach you how to actually see the electricity. They don’t tell you that a reading can lie to you if your probes are dirty or if you’re measuring a high-impedance circuit with a cheap meter that wasn’t built for the job.

    In this guide, I’m stripping away the fluff to show you the practical reality of troubleshooting. We aren’t just going to talk about settings; I’m going to show you how to stop chasing ghosts in your wiring and how to trust what those numbers are actually telling you. Whether you’re checking a battery for your portable rig or hunting for a cold solder joint on a transceiver, you’ll learn how to use a multimeter with actual confidence. No textbook nonsense—just the real-world methods I’ve used to keep my gear running for decades.

    Table of Contents

    Guide Overview

    Total Time: 30-60 minutes
    Estimated Cost: $20-50
    Difficulty: Beginner

    Tools & Supplies

    • Digital Multimeter (The primary device for measuring voltage, current, and resistance)
    • Test Leads (Probes used to connect the meter to the circuit)
    • AA or 9V Batteries (For testing voltage levels)
    • Assorted Resistors (For practicing resistance measurements)
    • Small Electronic Circuit (To practice real-world application)

    Step-by-Step Instructions

    • 1. First, you need to figure out what you’re actually looking for before you even touch the probes to the circuit. If you’re hunting for a broken trace, you want continuity; if you’re checking if a battery is actually holding its charge, you need DC voltage. Don’t just spin the dial around blindly hoping to stumble onto the right setting—that’s a quick way to blow a fuse in your meter or, worse, get a reading that tells you everything is fine when it isn’t.
    • 2. Plug your leads into the right jacks. This is where I see most people trip up. Most meters have a common port (usually black) and a primary input (usually red). If you’re measuring voltage or resistance, the red lead stays in the V/Ω port. But if you’re doing something more heavy-duty like measuring high current, that red lead has to move to the 10A or mA port. If you try to measure current while the lead is in the voltage jack, you’ll hear a very unpleasant pop and your meter will be a paperweight for the rest of the afternoon.
    • 3. Set your dial to the appropriate range. If you have a manual-ranging meter, don’t be afraid to start at the highest possible setting and work your way down. I’ve seen plenty of beginners try to measure a 12V lead with a meter set to millivolts, and it won’t give you a reading—it’ll just give you a headache. Once you get a stable number, then you can dial it down to get the fine-grained precision you actually need.
    • 4. Check your continuity with the “beep” test. If you’re troubleshooting a coax cable or a jumper wire, turn the dial to the continuity symbol (the one that looks like a little sound wave). Touch your probes together first to make sure the meter actually chirps. Then, touch them to the ends of your wire. A solid, continuous beep means the path is clear, but if it’s intermittent or raspy, you’ve got a cold solder joint or a fray somewhere that’s going to cause signal loss later.
    • 5. Measuring voltage requires a steady hand and a bit of caution. When you’re probing a live circuit, place your black lead on the ground or the negative terminal first. Then, take the red probe and touch it to the point you’re testing. I always recommend using one hand to hold the probe if you can, keeping your other hand in your pocket. It sounds like old-timer superstition, but it’s a good habit to prevent a current path through your chest if something unexpectedly shorts.
    • 6. When you’re measuring resistance, make sure the circuit is completely de-energized. This isn’t optional. If there’s even a tiny bit of residual voltage from a capacitor, it’ll throw your Ohms reading completely out of whack, or it’ll fry the internal shunt of your meter. I always double-check with a voltage setting first just to be absolutely certain the line is dead before I switch over to measure resistance.
    • 7. Finally, look at the actual number and the units. It sounds simple, but I’ve seen people stare at a reading of “0.5” and not realize the meter is set to kilo-ohms instead of ohms. Always check the little letters on the screen—is it mV, V, kΩ, or MΩ? If your reading looks suspiciously high or low, re-verify your scale before you go tearing apart a perfectly good radio rig based on a decimal point error.

    Analog vs Digital Multimeter Which One Actually Gives Truth

    Analog vs Digital Multimeter Which One Actually Gives Truth

    If you walk into a modern shop, you’ll see a wall of sleek, plastic digital units, and for 90% of what I do, that’s exactly what I reach for. A digital multimeter is great because it gives you a hard number that doesn’t dance around, which is vital when you’re testing electrical circuits for a specific voltage drop. But don’t let the convenience make you lazy. Digital meters can sometimes struggle with “ghost voltages”—those phantom readings you get from capacitive coupling that aren’t actually doing any work. If you’re chasing a signal that isn’t there, a digital readout might lie to you by being too precise about something that isn’t real.

    That’s where the old analog needles come in. I still keep a well-calibrated moving-coil meter in my kit because there is no substitute for watching a needle sweep. When you’re measuring resistance with a multimeter or looking for a fluctuating signal in a power supply, the needle shows you the trend in real-time. It tells you if a voltage is sagging or spiking in a way a digital screen simply can’t match. If you want the raw truth of a changing current, stop looking at digits and start watching the swing.

    Testing Electrical Circuits Without Relying on Pure Luck

    Testing Electrical Circuits Without Relying on Pure Luck.

    We’ve all been there: you’re chasing a phantom ground loop or a noisy power supply, and you keep getting different readings every time you probe the same point. That isn’t “unpredictable physics”—it’s usually just poor technique. When you’re testing electrical circuits, especially in a high-RF environment like a shack, your body and your leads act like antennas. If you aren’t careful with your multimeter probe placement, you’re essentially injecting noise into your own measurement. I’ve lost more afternoons than I care to admit because I was trying to measure a millivolt drop while my hand was hovering right over a high-gain coax, effectively coupling my own body capacitance into the circuit.

    If you want to stop guessing, you have to treat the meter like a precision instrument rather than a glorified screwdriver. This means being disciplined about your connections. Don’t just jam a probe against a terminal and hope for the best; ensure you have a solid, clean contact point. If you’re measuring resistance with a multimeter, for heaven’s sake, turn the power off first. I’ve seen plenty of newcomers try to check continuity on a live rail, and all they end up doing is blowing a fuse or, worse, getting a reading that looks “fine” simply because the meter is being overwhelmed by the circuit’s own voltage.

    Five Things Your Manual Won't Tell You (But Your Troubleshooting Should)

    • Stop treating the continuity beep like a magic wand. It’s a great tool for finding a break in a coax line or a blown fuse, but it won’t tell you if you’ve got a high-resistance connection that’s dropping voltage under load. If your radio is getting wonky power, don’t just check for continuity; measure the actual voltage while the rig is drawing current.
    • Watch your range settings like a hawk. I’ve seen too many beginners try to measure a high-voltage power supply on the 200mV DC scale, and it’s a fast way to turn a decent meter into a very expensive paperweight. If you aren’t sure what you’re looking at, start at the highest range and work your way down. It’s better to be imprecise for a second than to fry your equipment.
    • Capacitors are liars. You might measure a voltage, think the circuit is dead, and then get a nasty surprise when you touch a probe to a charged capacitor. Always verify your discharge with your meter before you start poking around a power supply board. I don’t care if the unit has been unplugged for an hour; treat every rail like it’s live until you’ve proven otherwise.
    • Lead resistance is real and it matters. If you’re trying to measure a low-ohm component—like a shunt resistor or a winding in a transformer—and your meter is reading 0.5 ohms when you know it should be zero, your leads are the problem. Touch your probes together first to see your “true zero.” If your leads are junk, your measurements are just educated guesses.
    • Don’t forget the ground. In the RF world, we spend half our lives chasing ground loops and bad shielding. When you’re testing a circuit, don’t just assume the chassis is a perfect zero-volt reference. Use your meter to check the potential between your power supply ground and your equipment chassis. If there’s a delta there, your signal-to-noise ratio is going to suffer, no matter how good your antenna is.

    Three Things to Remember Before You Probe

    Stop trusting the schematic blindly; a multimeter is there to tell you what is actually happening in the copper, not what the manufacturer promised would happen.

    Don’t get blinded by high-end digital displays; if you’re chasing a fluctuating signal or a noisy ground, sometimes a steady analog needle tells the real story of the instability.

    Always verify your leads and settings first, because there is nothing more frustrating than spending an hour troubleshooting a circuit only to realize you were just measuring the resistance of a bad probe connection.

    ## Stop Chasing Ghosts

    A multimeter isn’t a magic wand that tells you why a circuit is failing; it’s just a tool that tells you where the electricity actually is—or isn’t. If you aren’t probing the line yourself to see if that connection is real, you aren’t troubleshooting, you’re just guessing and hoping the universe agrees with you.

    Wren Castellano

    Beyond the Probes

    Understanding circuit diagnostics Beyond the Probes.

    At the end of the day, a multimeter isn’t just a box of buttons; it’s your eyes when you’re staring at a circuit board that refuses to cooperate. We’ve talked about why you can’t just trust a digital readout without understanding the context of your measurement, and why choosing between analog and digital comes down to whether you need a quick snapshot or a nuanced look at a shifting signal. Remember, whether you are checking continuity on a coax shield or measuring the voltage drop across a poorly soldered joint, the goal is the same: stop guessing and start knowing. If the numbers don’t make sense, don’t just assume the meter is broken—re-evaluate your ground, check your leads, and make sure you aren’t just chasing ghosts in a circuit that was never meant to work that way.

    There is a specific kind of quiet satisfaction that comes when you finally find that one faulty component or that tiny voltage leak that’s been ruining your signal-to-noise ratio. It’s the moment when the mystery stops being a headache and starts being a solvable engineering problem. Don’t let the gear intimidate you, and don’t let a bad reading discourage you from digging deeper. Radio, electronics, and everything in between are built on these fundamental truths, and once you master the ability to measure them accurately, you stop being a spectator and start being a builder. Now, get out there, grab your meter, and see what’s actually happening under the hood.

    Frequently Asked Questions

    Why does my multimeter show a reading that's way off when I'm testing a live circuit compared to when it's powered down?

    You’re likely running into the “loading effect.” Most decent multimeters have a high input impedance, but they aren’t infinite. When you probe a live circuit—especially one with high-resistance components or sensitive semiconductor junctions—the meter itself starts drawing a tiny bit of current to take the measurement. That current subtly alters the very voltage you’re trying to measure. It’s not your meter being broken; it’s physics interfering with your probe.
    Is it actually worth spending the extra money on a True RMS meter, or is that just marketing fluff for people who don't understand waveforms?

    If you’re just checking if a 9V battery is dead, a cheap meter is fine. But if you’re measuring anything with a non-sinusoidal waveform—like a switching power supply or a motor controller—an average-responding meter will lie to your face. It’ll give you a reading that looks stable but is mathematically wrong. For an RF engineer or anyone working with modern electronics, True RMS isn’t marketing fluff; it’s the difference between seeing reality and chasing ghosts.

    How do I know if my probes are actually making a good connection, or if I'm just getting a false reading because of oxidation on the component?

    If you’re getting a reading that looks “almost” right, don’t trust it. Oxidation is a liar. First, check your probes—if the tips are pitted or dull, you’re just measuring contact resistance, not the circuit. Use a bit of fine abrasive or isopropyl alcohol on the component leads if they look dull. Most importantly, wiggle the probe while measuring; if the numbers jump, you’ve got a bad connection, not a fluctuating voltage.

  • How to Set Audio Levels So Your Digital Signal Is Clean

    How to Set Audio Levels So Your Digital Signal Is Clean

    I spent three hours last Tuesday on a ridge in the Cascades, wrestling with a repeater that sounded like someone was gargling gravel, all because the operator thought “louder is better.” It’s the same old story every time I jump onto a digital mode: people treat their gain controls like a volume knob for a radio, completely ignoring the math behind it. They think if they just crank the input, they’ll overcome the noise, but all they’re actually doing is learning how to set audio levels for digital in the worst way possible—by burying the signal under a mountain of square-wave distortion. If you’re clipping your input just to feel like you’re “making an impact,” you aren’t transmitting a signal; you’re just broadcasting digital garbage.

    I’m not here to sell you a $500 specialized compressor or some proprietary software that promises “studio quality” on a 5-watt handheld. I’m going to show you how to actually look at your meters, understand your headroom, and set your levels so the decoder can actually do its job. We’re going to stick to the real numbers and the practical reality of what happens when that signal hits the buffer. No fluff, no marketing hype—just the physics of making sure your digital footprint is clean enough to actually be heard.

    Table of Contents

    Why Peak vs Rms Levels Determine Your Signal Integrity

    Why Peak vs Rms Levels Determine Your Signal Integrity

    Here is the problem most people run into: they look at their meters, see a nice, steady level, and assume they’re golden. But in the digital realm, a steady average tells you nothing about the sudden, sharp transients that actually kill your signal. If you only tune your gain based on the average volume—what we call the RMS—you’re essentially ignoring the spikes. Those spikes are the real killers. If you don’t account for them, you’ll end up preventing digital clipping only in theory, while in reality, your loudest syllables are already slamming into the ceiling and turning into square waves.

    Think of it like this: the RMS is the steady wind, but the peaks are the gusts. You can have a gentle breeze on average, but if a gust hits a window too hard, it breaks. When I’m setting up a digital mode or recording a voice log, I’m looking for optimal headroom for recording to catch those gusts. You need enough space between your highest peak and the 0dB ceiling so that when you inevitably get excited on a contact, you aren’t just generating digital garbage. It isn’t about being loud; it’s about making sure your peaks have room to breathe.

    The Math Behind Optimal Headroom for Recording

    The Math Behind Optimal Headroom for Recording

    Look, I’ve seen enough blown-out, crunchy-sounding digital files to know that “close enough” isn’t a measurement. When we talk about optimal headroom for recording, we aren’t just talking about leaving a little space so the meters don’t hit the ceiling; we’re talking about the mathematical reality of how a bit depth handles information. In the analog days, if you pushed a tape too hard, you got warm saturation. In the digital domain, if you cross that 0 dBFS threshold, you aren’t getting “character”—you’re getting mathematical errors that sound like a gravel grinder in your ears.

    To get this right, you need to understand that your signal-to-noise ratio is a finite resource. If you set your input gain too low, you’re burying your signal in the noise floor, forcing yourself to crank the volume later and bringing all that hiss along for the ride. But if you push it too high, you’re preventing digital clipping from being an afterthought and making it a constant battle. I usually aim for my peaks to sit well below the danger zone, leaving enough room so that even if the person on the other end of the mic suddenly shouts, the math stays intact and the waveform stays clean.

    Five Rules for Keeping Your Digital Signal Out of the Trash

    • Stop chasing the zero. In the analog days, we loved pushing the needle into the red for that sweet saturation, but in a digital system, hitting 0 dBFS isn’t “warmth”—it’s a hard ceiling that turns your signal into a square wave of digital garbage. Aim for your peaks to sit comfortably below that line, leaving enough room so the math doesn’t break.
    • Watch your meters, not your ears. Human hearing is notoriously bad at judging consistent loudness, especially when you’re tired or sitting in a quiet room. If you’re relying on “it sounds fine” while your software is flagging clipping, you’re just setting yourself up for a headache during post-processing.
    • Calibrate your gain staging from the source. If you’re running an SDR or a cheap preamp, don’t just crank the software volume to compensate for a weak input. If the signal is too quiet at the hardware level, you’ll end up boosting the noise floor right along with the signal, and no amount of digital gain can fix a bad signal-to-noise ratio.
    • Use a limiter as a safety net, not a crutch. I’ve seen people try to “set” their levels by letting a limiter do all the heavy lifting. A limiter is there to catch the unexpected transients—the sudden burst of static or a loud pop—not to act as your primary volume control. If your limiter is working constantly, your base levels are wrong.
    • Test with real-world dynamics. A steady sine wave is easy to level, but radio signals aren’t steady. Run a test with the most aggressive, erratic signal you expect to encounter. If your levels hold up during the peaks of a messy, high-SDR-bandwidth transmission, you’ve actually found your working headroom; if they clip, you haven’t.

    The Bottom Line: Stop Aiming for the Ceiling

    Stop chasing the loudest possible signal; if you’re constantly hitting the red, you’re just creating digital garbage that no amount of post-processing can fix.

    Learn to distinguish between your peaks and your average level—aim for enough headroom so that the sudden spikes in your voice don’t choke your processor.

    Trust your meters over your ears; your brain is a terrible way to measure clipping, so use real numbers to ensure your signal stays clean and usable.

    Stop Chasing the Red

    If you’re staring at your meters and waiting for them to hit zero just to feel like you’re ‘using’ the gear, you’re doing it wrong. Digital clipping isn’t a warm fuzziness like old tape saturation; it’s a mathematical error that turns your signal into a jagged mess of square waves. Leave yourself some breathing room—maybe 10 or 12 dB of headroom—because I’ve learned the hard way that it’s much easier to boost a clean signal later than it is to try and fix a digital disaster that happened because you were too greedy with your gain.

    Wren Castellano

    Stop Guessing and Start Measuring

    Stop Guessing and Start Measuring audio levels.

    At the end of the day, setting your audio levels isn’t about following a vague “rule of thumb” you read in a forum post from twenty years ago; it’s about respecting the math of your headroom. We’ve talked about why you can’t just look at your peaks and call it a day, and why understanding the relationship between RMS and those sudden transients is the only way to keep your signal clean. If you aren’t leaving enough space between your average signal and the digital ceiling, you aren’t just “running hot”—you are actively destroying your signal integrity before it even hits your storage. Keep your meters in the green, watch your peaks, and stop treating digital clipping like it’s something you can just fix in post.

    There is a certain satisfaction in knowing exactly why a signal sounds the way it does, from the moment it hits the transducer to the moment it’s encoded. It’s the same feeling I get when I finally see a clean trace on my scope after a long afternoon of troubleshooting a noisy power supply. Don’t let the complexity of the software intimidate you; the physics of the signal remains the same regardless of how many bells and whistles your interface has. Get your levels right the first time, build a foundation of clean, measurable data, and you’ll spend much more time actually making things and having fun rather than squinting at a waveform trying to figure out where it all went wrong.

    Frequently Asked Questions

    If I'm using an SDR with a built-in AGC, am I actually losing my ability to control these levels, or is the software just lying to me?

    The short answer? Yes, you’re losing control, and yes, the software is lying to you. An AGC is a blunt instrument; it’s essentially a fast-acting compressor trying to make everything look uniform. If you’re running a high-gain SDR, the AGC is likely squashing your dynamic range before the signal even hits your processing chain. You aren’t seeing the true signal peaks—you’re seeing what the AGC wants you to see. Turn it off and use manual gain.

    Does it really matter if I'm recording to a high-bitrate WAV versus a compressed format when I'm trying to maintain that headroom?

    Look, if you’re talking about headroom, you’re talking about math, not just file size. If you record to a compressed format like MP3 right out of the gate, you’re essentially throwing away the very buffer you just worked so hard to create. Compression eats your dynamic range for breakfast. Stick to a high-bitrate WAV; it keeps the data intact so that when you eventually do compress it, you aren’t just compressing digital artifacts.

    How much of my "clipping" is actually just the analog front-end of my interface hitting the ceiling before the digital converter even sees it?

    It’s a massive part of it, and honestly, it’s where most people trip up. You might see perfect green bars in your software, but if your preamp’s gain knob is cranked too high, you’ve already squared off those waveforms before they ever hit the A/D converter. Once that analog stage clips, you’re just recording digital noise. Watch your interface’s hardware meters, not just the DAW; if the hardware is redlining, your digital headroom doesn’t matter.

  • Software Defined Radio Explained Without the Maths

    Software Defined Radio Explained Without the Maths

    I spent the better part of the nineties hunched over a workbench, swapping out physical crystals and adjusting hardware filters just to shift a transceiver’s range by a few kilohertz. It was precise, sure, but it was also incredibly rigid. Nowadays, if you search for what is sdr radio, you’ll get hit with a wave of marketing jargon claiming it’s some kind of magic black box that renders traditional RF engineering obsolete. Let me clear that up right now: it isn’t magic, and it isn’t a replacement for understanding physics. It’s just a way to trade expensive, fixed hardware for flexible software, letting you move the heavy lifting from a physical circuit board into a digital processor.

    In this post, I’m not going to feed you the glossy brochure version. I want to show you how these devices actually handle the signal, from the moment the antenna picks up the voltage to the second it hits your computer screen. I’ll tell you which cheap dongles are actually worth your time and which ones are just expensive paperweights that will frustrate you the moment you try to use them. We’re going to look at the actual mechanics, the limitations, and the real-world math behind the screen.

    Table of Contents

    Sdr vs Traditional Radio Moving Beyond the Analog Box

    Sdr vs Traditional Radio Moving Beyond the Analog Box

    In a traditional transceiver, you’re essentially walking a fixed path. You have physical components—mixers, filters, and oscillators—hardwired to do one specific job. If you want to move from HF to VHF, you don’t just turn a knob; you often need a different radio or a massive bank of expensive, rigid hardware filters to keep the signal clean. It’s reliable, sure, but it’s also inflexible. You are a prisoner to the copper and the silicon layout.

    When we talk about SDR vs traditional radio, we’re talking about shifting the heavy lifting from those physical components into the realm of digital signal processing basics. Instead of using a hardware filter to strip away unwanted frequencies, an SDR captures a wide chunk of the spectrum and hands it over to a computer. This allows you to use spectrum analyzer software to see exactly what’s happening in real-time. You aren’t just listening to a single point on a dial anymore; you’re looking at the entire neighborhood of frequencies at once. It turns the radio from a single-purpose tool into a wide-open window.

    Rtl Sdr Hardware Explained More Than Just a Cheap Dongle

    Rtl Sdr Hardware Explained More Than Just a Cheap Dongle

    When you first pull an RTL-SDR out of the box, it looks like something you’d find at the bottom of a junk drawer—just a little plastic dongle with a USB connector. But don’t let the cheap housing fool you. Inside, that little device is performing a massive amount of heavy lifting. It takes the raw, analog voltages from your antenna and converts them into a digital stream that your computer can actually digest. Most people think they’re just buying a tuner, but what you’re really buying is a way to offload the complex radio frequency processing from a dedicated hardware chip to your PC’s CPU.

    The real magic happens once that data hits your desktop. Instead of turning a physical knob to move a needle, you’re using digital signal processing basics to manipulate the data stream in real-time. You can use spectrum analyzer software to see the entire slice of the band at once, which is something a traditional analog receiver simply cannot do without a massive, expensive display. Just remember: that little dongle has its limits. If you try to push it too hard on a high-noise floor without a decent LNA, you’re going to see a lot of digital artifacts that aren’t actually in the air.

    Five Reality Checks Before You Start Tuning

    • Don’t mistake bandwidth for magic. Just because your software can “see” a massive chunk of the spectrum doesn’t mean your hardware can actually resolve it. Most cheap SDRs have a much narrower usable bandwidth than the marketing sheet claims once you start dealing with real-world noise floors.
    • Your antenna is still the most important part of the chain. I see people buying high-end SDRs and then plugging them into a telescopic whip sitting on a desk. An SDR is just a way to process the signal; if your antenna isn’t cut for the frequency or isn’t elevated at least a few meters off the ground, you’re just digitally processing silence.
    • Watch your gain settings like a hawk. In a traditional radio, the hardware limits the damage; in an SDR, if you crank the digital gain too high, you’ll saturate the ADC (Analog-to-Digital Converter) and turn your beautiful signal into a flat line of digital noise. If it looks like a mess, back off the gain before you blame the software.
    • The computer is your new front end. Remember that your CPU is now doing the heavy lifting that used to be done by crystals and inductors. If your signal is stuttering or dropping packets, it’s usually not a radio problem—it’s your computer struggling to keep up with the data stream.
    • Expect to spend more time in the software than in the hardware. With a traditional rig, you turn a knob and you’re there. With an SDR, you’re managing sample rates, decimation, and driver settings. It’s more flexible, but it means you need to actually understand the math of what you’re doing rather than just trusting your ears.

    The Bottom Line on SDR

    An SDR isn’t a magic box that replaces physics; it’s just shifting the heavy lifting from fixed hardware components to flexible software, giving you much more control over what you’re actually seeing on the waterfall.

    Don’t let the low price tag of dongles fool you into thinking they’re perfect; they’re great entry points, but you need to be aware of their limitations in dynamic range and frequency stability if you’re trying to pull a weak signal out of the noise.

    Success with SDR comes down to understanding your signal chain—if your antenna is poorly matched or sitting too low to the ground, no amount of fancy digital processing is going to conjure a signal out of thin air.

    The Core Shift

    People get hung up on the “software” part of SDR, but they miss the actual physics of it. In a traditional rig, your signal is trapped by the physical limitations of the copper, the crystals, and the filters someone soldered onto a board twenty years ago. With an SDR, you’re just digitizing the raw electromagnetic field and letting math do the heavy lifting. You aren’t limited by what the hardware was built to do; you’re only limited by how much processing power you can throw at the signal.

    Wren Castellano

    Beyond the Spectrum

    SDR technology goes Beyond the Spectrum.

    At the end of the day, moving from a traditional hardware-based receiver to an SDR means you are shifting your focus from tuning a physical circuit to interrogating the raw data of the electromagnetic spectrum. We’ve looked at how the RTL-SDR dongle isn’t just a toy, but a gateway that trades rigid filters for mathematical flexibility. Just remember: while the software can do a lot of the heavy lifting, it can’t fix a bad signal chain. If you plug a cheap SDR into a noisy computer without any shielding, or if you try to catch a signal through a poorly tuned antenna sitting only two meters off the ground, the most sophisticated software in the world won’t save your SNR. The physics of the airwaves still apply, regardless of how many bits and bytes you’re processing.

    If you’re feeling overwhelmed by the sheer amount of software and math involved, take a breath and just start listening. You don’t need a PhD in signal processing to appreciate the magic of seeing a waterfall display for the first time and realizing the air is absolutely teeming with invisible life. Whether you’re hunting for local FM stations or trying to pull a weak CW signal out of the noise floor on a quiet night, SDR gives you a front-row seat to the real world. So, get a dongle, get a decent antenna, and go see what’s actually out there.

    Frequently Asked Questions

    If I'm using an SDR, do I still need to worry about my antenna's resonant frequency, or does the software handle all that?

    Software doesn’t fix physics. You can have the most advanced SDR on the planet, but if your antenna isn’t resonant or your SWR is through the roof, you’re just digitizing noise. The SDR handles the signal processing, but the antenna still has to actually catch the energy. If you’re running a dipole at 14.2 MHz but it’s cut for 7 MHz, your receiver isn’t going to magically pull that signal out of the ether. Respect the resonance.

    How much "noise" am I actually going to deal with when I swap my dedicated hardware receiver for a cheap USB dongle?

    Look, let’s be honest: you’re going to see more noise. A cheap RTL-SDR isn’t shielded like a high-end transceiver; it’s basically a tiny, unshielded computer sitting right next to your antenna. You’ll see spurious emissions from your own Wi-Fi and local power lines cluttering the waterfall. But if you use a proper LNA and keep your power supplies clean, that noise floor becomes manageable. It’s not a dealbreaker; it’s just a reality of the hardware.

    Do I really need a high-end computer to run these SDR programs, or can I get away with something basic?

    Look, I’ve seen people drop two grand on a workstation just to listen to local FM, and frankly, it’s a waste of good money. For basic narrowband stuff—like tracking NOAA satellites or scanning local repeaters—an old laptop or even a Raspberry Pi is plenty. But if you’re trying to pull down a wide swath of spectrum with a high-end SDR, that’s where the CPU starts to sweat. If the computer can’t keep up with the data stream, you’ll get dropped samples and a signal that looks like a jagged mess. Match your processing power to your bandwidth, not your ego.

  • How to Get Your Clock Accurate Enough for Digital Modes

    How to Get Your Clock Accurate Enough for Digital Modes

    I spent three hours last Tuesday staring at a waterfall display that looked more like static than a signal, convinced my transceiver was dying or the ionosphere had simply checked out for the night. It wasn’t the hardware, and it wasn’t the band conditions; it was my computer’s internal clock drifting just enough to turn my FT8 session into a series of dropped packets and missed opportunities. People will try to sell you expensive dedicated hardware or complex software suites to solve this, but half that advice is just noise. If you want to know how to sync your clock for digital modes without throwing money at a problem that a simple NTP server can fix, you need to stop guessing and start measuring the offset.

    I’m not here to give you a theoretical lecture on how atomic time works. I’m going to show you exactly how I stabilize my workstation so that my timing is rock-solid, whether I’m sitting in a temperature-controlled shack or hunched over a laptop on a windy ridge. I’ll walk you through the specific settings that actually move the needle and, more importantly, I’ll tell you when a “fix” is just expensive placebo.

    Table of Contents

    The Myth of Good Enough Oscillator Stability

    The Myth of Good Enough Oscillator Stability

    I’ve sat in too many workshops listening to operators shrug off a drifting frequency as “just part of the hobby.” They think that if they can hear the carrier, they’re doing fine. That’s a dangerous way to think when you’re moving into high-speed digital modes. If your hardware is relying on a cheap, temperature-sensitive crystal, you aren’t just fighting the ionosphere; you’re fighting your own gear. When your oscillator stability starts to wander because the sun went down and the temperature dropped ten degrees, your digital packets don’t just slow down—they vanish.

    In the world of radio amateur digital modes, “close enough” is usually a recipe for a high packet error rate. I’ve run tests where a standard TCXO held steady for an hour, only to drift just enough to cause a cascade of timing errors during a FT8 or JS8Call session. If you want to stop chasing ghosts, you need to look at a GPS disciplined oscillator (GPSDO). It’s not about being a perfectionist; it’s about ensuring that your local reference is actually a reference, rather than a moving target that forces your software to work twice as hard just to stay in the window.

    Why Microsecond Accuracy Requirements Actually Matter

    Why Microsecond Accuracy Requirements Actually Matter.

    Look, I get it. In FT8, you can usually get away with a bit of drift because the protocol is designed to be incredibly forgiving. It’s built to hunt for signals in a messy, shifting environment. But if you move into faster modes or try to run high-speed data links, that “close enough” mentality becomes your worst enemy. When we talk about microsecond accuracy requirements, we aren’t just being pedantic about engineering specs; we are talking about the difference between a clean packet and a total collapse of the link.

    If your timing is drifting, you aren’t just fighting the ionosphere; you’re fighting your own hardware. As the timing error grows, the receiver’s ability to lock onto the symbol timing degrades. You end up fighting a losing battle against packet loss because your station is essentially shouting out of sync with the rest of the world. If you want to stop playing Russian roulette with your digital links, you need to move past the internal quartz oscillator in your transceiver and start looking at something like a GPS disciplined oscillator. It’s the only way to ensure that your “window” of operation actually aligns with the rest of the band.

    Five Ways to Stop Chasing Your Tail with Digital Timing

    • Ditch the NTP-only approach; if you’re running high-speed FT8 or JS8Call, you need to be looking at NTP with a high-precision stratum-1 source or, better yet, a local GPS-disciplined oscillator if you want to stop seeing those “packet dropped” errors when the network gets jittery.
    • Check your PC’s CMOS battery and BIOS settings; I’ve seen too many people blame the ionosphere for a weak signal when their local system clock is actually drifting because the hardware is struggling to maintain a baseline.
    • Stop using generic Windows time sync; it’s fine for checking your email, but for digital modes, you need a dedicated service like Meinberg NTP or a similar high-precision client that polls more frequently and handles the jitter better than the OS default.
    • Watch your thermal drift; if your computer is sitting in a cramped, unventilated shack, the internal clock crystal is going to wander as the temperature climbs, and no amount of software syncing will fix a hardware component that’s physically changing its frequency.
    • Use a dedicated machine if you can afford it; running your digital mode software on the same PC you use for heavy web browsing or gaming introduces massive amounts of interrupt latency that can throw your timing off by more than the millisecond margin we need.

    The Bottom Line on Timing

    Stop relying on your PC’s internal clock; if you aren’t syncing to a reliable NTP server or using a GPS-disciplined source, you’re just praying the drift doesn’t kill your packet rate mid-session.

    “Good enough” is a dangerous metric in digital modes—a few milliseconds of jitter might not crash a voice call, but it will turn your FT8 or JS8Call window into a graveyard of failed decodes.

    Treat clock sync as a fundamental part of your station setup, not an afterthought; an expensive transceiver won’t save a signal if your timing is drifting out of phase with the rest of the world.

    ## The Cost of Drifting

    “I’ve seen too many operators blame a ‘bad sunspot cycle’ for a failed FT8 contact, when the reality is much simpler: their local clock was drifting by a few milliseconds and they were essentially trying to have a conversation with someone while shouting at different intervals. If your timing isn’t rock solid, you aren’t fighting the ionosphere; you’re just fighting yourself.”

    Wren Castellano

    Getting Your Timing Right

    Getting Your Timing Right for RF signals.

    At the end of the day, syncing your clock isn’t about chasing some arbitrary technical perfection just to say you did it; it’s about removing the variables you can actually control. We’ve talked about why your local oscillator isn’t a substitute for a disciplined time source and why those microsecond drifts turn a clean FT8 signal into a pile of dropped packets. If you aren’t syncing to a reliable NTP server or, better yet, a GPS-disciplined source, you’re essentially leaving your digital links up to the whims of chance. Stop blaming the ionosphere for a weak signal when your computer’s internal clock is drifting like a loose wire in a gale. Get the timing locked down, verify your offsets, and then—and only then—can you actually start diagnosing the real RF issues.

    There is a specific kind of satisfaction that comes from seeing a perfect waterfall display where every station is exactly where it should be, right on the mark. It’s the difference between feeling like you’re fighting your equipment and feeling like you’re actually mastering the medium. Radio is a science of precision, even when we’re out on a hill with nothing but a wire and a battery. When you tighten up your digital housekeeping, you stop being a passenger to the noise and start becoming a reliable station in the global net. So, go check your sync, calibrate your gear, and then get out there and make the connection count.

    Frequently Asked Questions

    If I'm running FT8 from a portable setup on a hill without a stable internet connection, what's my best fallback for keeping the clock from drifting?

    When you’re up on a ridge with nothing but a battery and a handheld, you can’t rely on a flaky LTE link to keep your NTP sync alive. If you can’t get a solid internet handshake, stop relying on the OS clock and get a dedicated GPS-disciplined oscillator (GPSDO). I’ve used a small USB GPS module that feeds a 1PPS signal directly; it keeps your timing rock-solid regardless of whether the ionosphere or your signal strength is acting up.

    Does the actual hardware clock on my PC matter if I'm using a dedicated GPS-disciplined oscillator, or is the computer just a middleman?

    Think of it this way: your GPSDO is the master reference, but the computer is the one actually holding the stopwatch. If your PC’s internal clock is drifting like a cheap wire antenna in a gale, it’s going to introduce jitter during the handoff. The GPSDO provides the truth, but if the OS or the USB bus can’t pass that timing data to your radio interface with precision, you’re still going to drop packets.

    At what point does my local oscillator's drift start fighting against my sync accuracy—is there a specific threshold where the hardware becomes the bottleneck?

    You hit the nail on the head. It’s a tug-of-war. Once your local oscillator drifts more than a few parts per billion (ppb) during a single transmission window, your sync accuracy becomes a moot point. If your TCXO is drifting faster than your software can correct for it, the hardware wins every time. For most high-speed digital modes, once you cross that 1-2 ppb threshold, the hardware becomes the bottleneck, and no amount of NTP tweaking will save your packets.

  • How to Read a Schematic and Follow the Signal

    How to Read a Schematic and Follow the Signal

    I spent three hours last Tuesday staring at a service manual for a vintage transceiver, feeling that familiar, creeping sense of dread because the diagram looked more like a bowl of spilled spaghetti than a circuit. I think a lot of people will tell you that learning how to read a schematic is about memorizing a thousand different symbols until your eyes bleed, but that’s a load of rubbish. If you approach a drawing like it’s some sacred, impenetrable text, you’re going to fail every time you pick up a soldering iron. The truth is, a schematic isn’t a map of where the parts are; it’s a map of what they’re doing to the signal, and if you can’t see the flow, you’re just chasing ghosts in the copper.

    I’m not here to give you the sanitized, textbook version that ignores how components actually behave when they get hot or when your power supply starts sagging. My promise to you is simple: I’m going to show you how to actually track a signal from input to output without getting lost in the weeds. We’re going to strip away the academic fluff and focus on the practical logic that tells you why a circuit works—or why it just blew a capacitor.

    Table of Contents

    Decoding the Electronic Component Symbols Guide Without the Fluff

    Decoding the Electronic Component Symbols Guide Without the Fluff

    Look, you don’t need to memorize a dictionary of symbols to get started, but you do need to stop treating them like abstract art. When you’re staring at an electronic component symbols guide, don’t just try to recognize the shapes; try to understand what they are actually doing to the current. A resistor isn’t just a zigzag; it’s a bottleneck. A capacitor isn’t just two parallel lines; it’s a temporary reservoir. If you treat them as functional objects rather than just icons, understanding circuit diagrams becomes a lot less about memorization and a lot more about intuition.

    The real trick is learning how to follow the flow. Most beginners get lost because they try to look at the whole page at once. Stop that. Pick a starting point—usually your power source—and start tracing electrical paths one junction at a time. It’s like following a stream; you don’t need to see the ocean to know which way the water is moving. If you can follow the path from the rail through the components and down to ground, you’ve already won half the battle.

    Understanding Circuit Diagrams Beyond the Old Wives Tales

    Understanding Circuit Diagrams Beyond the Old Wives Tales

    Here is the problem with most tutorials: they treat a schematic like a static map, a finished picture that you just “study.” But if you want to actually master understanding circuit diagrams, you have to stop looking at them as art and start seeing them as a logical flow of energy. A schematic isn’t a blueprint of where things sit on a board; it’s a description of how electricity intends to move. When I’m troubleshooting a receiver that’s lost its gain, I’m not just looking at lines; I’m tracing electrical paths to see where the signal is being choked or shunted to ground.

    You also need to stop confusing a schematic with a wiring diagram. I’ve seen plenty of beginners get frustrated because the lines on the paper don’t match the physical traces they see when reading PCB layouts under a microscope. That’s because the schematic is the intent, while the layout is the reality of physics, dealing with parasitic capacitance and real-world spacing. If you try to treat them as the same thing, you’ll spend three hours looking for a component that isn’t “where it’s supposed to be.”

    Five Rules for Not Getting Lost in the Lines

    • Follow the signal, not just the lines. When I’m looking at a new board, I don’t just scan the symbols; I trace the path from the input to the output. If you try to learn the whole thing at once, you’ll just get a headache. Pick one signal path—like the power rail or the RF input—and follow it until it hits something that changes it.
    • Learn to recognize the “neighborhoods.” A schematic isn’t just a soup of parts; it’s organized into functional blocks. You’ll see a cluster of capacitors and resistors around an op-amp, and you’ll know, “Okay, that’s the filter stage.” If you start seeing blocks instead of individual components, the whole thing starts to make sense.
    • Don’t ignore the reference designators. If a schematic says C12, but your physical board has a component labeled R4 in that same spot, stop. You aren’t looking at the right version of the design, or the manufacturer changed something without updating the silkscreen. Trust the labels, but verify they actually match the physical reality in front of you.
    • Pay attention to the nets, not just the connections. A line on a page is just a drawing, but a “net” is a functional connection. If you see a line connecting a transistor base to a resistor, that’s a relationship. If you treat every line as a specific electrical path with a purpose, you stop seeing a drawing and start seeing a machine.
    • Watch out for the “implied” stuff. Schematics are shorthand, and they leave things out to keep the page clean. They won’t draw the ground plane or the traces on the PCB, but those things are there, and they matter. If a circuit looks like it’s behaving erratically, it’s often because there’s a return path or a decoupling capacitor that the schematic designer thought was “too obvious” to include.

    The Reality Check: What to Actually Carry Away

    Stop treating symbols like a foreign language and start seeing them as a map of intent; if you can’t trace the signal path from the input to the output in your head, you aren’t reading the schematic, you’re just looking at a drawing.

    Component values are your ground truth, so don’t let a messy, hand-drawn line or a faded silkscreen trick you into assuming a resistor is 100 ohms when it’s actually 10k—always verify the math against the physical part.

    Remember that a schematic is an idealized version of reality, not the truth itself; it won’t show you the parasitic capacitance of a poorly routed trace or the way a nearby power supply is dumping noise into your signal, so keep your multimeter ready.

    ## Stop Looking at Lines and Start Seeing Electrons

    A schematic isn’t a map of where things are sitting on a PCB; it’s a story of where the energy is trying to go. If you’re just memorizing what a zig-zag line looks like without understanding why that resistor is sitting there in the first place, you aren’t reading a circuit—you’re just staring at a coloring book.

    Wren Castellano

    Stop Staring at the Lines and Start Seeing the Signal

    Stop Staring at the Lines and Start Seeing the Signal

    Look, we’ve covered a lot of ground, from identifying a capacitor by its symbol to actually tracing the signal path through a complex network. The most important thing to remember is that a schematic isn’t a map of where the parts are physically sitting on the PCB; it’s a map of how the electricity actually behaves. If you try to use a schematic to find a component by its physical location, you’re going to spend three hours hunting for a resistor that’s actually tucked under a heatsink. Focus on the logical flow of the signal, respect the component values, and for heaven’s sake, don’t assume a line is just a line—it’s a path that requires a specific impedance and a clear connection to work.

    At the end of the day, being able to read a schematic is what separates the people who just swap modules from the people who actually understand the machine. It’s the difference between being frustrated by a dead radio and knowing exactly which trace has a cold solder joint or which transistor has finally given up the ghost. It takes practice, and yes, you will probably blow a fuse or two while you’re learning, but that’s just part of the process. Don’t let the complexity intimidate you; once you start seeing the patterns in the chaos, you’ll realize that every circuit is just a conversation between components, and you finally have the language to join in.

    Frequently Asked Questions

    I’ve got the schematic in front of me, but how do I actually trace a signal path from the input to the output without getting lost in a sea of lines?

    Stop trying to look at the whole page at once; you’ll just get a headache. Pick your starting point—usually the input jack or the antenna terminal—and follow a single trace with your finger or a probe. Don’t jump ahead. Trace it until you hit a component, note what it does, and then move to the next junction. If you lose your place, find the ground plane. It’s the anchor that keeps you from drifting.
    Why does the schematic look so much cleaner than the actual physical PCB I'm looking at?

    Because a schematic is a map, not a photograph. It’s a logical flow designed to show you how the signal travels from point A to point B without the clutter. A PCB has to deal with the messy reality of physics: traces need to be short to minimize inductance, ground planes need to be massive to manage noise, and components have to actually fit on a piece of fiberglass. If the schematic looked like the board, you’d never find the signal path.

    If I see a component value that doesn't match what's printed on the board, should I trust the diagram or my eyes?

    Trust your eyes, every single time. A schematic is a theoretical map, but the board is the actual terrain. Schematic designers make typos, and components get swapped during a production run to save a few cents. If the diagram says 10k but the physical resistor is 1k, that 1k is what’s actually controlling your current. Measure it with your multimeter to be sure, but never assume the printed silk screen or the diagram is gospel.

  • What to Check Before You Buy a Used Radio

    What to Check Before You Buy a Used Radio

    I spent three hours last Tuesday sitting in a damp field, staring at a spectrum analyzer that was telling me absolutely nothing useful because the rig I’d just picked up on a local forum had a dying receiver stage. The seller had been adamant that it “worked like a charm,” but they were clearly just riding a massive solar spike that masked the noise floor issues. When you’re hunting for gear, people will try to sell you on the shiny knobs and the brand name, but knowing what to look for in a used radio has very little to do with how much it cost in 1995. If you aren’t checking the actual stability of the local oscillator or looking for signs of acid leakage from old electrolytic capacitors, you aren’t buying a radio—you’re buying a very expensive paperweight.

    I’m not here to give you a checklist of marketing buzzwords or tell you which brand is “legendary.” My promise to you is simpler: I’m going to tell you how to test the components that actually matter. We’re going to talk about signal purity, thermal stability, and how to spot the difference between a rig that’s well-maintained and one that’s been beaten on a workbench for twenty years.

    Table of Contents

    Inspecting Vintage Radio Components Without Getting Fooled

    Inspecting Vintage Radio Components Without Getting Fooled

    When you crack open a chassis, don’t just look for dust; look for the story the components are telling you. If you see a graveyard of leaking electrolytic capacitors or those telltale dark scorch marks around a power transistor, walk away—or prepare to spend your entire weekend with a soldering iron and a desoldering pump. Common radio hardware failures often start with heat, so check the mounting of the final transistors. If they look like they’ve been baked in a kiln, the heat sinking was likely inadequate, and you might be looking at a rig with compromised traces or even a failing transformer.

    I also tell people to keep a sharp eye on the mechanical side of things. If it’s a tube rig, check the sockets for oxidation; if it’s solid-state, look at the potentiometers. If the tuning feels “crunchy” or gritty, those contacts are oxidized, and you’ll be fighting intermittent signal drops for months. Inspecting vintage radio components is as much about touch and smell as it is about sight. If it smells like ozone or burnt phenolic resin, that radio has been pushed far beyond its design limits, and no amount of cleaning will fix the underlying damage.

    Common Radio Hardware Failures That Kill Your Budget

    Common Radio Hardware Failures That Kill Your Budget

    When you’re digging through a pile of gear, you have to look past the shiny chassis and check the stuff that actually matters. One of the most frequent common radio hardware failures I see in older rigs involves the electrolytic capacitors. They’re essentially little chemical batteries that dry out over twenty years; if you see any leaking fluid or bulging tops, walk away. Even if the rig seems fine on the bench, those aging caps can cause erratic frequency drift. I’ve spent far too many afternoons chasing used radio frequency stability issues only to find a single dried-out capacitor in the PLL loop was the culprit.

    Then there’s the power amplifier stage. If the previous owner pushed a heavy load or used a poorly matched antenna, they might have cooked the final transistors. You can sometimes spot this during audio output quality testing—if the signal distorts or loses power significantly as you increase the gain, the PA is likely wounded. It’s a costly fix that can easily turn a “bargain” into a money pit. Always ask if they’ve seen a high VSWR alarm lately; if they hesitate, they might be hiding a dying final.

    Five Red Flags That Should Make You Walk Away

    • Check the connector integrity. If you see a rig with mismatched PL-259s or connectors that look like they’ve been soldered and desoldered a dozen times, walk away. It’s usually a sign that the previous owner was fighting a high SWR issue they couldn’t solve, and they likely cooked the final transistors trying to force it through.
    • Demand a real test, not just a “it powers on” claim. A radio might look fine on the bench, but if the seller can’t demonstrate a clean signal on a band with moderate solar activity, you’re just buying a paperweight. I don’t care if the screen lights up; I want to see the frequency stability under a slight load.
    • Look for “modding” scars. If the chassis is covered in non-standard drill holes or there’s a mess of jumper wires visible through the vents, be careful. I’ve seen plenty of “upgraded” rigs where a well-meaning amateur accidentally bypassed a critical protection circuit, turning a reliable transceiver into a ticking time bomb.
    • Inspect the display and knobs for physical fatigue. If the tuning knob feels gritty or the LCD has those inevitable dark patches, it tells me how the radio was treated. A rig that’s been bounced around in a truck bed or left in a damp shack is going to have internal corrosion that no amount of contact cleaner will fix.
    • Verify the cooling system. Open the vent and look for dust buildup or signs of dried-out electrolytic capacitors near the heat sinks. If the radio has been run hard—like in a contest environment or a high-duty cycle repeater—the thermal stress on the components is much higher, and you’ll likely be replacing something within the first six months of owning it.

    The Bottom Line Before You Hand Over the Cash

    Never buy a rig based on a “looks good in photos” assessment; if you can’t see a steady, clean signal on a spectrum analyzer or a decent SWR reading on a known load, you’re just buying a very expensive paperweight.

    Check the cooling fans and heat sinks—if the previous owner ran this thing at full tilt on HF without any airflow, the internal components have likely been cooking for years, and you’ll be replacing them sooner rather than later.

    Always ask for a specific test report or a video of the radio operating under low solar activity; anyone can claim a rig is “perfect” when the ionosphere is wide open, but you want to know how it performs when the conditions are actually working against you.

    The Real Cost of a "Good Deal"

    Don’t let a shiny chassis or a low price tag distract you; a radio that looks mint but has drifted ten kilohertz off-frequency because of a dying crystal or a leaking electrolytic capacitor isn’t a bargain—it’s a project you didn’t sign up for.

    Wren Castellano

    The Final Check

    Performing The Final Check on used gear.

    At the end of the day, buying used gear is a trade-off between a bargain and a potential headache. You’ve looked at the capacitors, you’ve checked for the tell-tale signs of overheating on the PCB, and you’ve hopefully verified that the power amplifier isn’t just screaming into a void of high VSWR. Don’t let a shiny chassis distract you from a messy internal layout or a history of questionable repairs. If the seller can’t walk you through a basic test—showing you a clean signal or a stable frequency lock—then you aren’t buying a radio, you’re buying a lottery ticket. Stick to the measurements, trust your eyes more than the marketing fluff, and remember that a cheap rig becomes the most expensive thing you own the moment it fails on a clear night.

    But don’t let the fear of a bad deal keep you from the workbench. There is a specific kind of satisfaction that comes from taking a piece of gear that someone else gave up on, cleaning the oxidation off the contacts, and hearing that first clear DX contact after a successful repair. Radio is about more than just clicking buttons on a modern SDR; it’s about the connection between the hardware and the physics of the air around us. If you do your homework and buy with a bit of measured skepticism, you won’t just be acquiring a tool—you’ll be continuing the cycle of keeping this hobby alive, one well-maintained transceiver at a time.

    Frequently Asked Questions

    Should I be worried about the signal drift on these older VFOs, or is that just part of the charm?

    “Charm” is a nice word for it, but in practice, it’s just a headache. If you’re looking at a rig with a VFO that drifts more than a few hundred Hertz after it warms up, it’s usually a sign of aging capacitors or a poorly compensated temperature coefficient in the oscillator circuit. I’ve seen it a dozen times. If you can live with constant retuning, go for it; if you want to actually work a station, it’s a problem.

    If the seller says the rig "works perfectly," what specific tests should I demand to see before I hand over the cash?

    “Works perfectly” is a phrase that scares me. It’s too broad. If they won’t let you see it in action, walk away. I want to see a clean signal on a band with low solar activity—don’t let them claim a miracle just because the ionosphere was wide open. Ask to see the SWR reading on a known good load, and if it’s a transceiver, make sure the receiver isn’t deaf when you’re testing it away from a high-power source.

    Is it worth paying a premium for a radio with a low number of operating hours, or does that tell me nothing about how well it was actually maintained?

    Low hours are a bit of a vanity metric. I’ve seen rigs with 50 hours that sat in a damp garage and died, and rigs with 5,000 hours that were kept in a climate-controlled shack and are still pristine. Instead of obsessing over the hour meter, look at the chassis. Is there dust buildup in the fan housing? Are the connectors oxidized? I’d rather buy a well-loved rig with high hours than a “mint” one that’s been rotting in storage.